Celebration App
Show birthdays and work anniversaries on your digital signage display. Upload via csv, Google Sheet or connect directly to your HR system January 13, 2026
Display employee birthdays, work anniversaries, and custom milestones on your digital signage to celebrate your team.
Overview
The Celebrations feature allows you to:
- Display employee birthdays
- Celebrate work anniversaries with years of service
- Show custom milestones and achievements
- Filter by office location
- Auto-rotate through multiple celebrants
Data can be imported from: - CSV/JSON files - Upload spreadsheets or data files - HR Integrations: - Workday - Sync from Workday RaaS (Report as a Service) - Charlie HR - Sync from Charlie HR API (OAuth) - BambooHR - Sync from BambooHR directory API - Google Sheets - Sync from a live spreadsheet (coming soon)
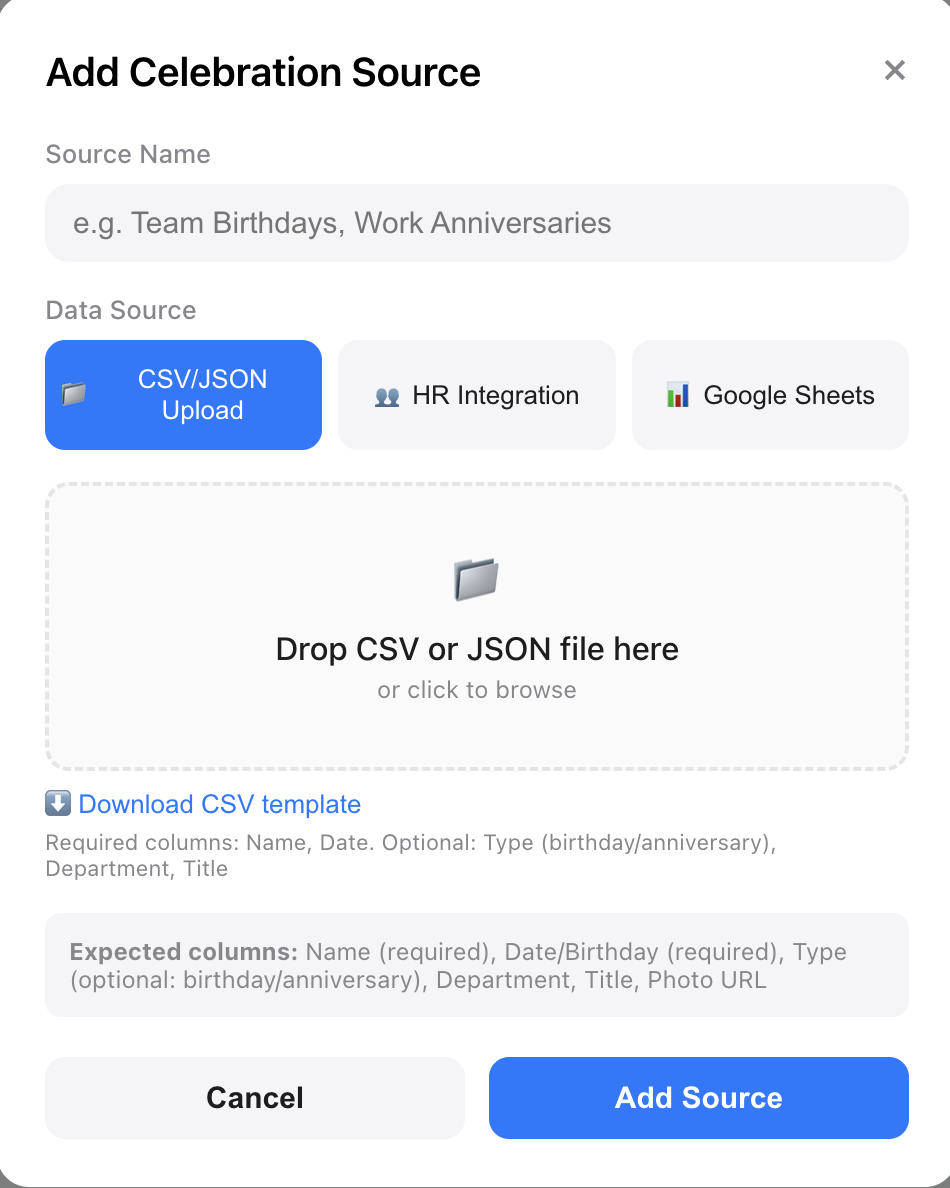
Adding a Celebration Source
- From the Dashboard, find the Celebrations section
- Click + Add Source
[SCREENSHOT: Dashboard showing Celebrations section with “+ Add Source” button]
- Enter a Source Name (e.g., “Team Birthdays”, “Work Anniversaries”)
- Select the Data Source type from the available tabs:
- When selecting HR Integration, you’ll see sub-options:
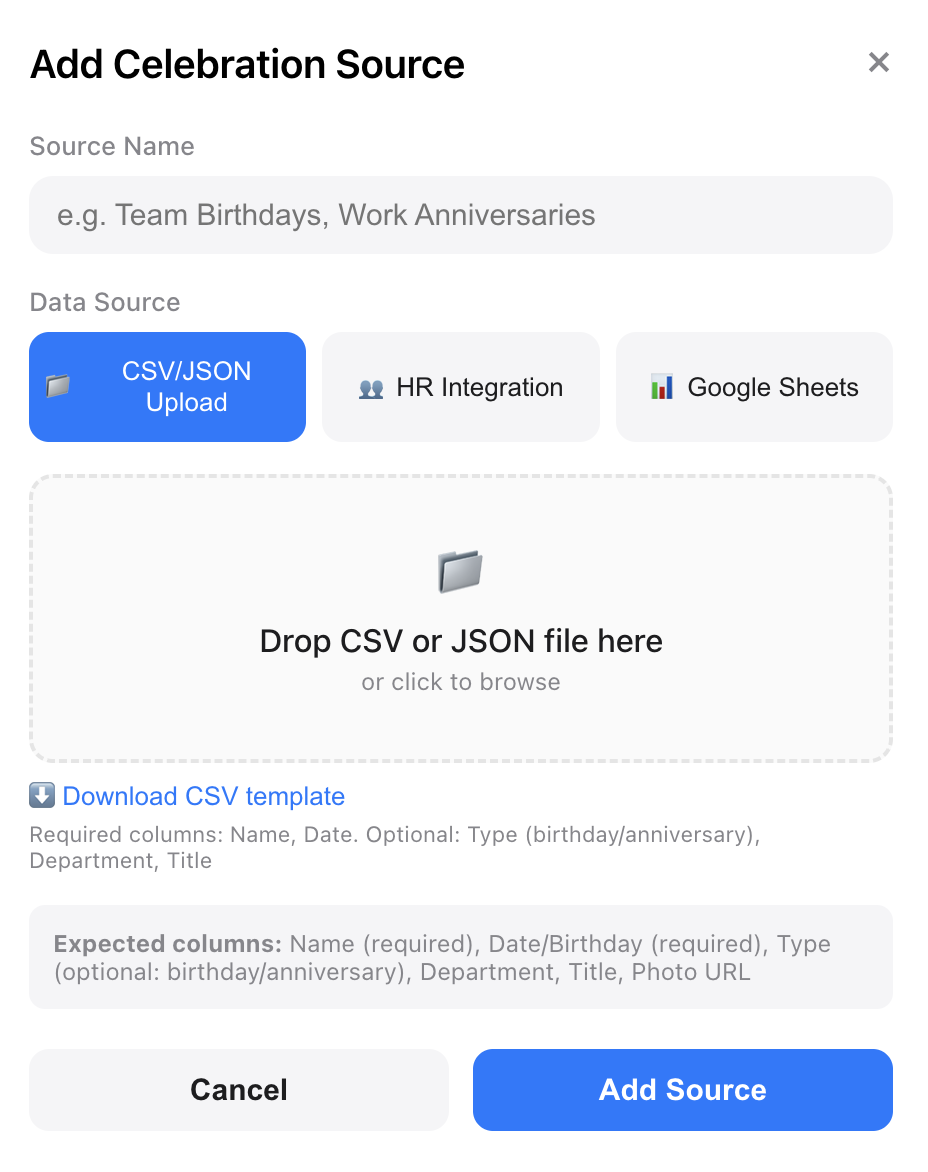
CSV/JSON Upload
The simplest way to get started is uploading a file with your celebration data. We have a csv template for you to download and add your own data.
Supported Formats
- CSV - Comma-separated values (Excel export)
- JSON - JavaScript Object Notation
Required Fields
| Field | Description | Format |
|---|---|---|
| name | Person’s display name | Text |
| occasionType | Type of celebration | birthday, anniversary, or custom |
| occasionMonth | Month of the occasion | 1-12 |
| occasionDay | Day of the occasion | 1-31 |
Optional Fields
| Field | Description |
|---|---|
| occasionYear | Year (for anniversaries - hire year) |
| department | Department name |
| title | Job title |
| location | Office location (for filtering) |
| photoData | Photo URL or base64 image |
| customMessage | Custom celebration message |
Example CSV
name,occasionType,occasionMonth,occasionDay,occasionYear,department,location
John Smith,birthday,3,15,,Engineering,Los Angeles
Sarah Johnson,anniversary,6,1,2019,Marketing,New York
Mike Chen,birthday,11,22,,Sales,Los Angeles
Example JSON
[
  {
    "name": "John Smith",
    "occasionType": "birthday",
    "occasionMonth": 3,
    "occasionDay": 15,
    "department": "Engineering",
    "location": "Los Angeles"
  },
  {
    "name": "Sarah Johnson",
    "occasionType": "anniversary",
    "occasionMonth": 6,
    "occasionDay": 1,
    "occasionYear": 2019,
    "department": "Marketing",
    "location": "New York"
  }
]
Uploading Your File
- Select the CSV/JSON tab
- Click Choose File or drag and drop your file
- Preview the imported entries
- Click Add Source
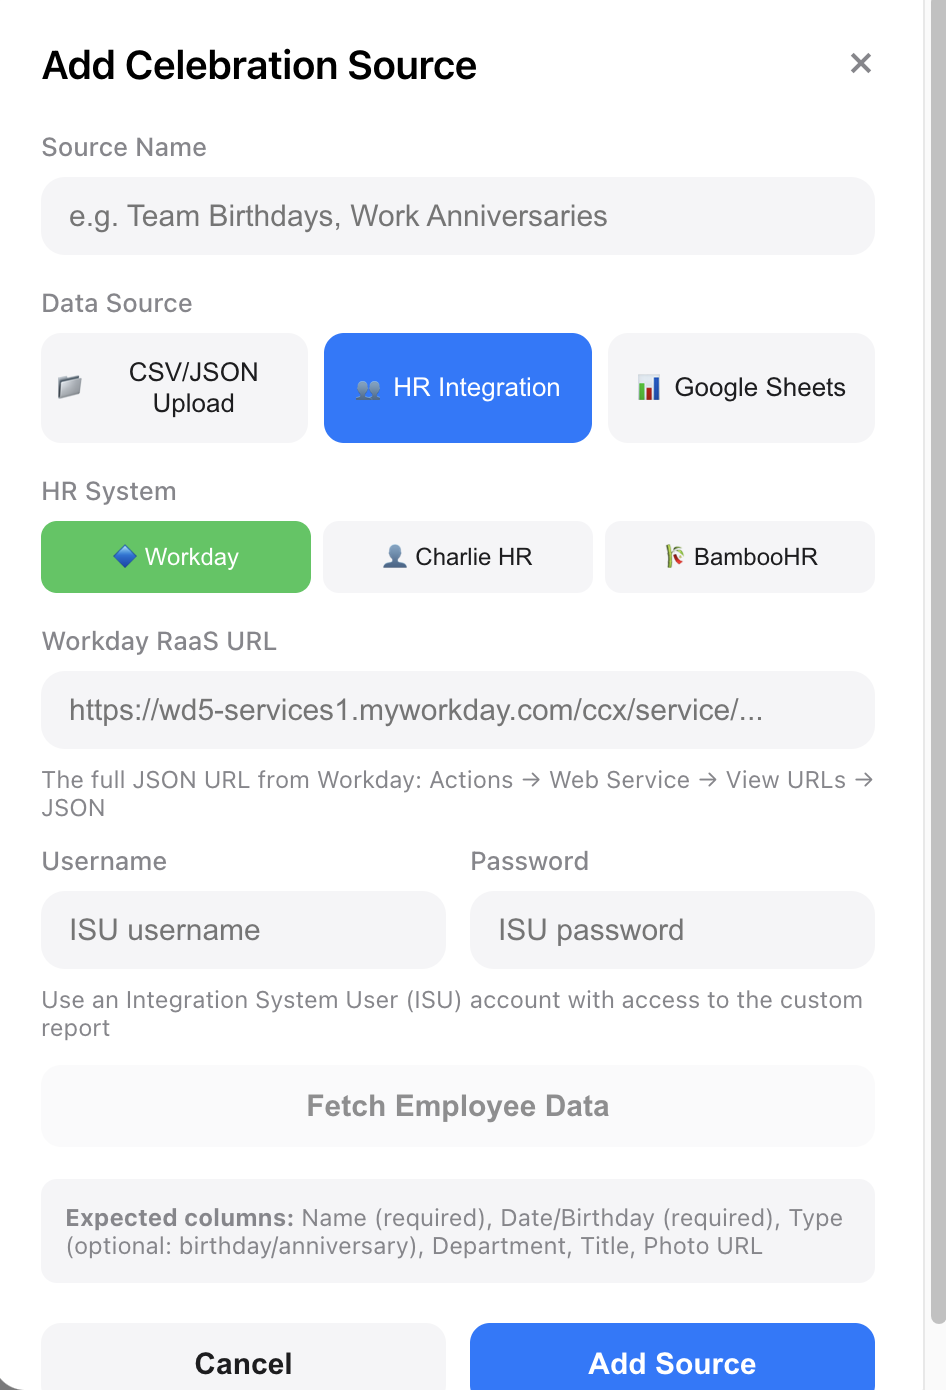
Workday Integration
Sync employee birthdays and work anniversaries directly from Workday using RaaS (Report as a Service).
Prerequisites
Before setting up the Workday integration, you’ll need:
- A Workday Custom Report configured to output employee data via RaaS
- Integration System User (ISU) credentials with access to the report
- The RaaS JSON URL for your custom report
Setting Up the Workday Report
Your Workday administrator needs to create or provide access to a custom report that includes:
| Required Field | Workday Column Names (any of these) |
|---|---|
| Employee ID | worker_id, Worker_ID, employeeId, Employee_ID |
| Display Name | display_name, Display_Name, fullName, name |
| Date of Birth | date_of_birth, Date_of_Birth, birthDate, DOB |
| Hire Date | hire_date, Hire_Date, hireDate, startDate |
| Optional Field | Workday Column Names |
|---|---|
email, Email, emailAddress | |
| Status | status, Status, active (Active/Terminated) |
| Department | department, Department, costCenter |
| Location | location, Location, office |
| Job Title | job_title, Job_Title, title, position |
Getting the RaaS URL
- In Workday, navigate to your custom report
- Click Actions → Web Service → View URLs
- Find the JSON URL (ends with
?format=jsonor similar) - Copy the full URL
Example URL format:
https://wd5-services1.myworkday.com/ccx/service/yourcompany/reports/Employee_Report?format=jsonConnecting Workday
- From the Dashboard, click + Add Source in the Celebrations section
- Select HR Integration tab, then choose Workday
- Enter a Source Name (e.g., “Workday Birthdays & Anniversaries”)
- Paste the RaaS URL
- Enter the Username (ISU username, often format:
ISU_name@tenant) - Enter the Password (ISU password)
- Click Test Connection
Test Connection Results
After clicking Test Connection, you’ll see:
- Success: Preview of entries found (birthdays and anniversaries)
- Authentication Error: Check username/password, ensure ISU has report access
- 404 Error: Verify the RaaS URL is correct and report is published
- No Data Found: Check report columns match expected names
What Gets Synced
The integration automatically creates two types of entries for each active employee:
- Birthday Entry
- Anniversary Entry
Privacy Note
Birth years and ages are never stored or displayed. Only the month and day of birth are used to determine when to show birthday celebrations.
Re-Syncing Data
To update data from Workday:
- Find your Workday source in the Celebrations section
- Click the Sync button
- Fresh data will be pulled from Workday
This replaces all existing entries from that source with the latest data.
Troubleshooting Workday Connection
| Error | Solution |
|---|---|
| 401 Unauthorized | Verify ISU username and password. Format is often ISU_name@tenant |
| 403 Forbidden | ISU may not have access to the report. Contact your Workday admin |
| 404 Not Found | Check the RaaS URL. Go to report → Actions → Web Service → View URLs |
| Timeout | Large reports may take longer. Try again or contact your Workday admin |
| No employees found | Verify report has expected column names (see table above) |
| Missing birthdays | Ensure date_of_birth field is included and populated |
| Missing anniversaries | Ensure hire_date field is included and populated |
Workday Best Practices
- Use an ISU account - Don’t use personal credentials; ISUs are designed for integrations
- Limit report scope - Include only active employees to reduce data size
- Schedule regular syncs - Sync weekly or monthly to capture new hires
- Test with a small report first - Validate the connection before using a large dataset
- Secure credentials - ISU passwords should be managed by IT/HR
Charlie HR Integration
Sync employee birthdays and work anniversaries directly from Charlie HR using OAuth authentication.
Getting Your Credentials
Ready to get started?
Open Brix Portal