Proof of play is the log a digital signage player keeps of every item it played: which content, on which screen, at what time and for how long, plus the items it skipped or failed to play. Advertisers, suppliers who pay for screen time and compliance teams ask for it as evidence that a campaign ran.
The player records it, so it proves the player played the file. It does not prove the TV was on, the picture was visible, or anyone looked at it.
Most systems only record while logging is on, and nothing is filled in afterwards, so turn it on before the campaign starts.
In Brix, turn on recording in Settings > Proof of Play, choose the campaign dates, and select Export CSV.
Turn on proof-of-play recording
- Select Settings in the sidebar, then Proof of Play.
- Select Start recording in the amber Recording is off banner.
- Check that the Recording switch in the top bar is on.
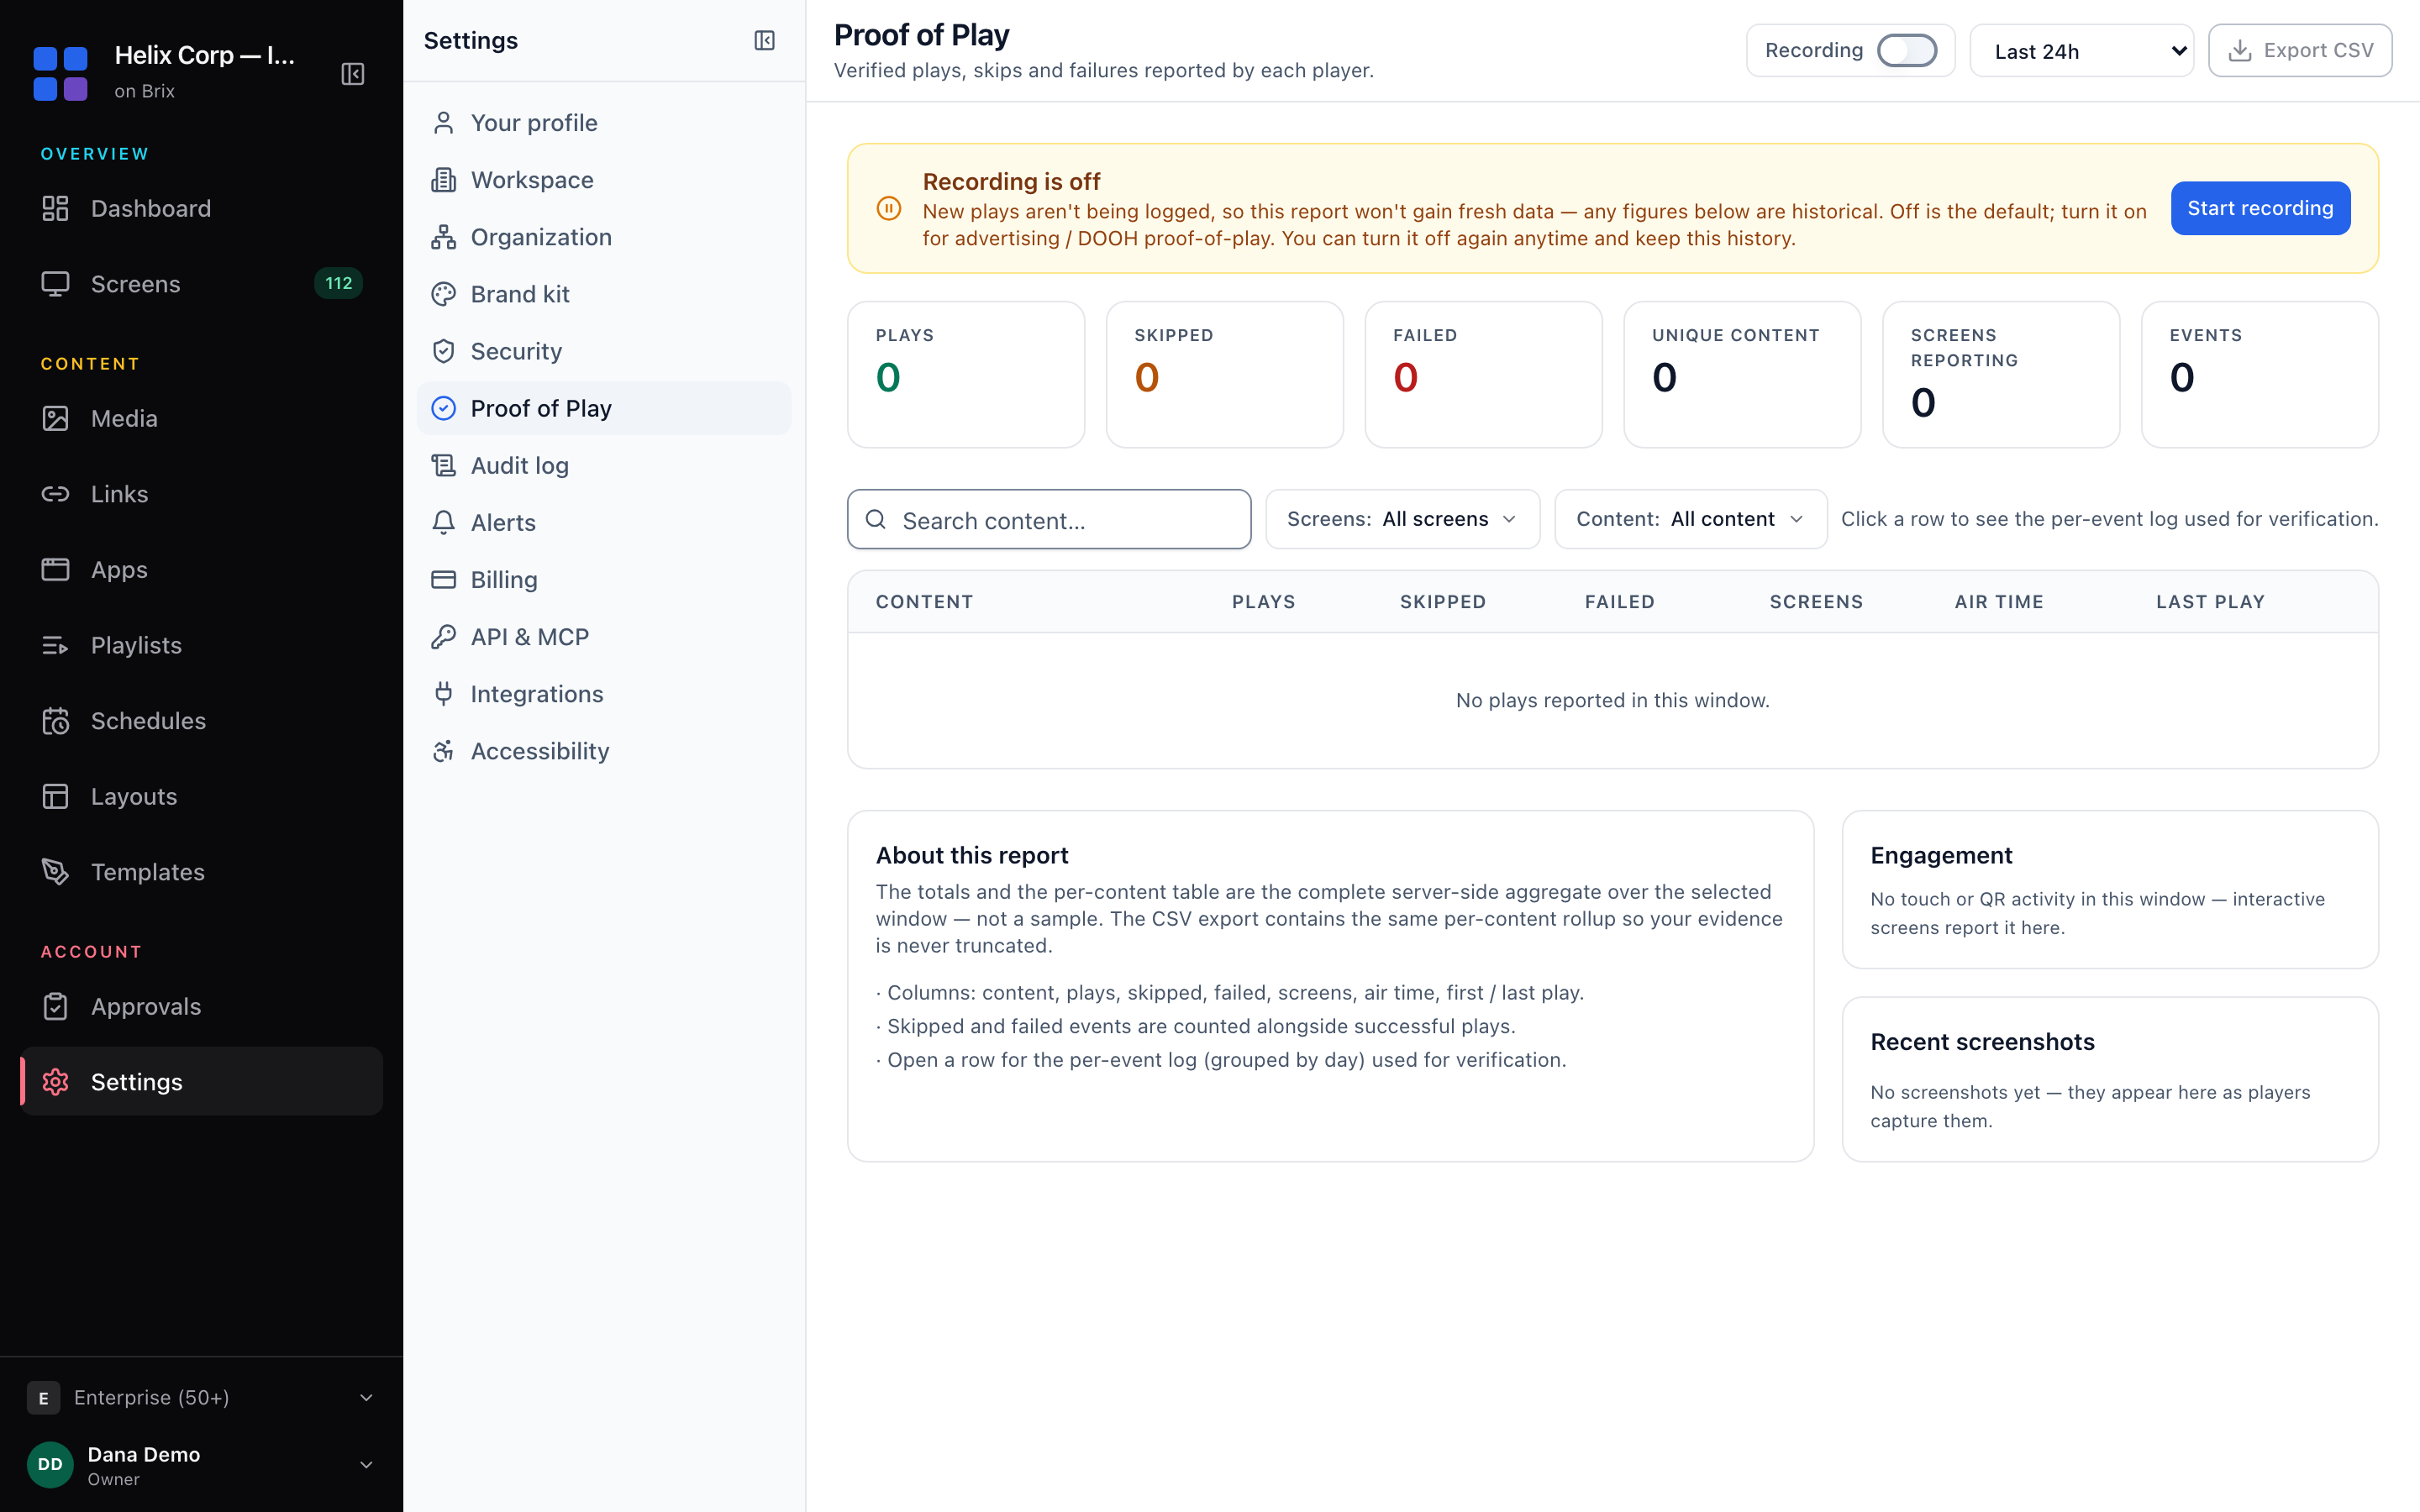
- Recording is off by default. A free trial turns it on, and it switches off when a paid plan starts. Turn it back on here, or under Settings > Organization > Feature defaults.
- Only a member who can change billing sees the switch. Everyone else sees a read-only Recording or Recording off pill.
- Turning recording off stops new logging only. The report and export keep the history you already have.
Report on a campaign window
- Open the date range list in the top bar and choose Last 24h, Last 7 days, Last 14 days or Custom range....
- For a custom range, fill in both dates. With one date only, the report shows the last 7 days.
- Read the six totals: Plays, Skipped, Failed, Unique content, Screens reporting and Events. They are the complete count for the window, not a sample.
- Read the table for each piece of content: plays, skipped, failed, screens, air time and last play.
- To narrow it, type in Search content... or use the Screens and Content filters. Clear filters resets them.
The table shows at most 200 rows, so search to reach the rest. Select a row to open its per-event log: the 2,000 most recent events in the window, grouped by day, with the time, screen, length and result of each play.
Export the proof-of-play report
- Set the date range and filters.
- Select Export CSV in the top bar.
The file has one row per piece of content: content_id, content_name, content_kind, plays, skipped, failed, screens, air_time_sec, first_play and last_play. Export CSV is dim when the window has no content rows.
How long the history is kept
Brix keeps each play event for 14 days. It rolls them up into daily totals per content and screen, and keeps those for 400 days. So a report on an older window still gives plays, skips, failures and air time per day, but the per-event log only reaches back 14 days. Export the CSV at the end of each campaign if you need it for longer.
What proof of play does not tell you
- Whether the TV was on. A player can play to a TV that is switched off or on the wrong input. The Recent screenshots on the same page and each screen's live preview help you check the picture.
- Who watched. Brix does not count viewers or measure attention. If a buyer asks for impressions or audience figures, you need a separate audience measurement system.
- Plays before you turned it on. Nothing is recorded while recording is off.
Find out who changed something (audit log)
Proof of play shows what played. The audit log shows who changed what in the workspace.
- Select Settings, then Audit log.
- Type a name, target or phrase into Search summary, actor, target....
- Use the Action and Actor filters. Each row shows when, the actor, the action, the scope and the IP address.
- Select Load more for older rows. The page loads the 12,500 most recent events.
- Select Export CSV for the filtered rows, for example for a compliance request.
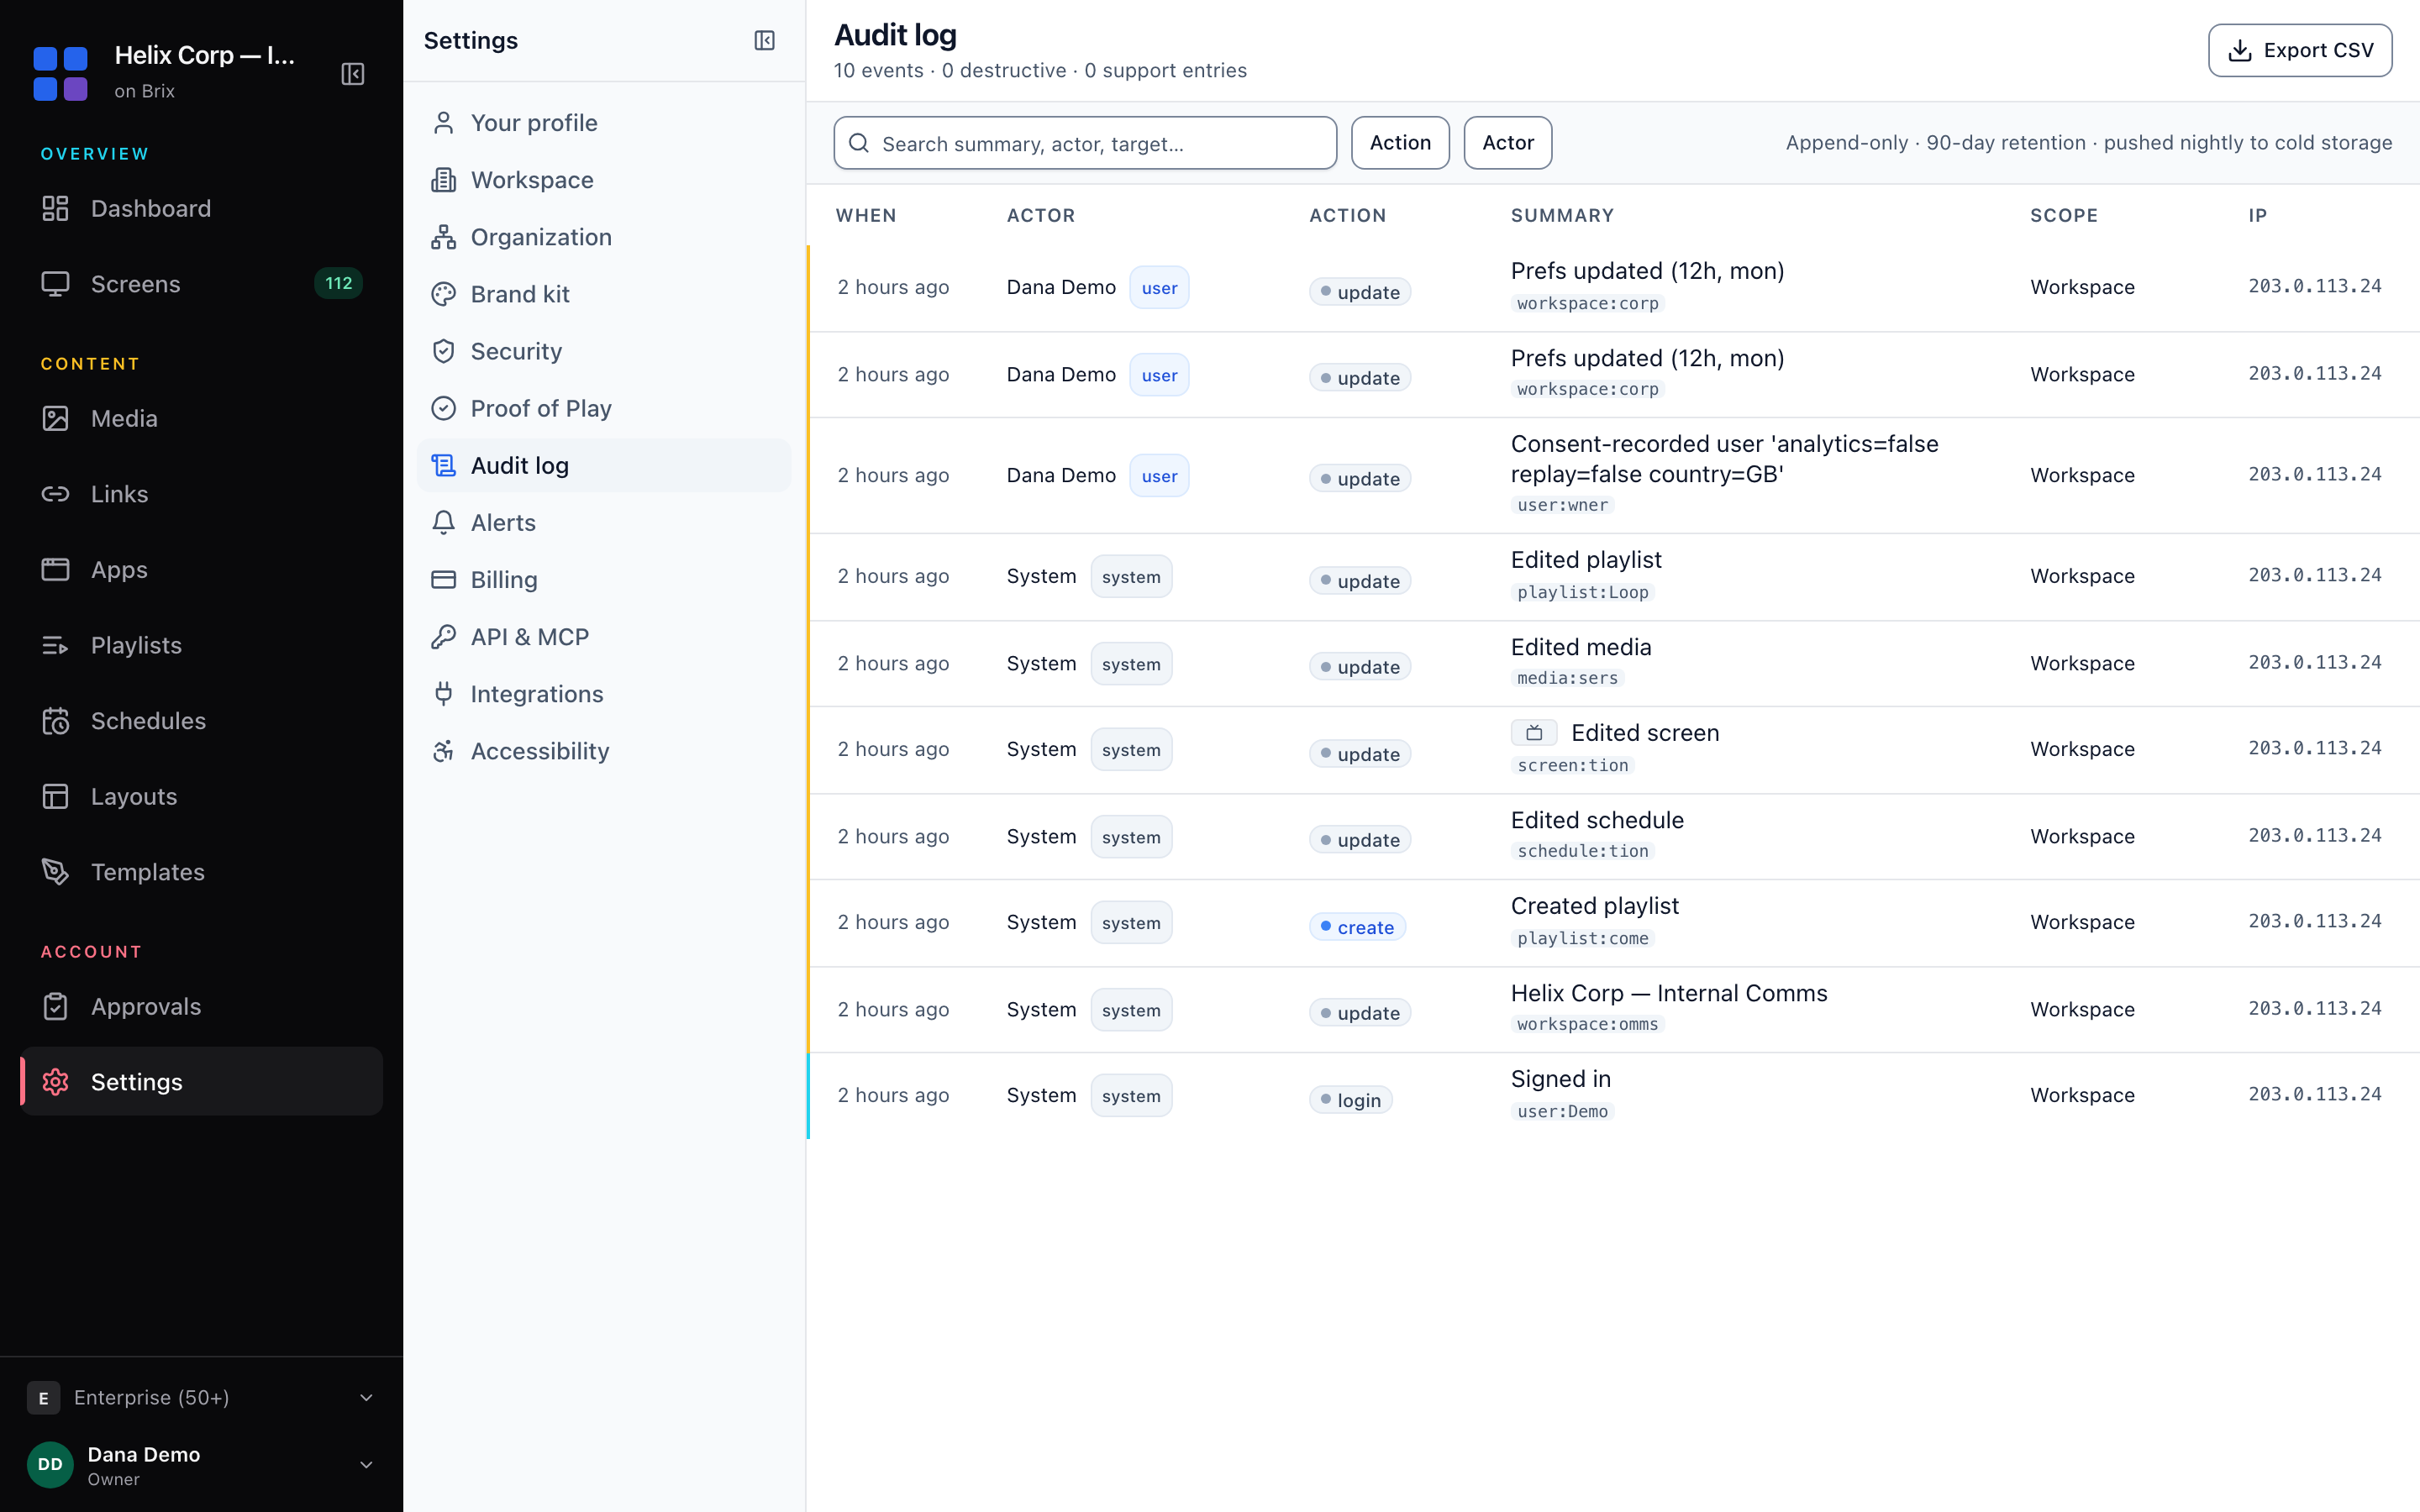
The audit log is append-only and kept for three years. Audit log appears in the settings list only where the audit log feature is on. It is on by default for workspaces set up for more than 10 screens, and any workspace can turn it on under Settings > Organization > Feature defaults.
To decide who can read these pages, read organization, people and roles. To get a message when a screen stops playing, read alerts and emergencies.