A split-screen (multi-zone) layout divides one screen into rectangles, and each zone plays its own content at the same time: a video loop in the main zone, the weather and a clock in a sidebar, a news ticker along the bottom. To make one, pick a layout, put a playlist, app or web page in each zone, and assign the layout to the screen.
In Brix, go to Layouts under Content in the sidebar, select New, pick a preset and give each zone its content. Layouts appears in the sidebar only when Multi-zone layouts is on (Settings → Organization → Feature defaults). To put a finished layout on a screen, read put content on a screen.
Common split-screen layouts
| Preset in Brix | Zones | Good for |
|---|---|---|
| 1 Main + ticker | Main area, ticker across the bottom | Promotions with a line of news or offers |
| 2 zones (side-by-side) | Main area, sidebar | Video beside a clock, weather or queue number |
| 3 zones | Main area, sidebar, ticker (an L-bar) | Lobby and break-room screens |
| 4 zones | Main area, two sidebars, ticker | Dashboards with several live figures |
| Video frame | Centered content in a brand frame | Content that does not fill the whole screen |
| Portrait — Main + ticker | Main area, ticker, 9:16 | A TV mounted on its side |
Keep it to three zones or fewer on a screen people pass. Every zone competes for the same few seconds of attention, and text in a narrow sidebar must still be large enough to read from where people stand. Split screen or designed slide? A layout runs separate content side by side; to put text and images together on one slide, design a sign instead.
Create a layout from a preset
- Select New at the top of the Layouts rail.
- In Choose a starting layout, select 16:9 for landscape or 9:16 for portrait.
- Select a preset card, such as 1 Main + ticker or 3 zones.
- Select the layout name in the header, type a name and press Enter.
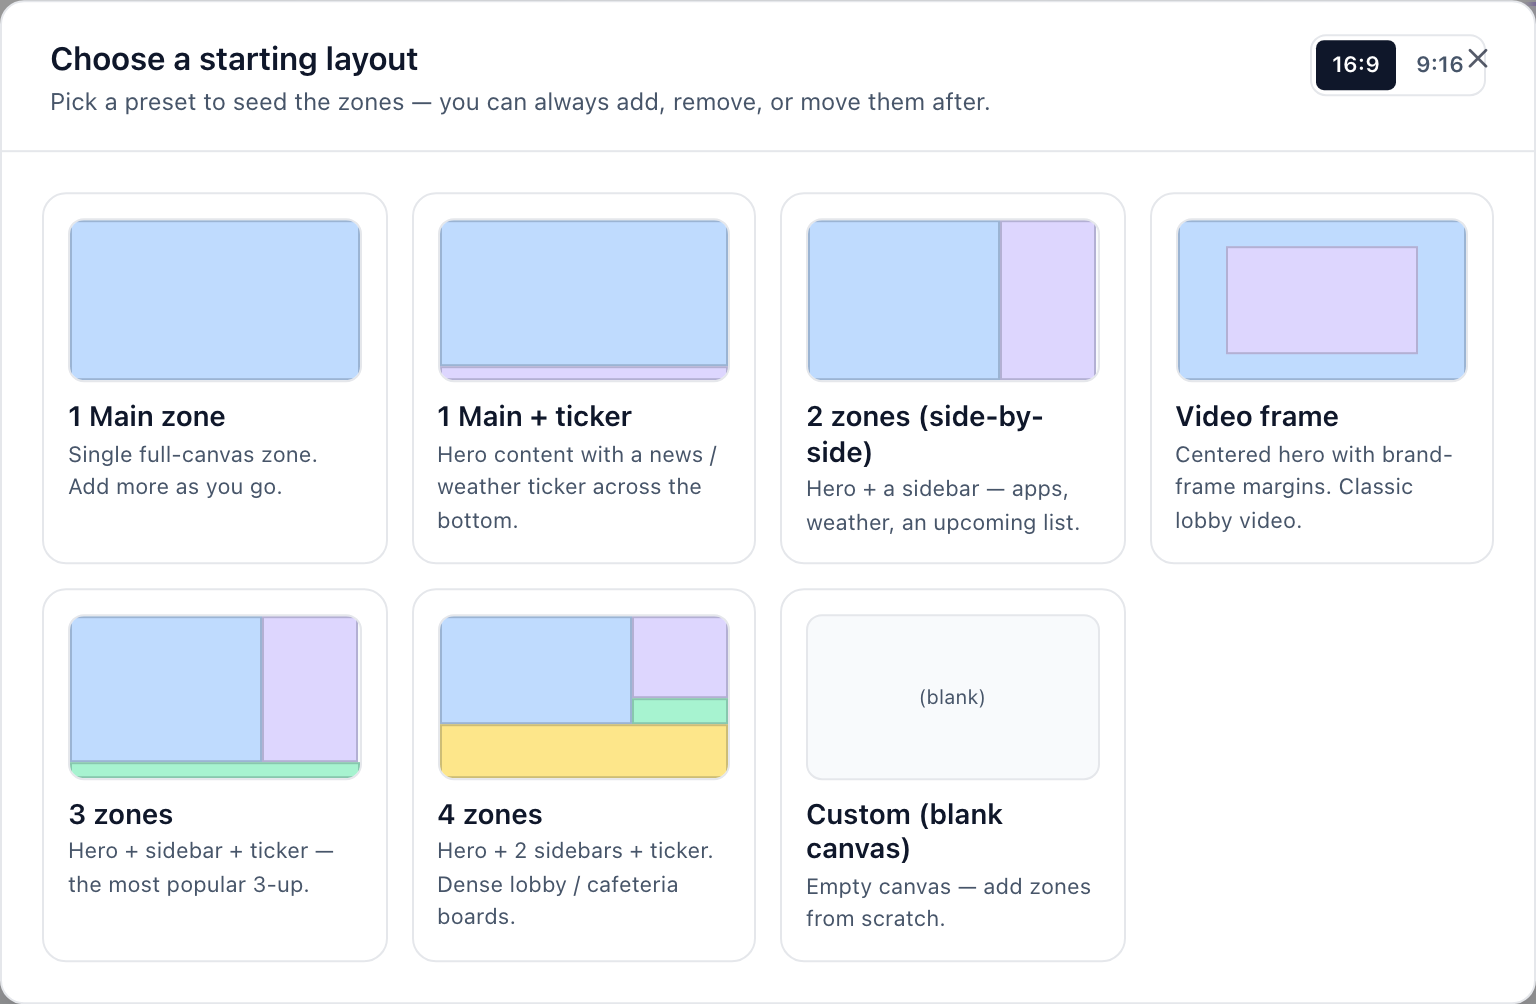
The editor has no Save button. Brix saves each change about 800 milliseconds after you stop, and the header reads saves automatically, Saving…, then Saved.
Fill a zone with content
- Select the zone on the canvas.
- Select the Content button in the Zone panel on the right.
- Choose a tab: Playlists, Schedules, Files, Apps, Web pages or Canvas (your designs from Templates).
- Select the item the zone should play. The zone shows the item name.
To unbind a zone, select Clear in the sheet footer. A zone with no content paints a dead region, so Brix refuses to add the layout to a playlist or assign it to a screen until every zone has content. The amber line in the header names the empty zones. Saving is not blocked.
Add, move and resize zones
- Select Add section to drop a new zone into the first free space, Add ticker for a full-width strip across the bottom, or Add overlay for a zone that sits on top of every other zone.
- Drag a zone to move it, and drag the round handle at its bottom-right corner to resize it.
- Select Auto-fill to grow the selected zone into the empty space around it.
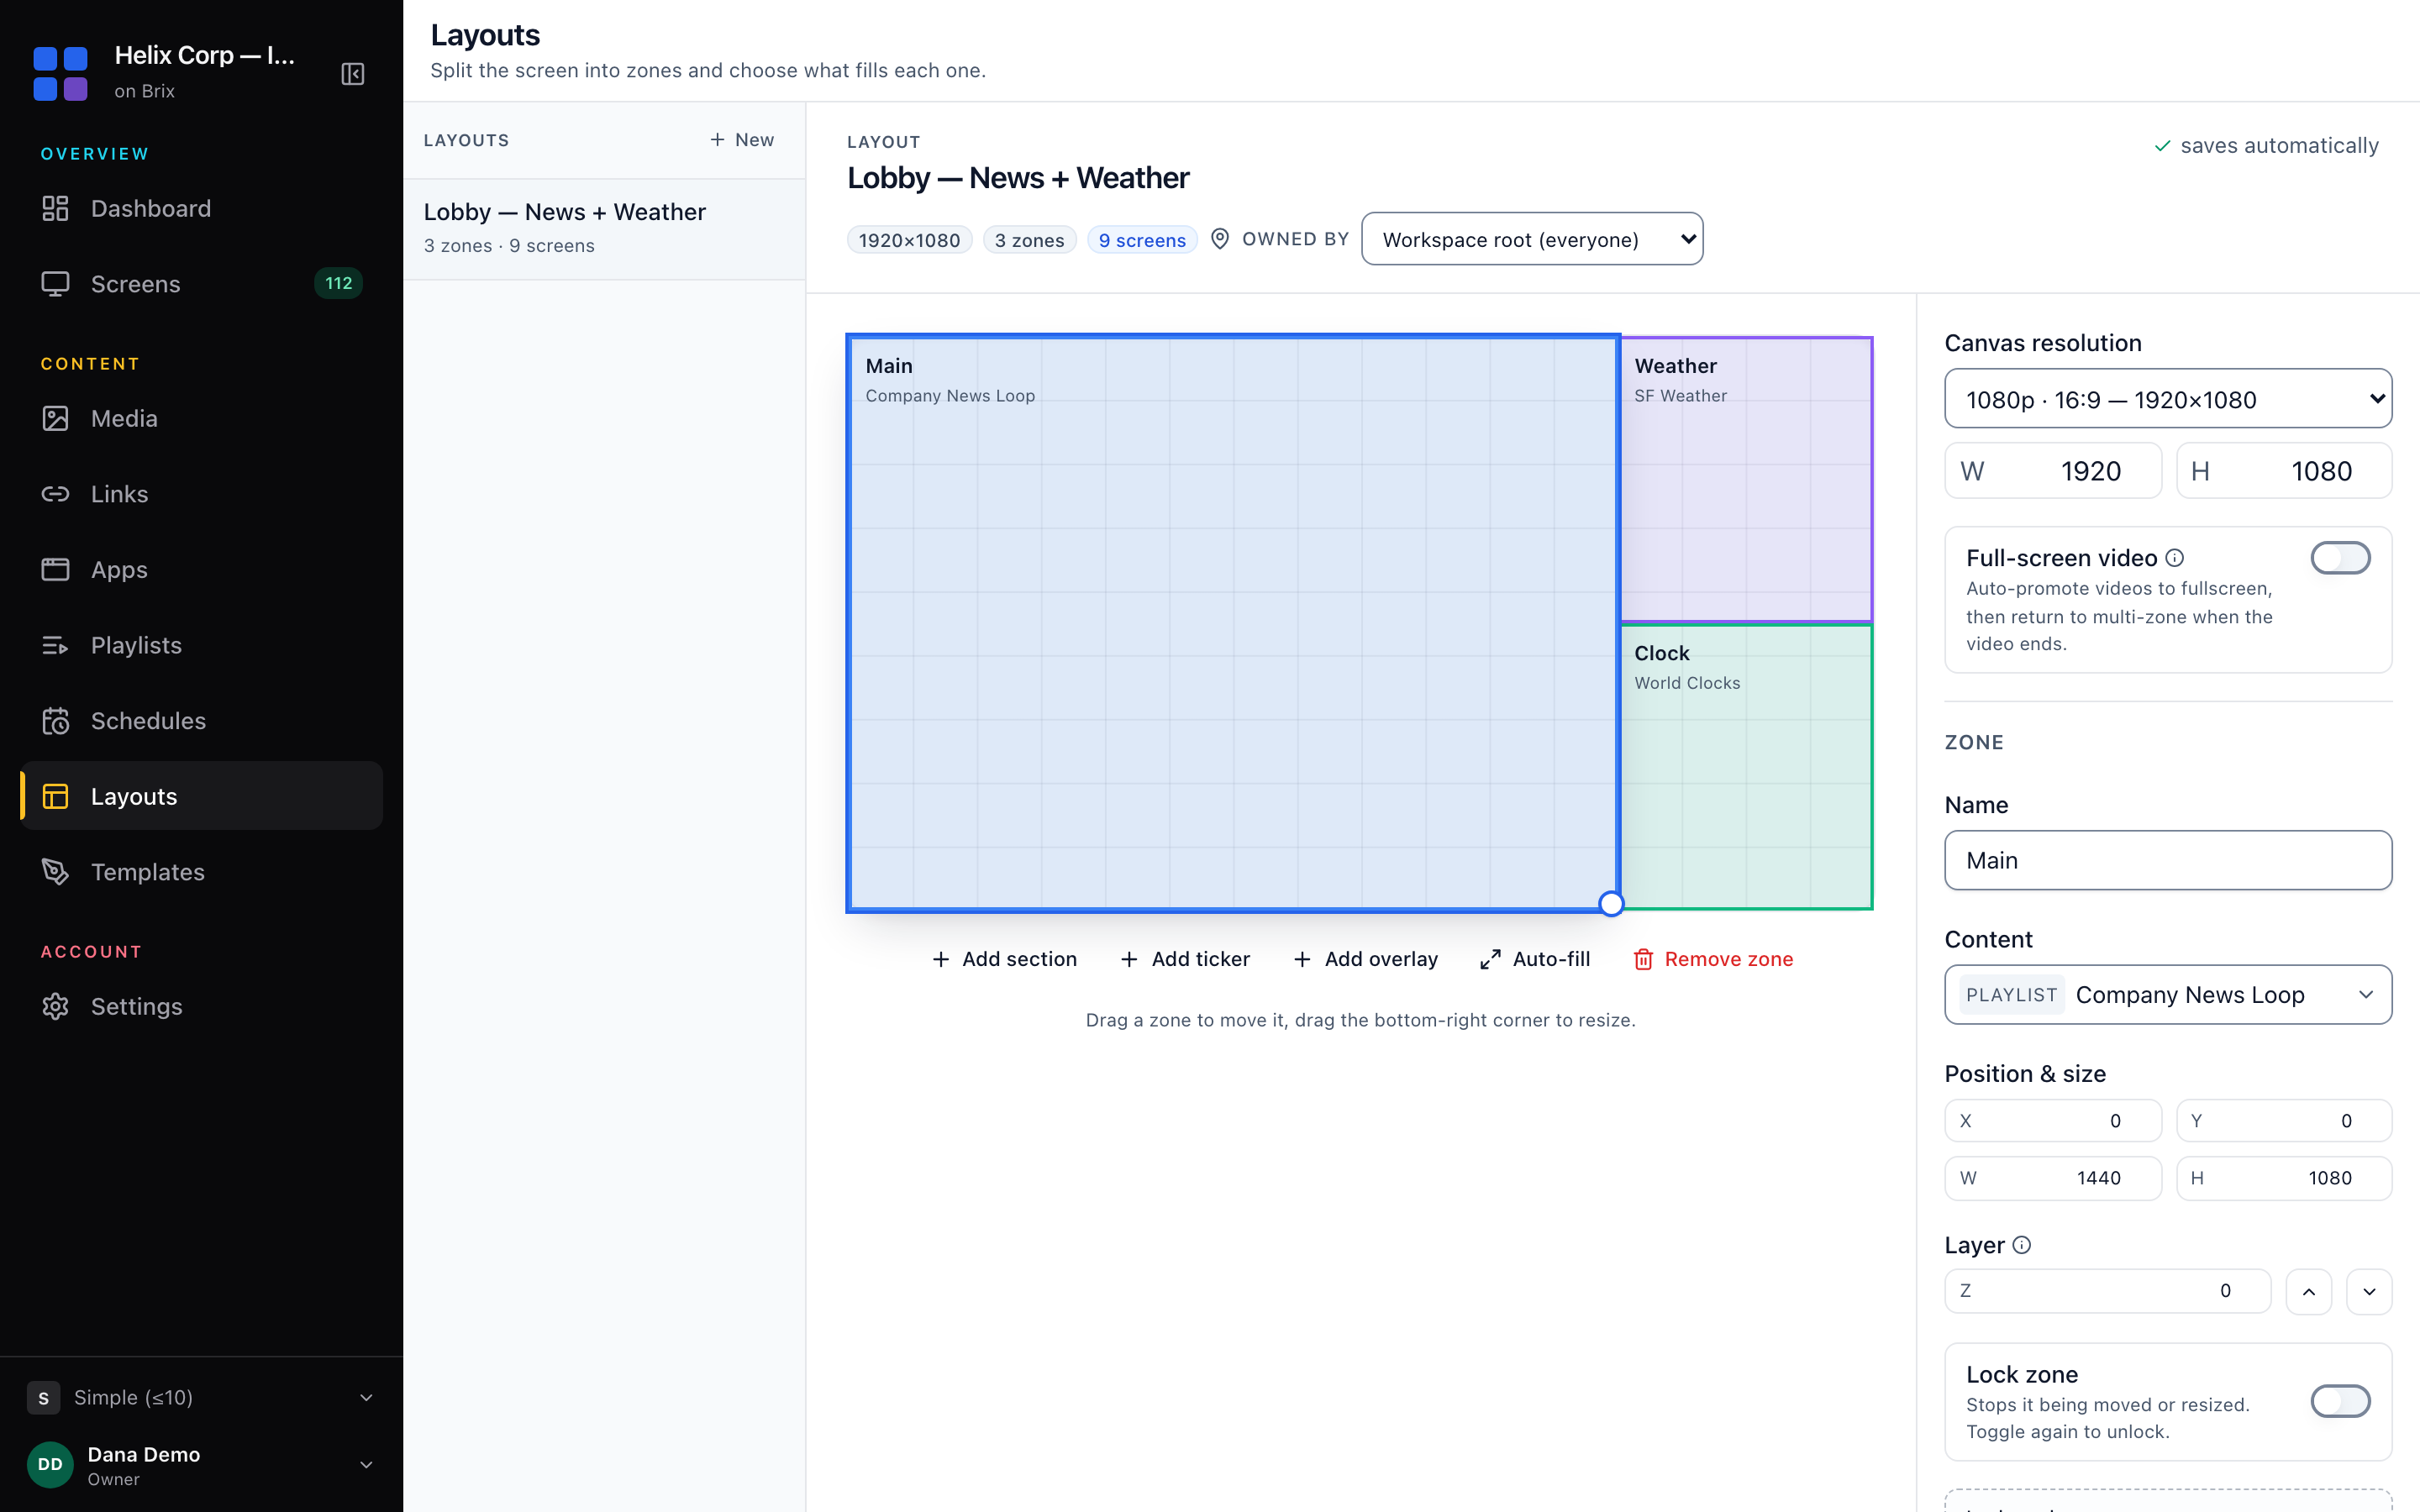
Add ticker moves or crops any unlocked zone that reaches into the bottom strip. If the canvas is full, Add section refuses: drag a zone smaller first. To delete a zone, select it and select Remove zone under the canvas. The page has no control to delete a whole layout.
Set exact size, position and layer
- Select the zone.
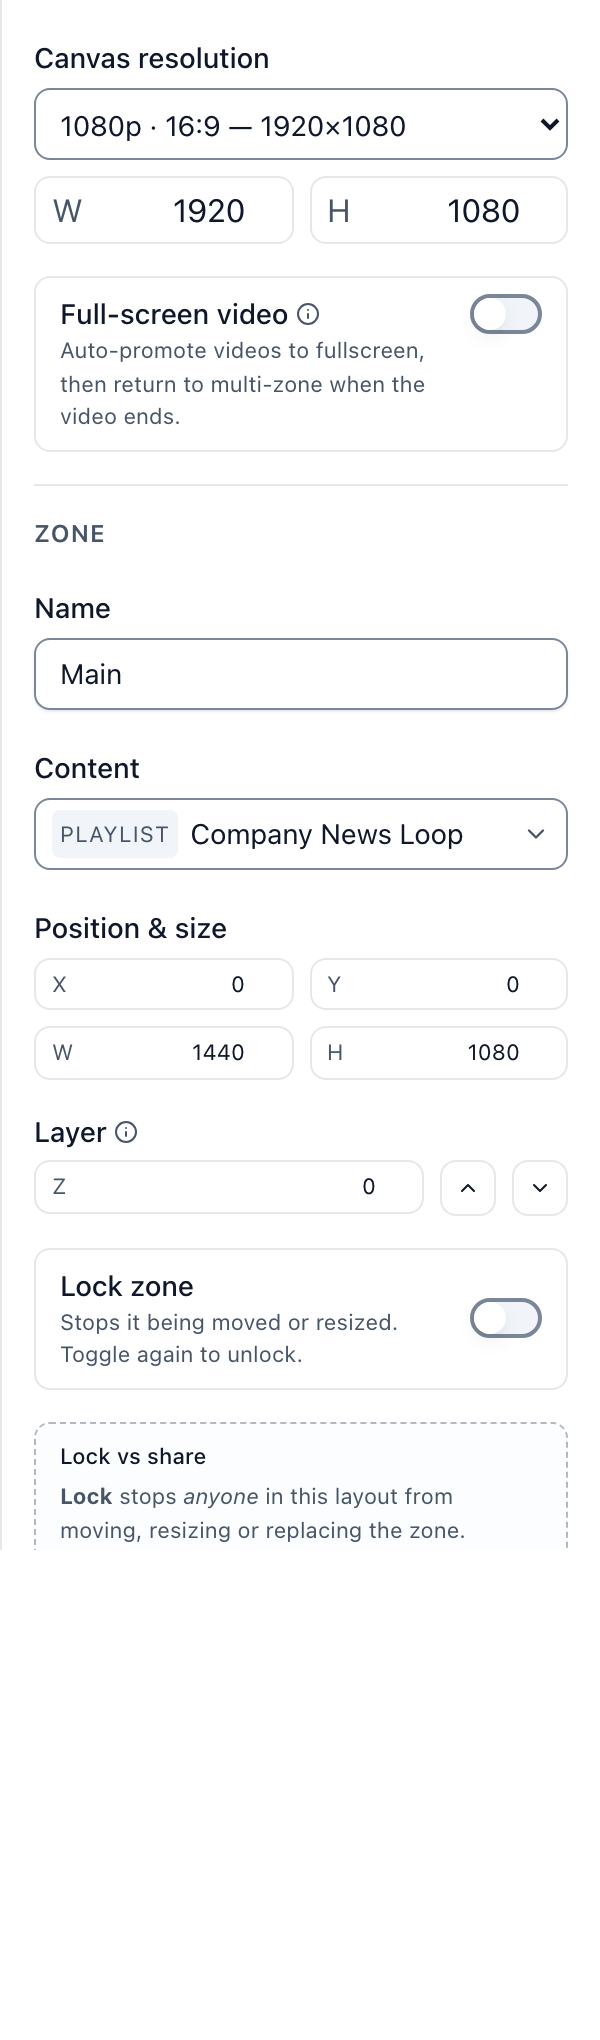
- Type a pixel value into X, Y, W or H in the Zone panel and press Enter.
- To change which zone paints on top, type a higher number into the Z field under Layer.
A value that pushes the zone off the canvas snaps back to the nearest value that fits.
Lock or share a zone
- Lock: turn on Lock zone in the Zone panel. Nobody in this layout can move, resize or replace the zone. Turn it off to unlock, unless a parent Space locked it when it shared the layout.
- Share: select Share this zone… under Sharing and finish the grant on the Settings > Sharing page. The other team can swap the zone's content but not the rest of the layout.
Change the canvas resolution
- Find Canvas resolution at the top of the right rail.
- Choose a preset, such as Portrait · 9:16 — 1080×1920, or type your own size into the W and H fields (64 pixels or more) and press Enter.
Zones keep their pixel coordinates, so after you shrink the resolution, drag or retype each zone to fit the new frame.
Let a video take the whole screen
In the Full-screen video card in the right rail, turn the switch on. When the main zone plays a video, the player fills the screen with it and hides the other zones until the video ends. It is off for a new layout.
To decide when each layout plays, read schedules.