Good digital signage is read in a few seconds from across a room. Design at the screen's resolution (1920 x 1080 for a landscape HD TV, 1080 x 1920 for portrait), use one message per slide, large sans-serif text with strong contrast, and no more than about 15 words. Start from a template made for your kind of business, change the words and pictures, and preview it at full size before it goes to a screen.
In Brix, open Content > Templates, pick a template and select Use this template, or select Upload to import a Photoshop file or an image. The design opens in the Creative Canvas editor, where you edit layers of text, images and shapes, then press Save.
Rules that make a sign readable
| Rule | Why |
|---|---|
| About 1 inch of letter height for every 10 feet of viewing distance | A 2-inch headline reads from about 20 feet. Stand where your customers stand and check. |
| One message per slide, about 15 words or fewer | Most people look for a few seconds and may join mid-loop. |
| Sans-serif fonts, at most two per design | Thin, script and italic faces break up at a distance. |
| Dark text on light, or light on dark, never mid-tone on mid-tone | TVs in bright rooms lose contrast. |
| Keep text away from the edges | Some TVs crop a few percent of the picture (overscan). |
| Use your brand colors and logo the same way on every screen | A viewer should know it is your screen before reading it. |
The common mistake is adding more text than the template was built for. If a text box has to shrink its text to fit (Auto-fit), cut words instead.
Start from a digital signage template
- Open Content > Templates. The Browse tab opens first.
- Select Landscape or Portrait at the right end of the filter bar, then an industry tile. Narrow the look with the Style chips and the Mode toggle. To search the whole catalog, type in Search templates... or pick a Kind.
- Select a template card to open a large preview. Hover it for Replay animation.
- Select Use this template, or hover a card and select Use. The editable copy opens in the editor.
- Select the name in the canvas header and type your own name, edit each layer, then press Save.
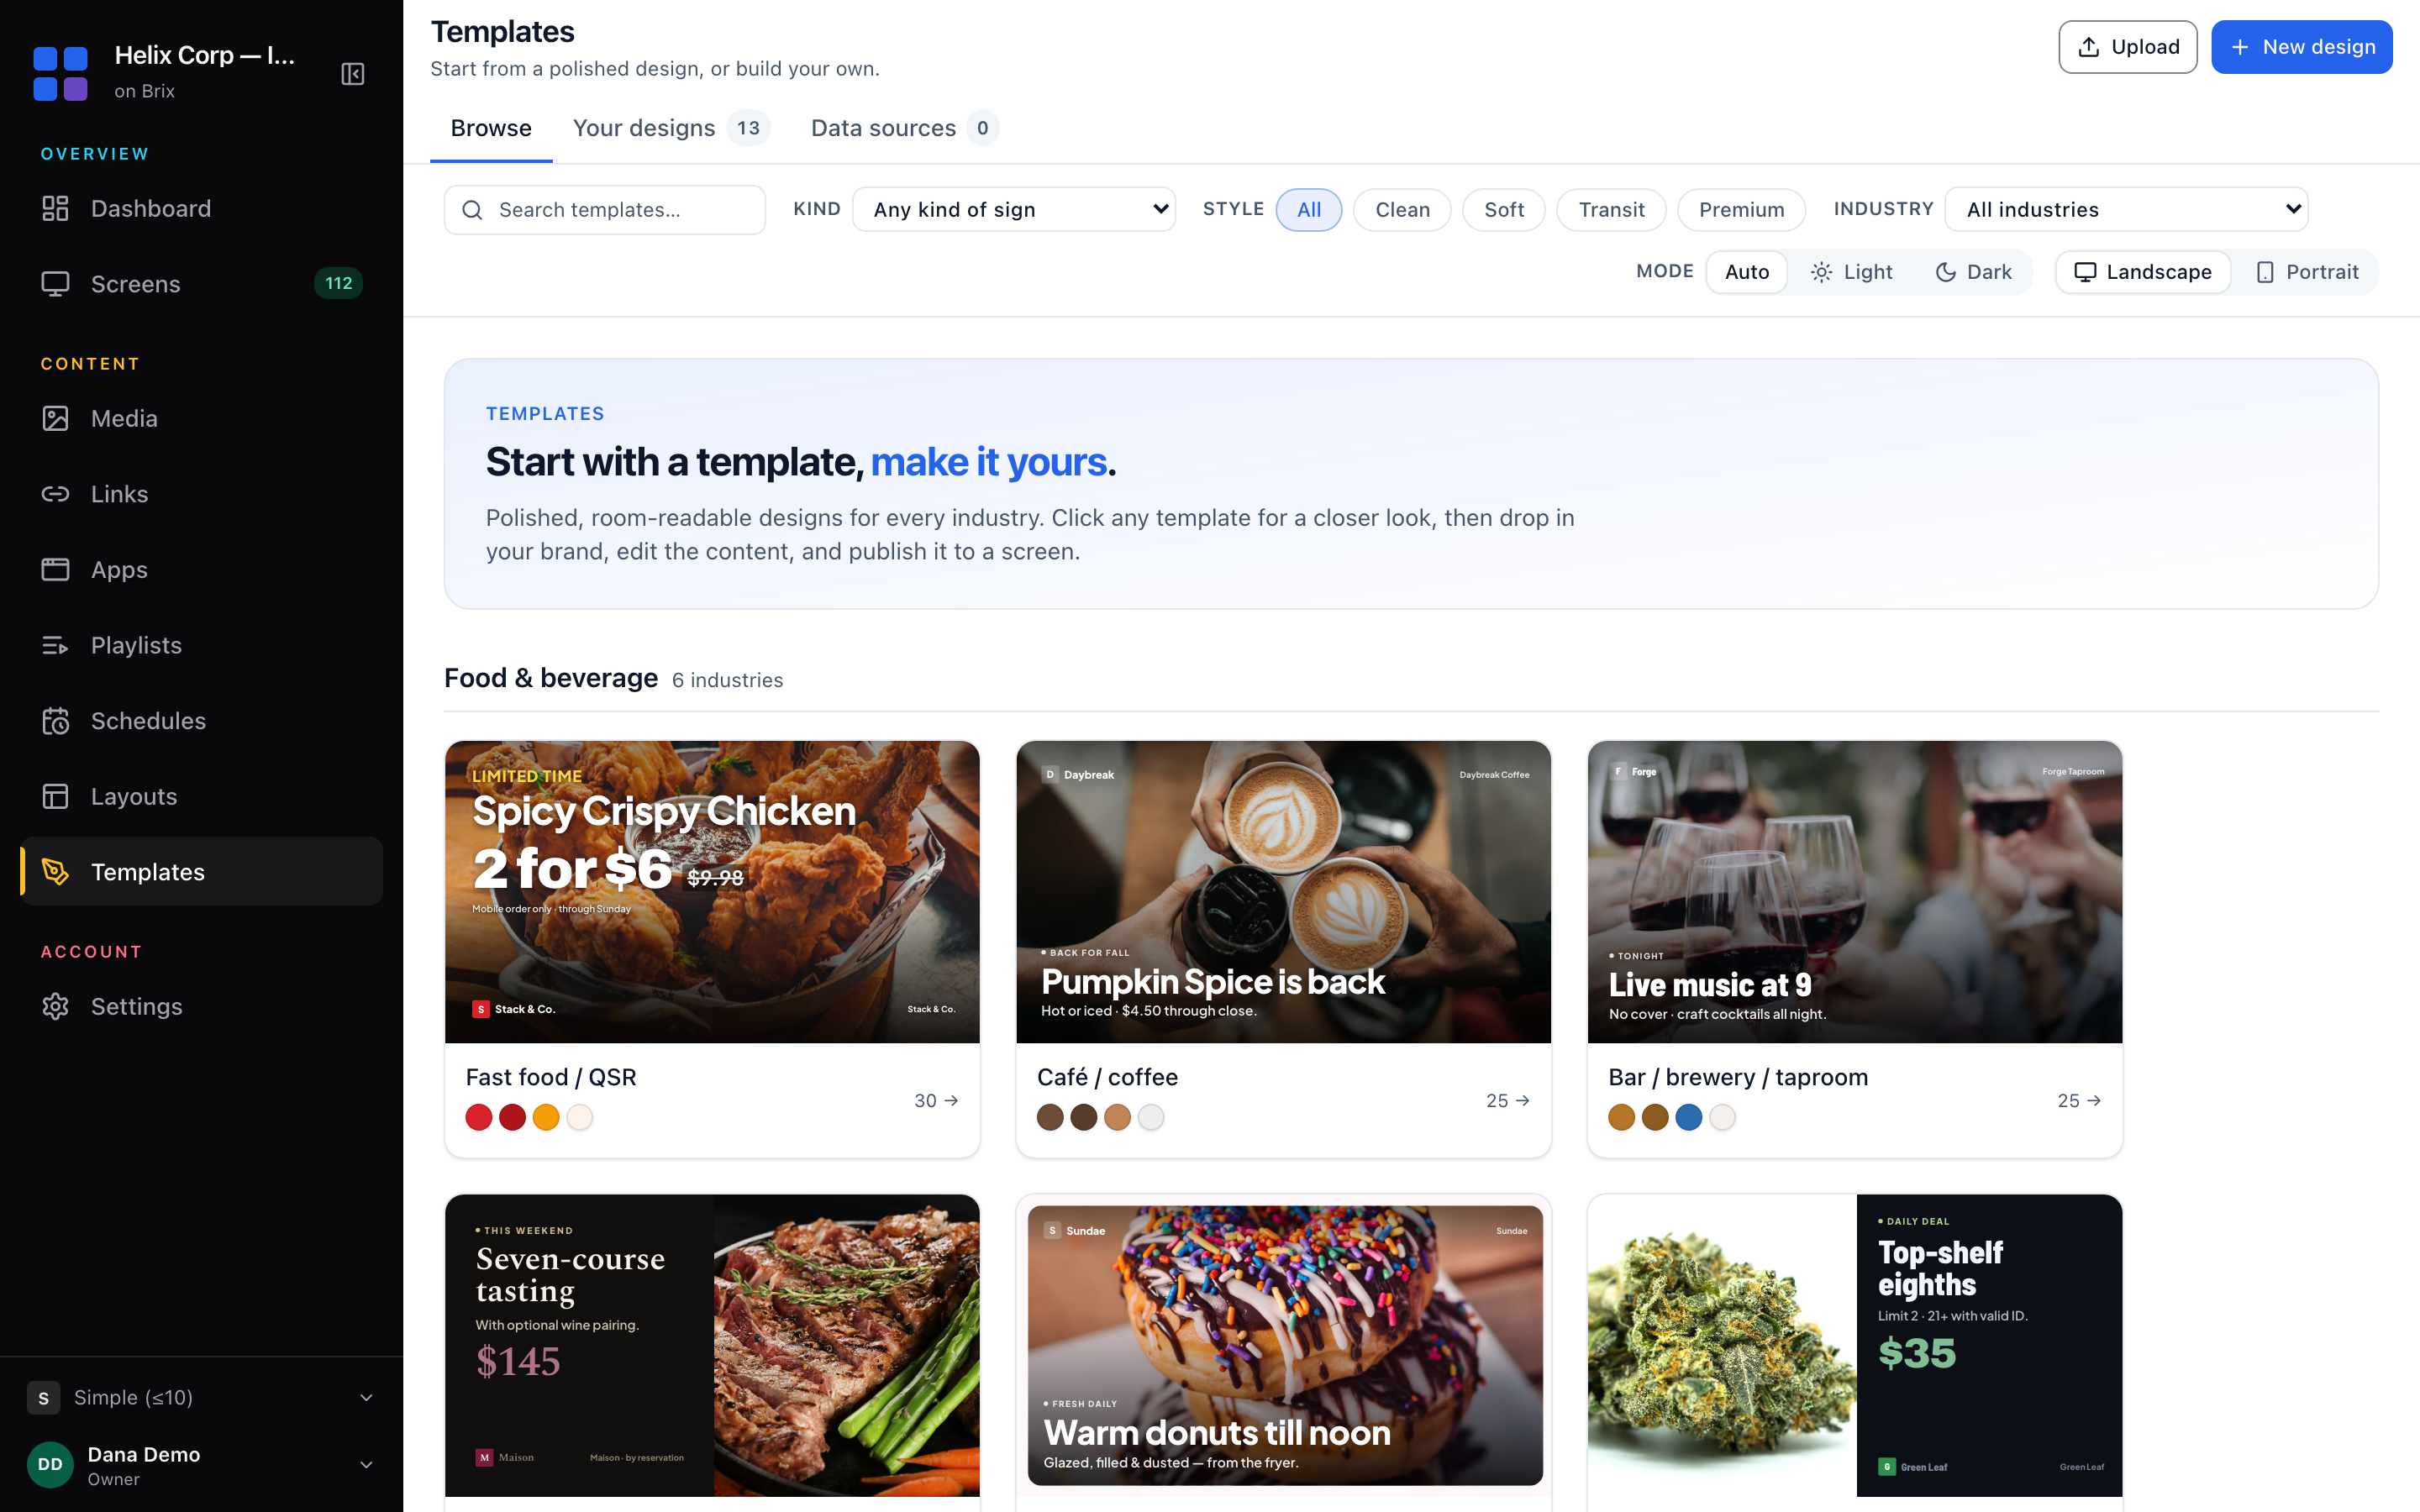
Browsing makes no copy, so it never fills Your designs. A second copy of the same template gets a number on the end, for example "Menu board 2".
Import a Photoshop file or an image
- On Content > Templates, select Upload in the page header.
- Choose a .psd file to get each readable Photoshop layer as its own box, or a .png, .jpg, .svg, .webp or .gif file to get one full-bleed layer.
- Wait for the editor to open, then add text or shapes on top with the topbar tools.
The picker accepts Illustrator (.ai) and Sketch (.sketch) files, but the importer rejects them. Export to .psd or .svg to keep the layers. A red "Import failed" banner under the page header reports a failure. Every import saves the design as it opens it.
Add text, images and shapes
- Select Text, Image, Shape or Template in the topbar to drop a layer on the canvas. Apps holds the Celebrations and Event Board blocks, and Data inserts a live field: read live data on screen.
- Drag the layer to move it. Alignment guides appear as it lines up. Drag a corner handle to resize. Arrow keys nudge the layer (Shift for a coarser step, Alt to resize).
- Open the Box tab to type exact percentages, set the rotation or press an alignment button.
- Double-click a text layer to retype it in place. Press Enter to keep the text, Escape to cancel. Tag beside the Text field inserts a live value such as the company name, the date or the weather.
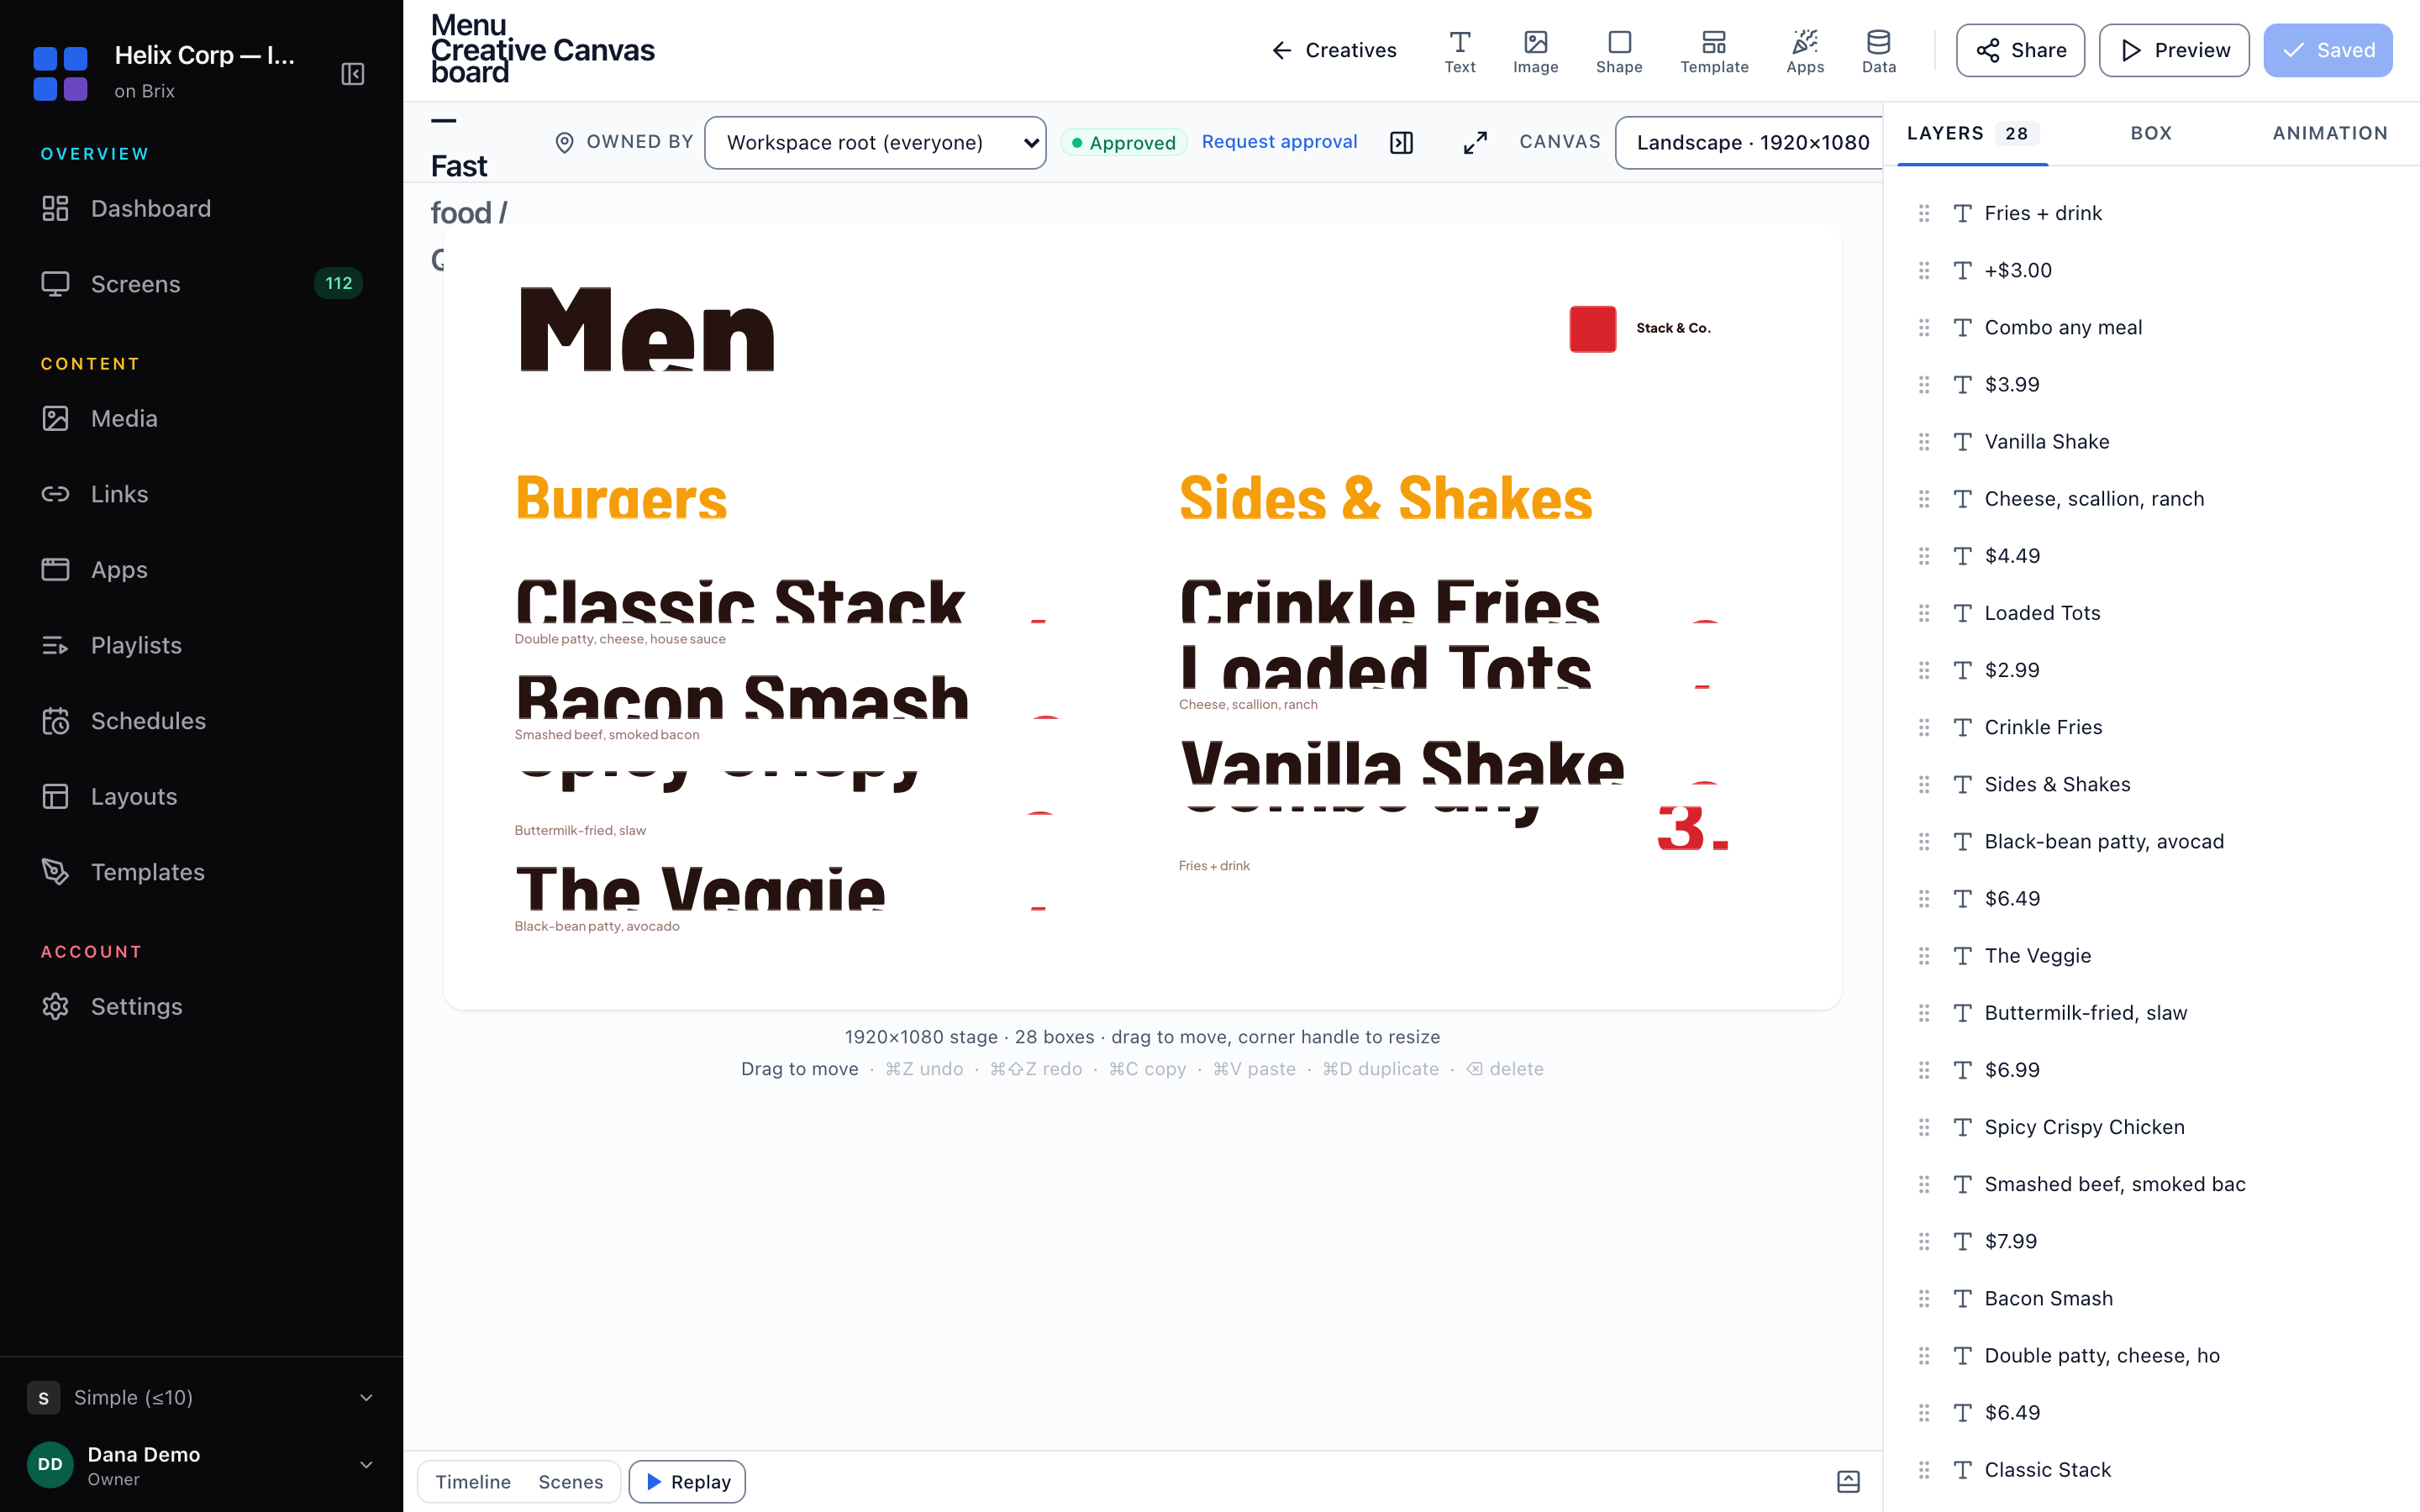
A new layer stacks above the others, so a full-bleed background cannot hide it.
Set fonts, colors and backgrounds
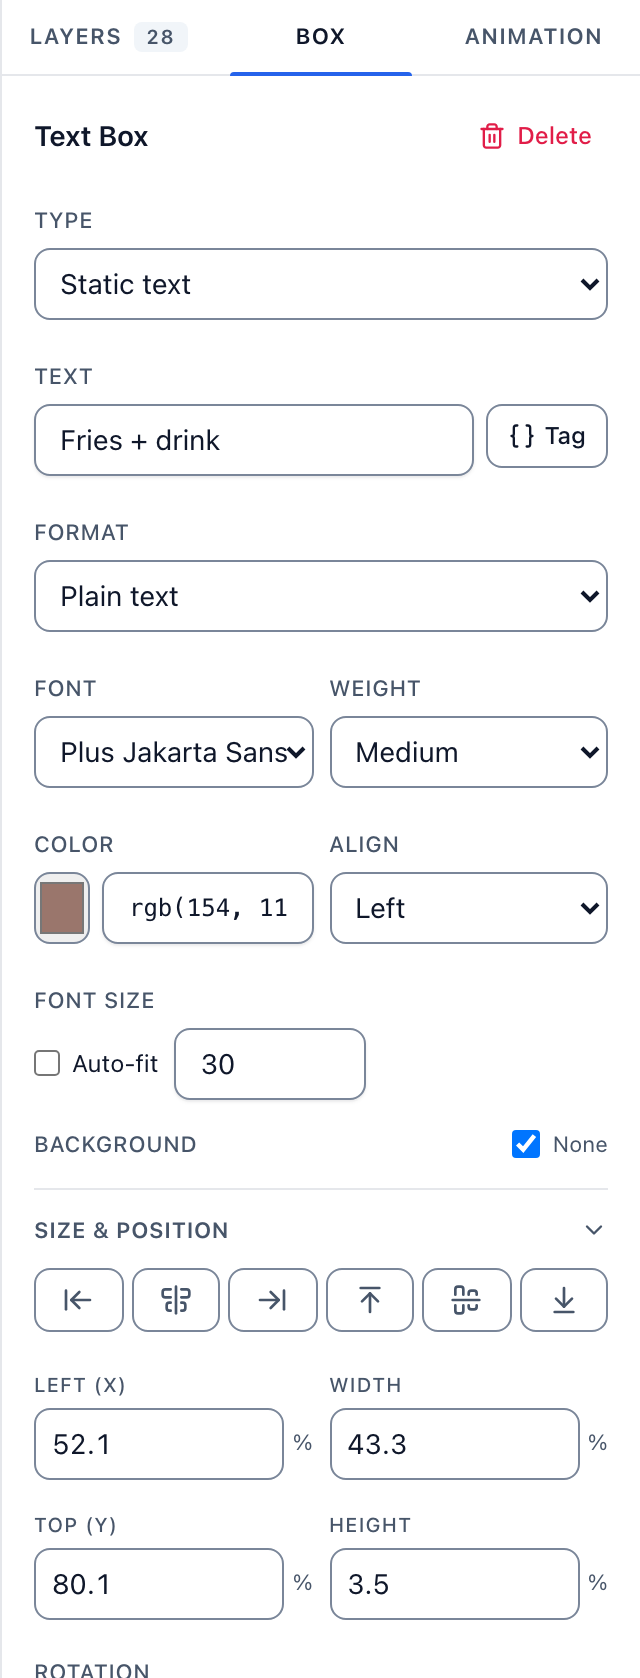
- Select the layer and open the Box tab.
- Set Font, Weight, Color and Align. Tick Auto-fit or type a font size.
- Set a Background fill. Untick None first if the layer has no fill yet.
- Open Advanced for the frame color and width, the corner rounding, the opacity, the arrange order, and the lock and hide controls.
A locked layer does not drag and shows no resize handles. A hidden layer shows at 30 percent opacity in the editor and does not render in Preview or on a screen.
Set the canvas size (landscape or portrait)
Open the Canvas list in the canvas header and pick Landscape · 1920×1080, Portrait · 1080×1920, or Custom... for a width and height between 120 and 8192 pixels.
Save, preview and reopen
- Press Save in the topbar. The button reads Saved when nothing is left to write. Ctrl or Cmd with Z undoes a step (the last 50), and adding Shift redoes it.
- Select Preview to see the design as a screen renders it, with live tags resolved. Save first. Select Exit preview or press Escape to go back.
- To open a saved design, go to Content > Templates > Your designs and select its card, or select New design for an empty canvas.
If Brix offers Recover unsaved changes on the next open, it kept a local backup of your edits. If somebody else saved the design while you worked, This creative was changed somewhere else lets you keep yours, take theirs or save a copy. Owned by appears only when your workspace has locations.
Delete designs
On Your designs, tick the checkbox on each card (Shift selects a range), then select Delete N and confirm. This needs the permission to delete media. The recycle bin holds a deleted design for 30 days. A playlist or schedule that uses a deleted design falls back to a placeholder.
To make the layers move, read animate a design. To limit what another team can change, read share a locked template. To put the design on a screen, read put content on a screen.