To schedule digital signage content, divide the week into time blocks (dayparts) and give each block its own playlist: for example a breakfast menu from 6:00 to 10:30, lunch from 10:30 to 4:00 and dinner after that. Then set what plays in the gaps, and assign the schedule to your screens. Good scheduling software also lets a block run only between two dates (a holiday promotion) and turns the screens off when you are closed.
In Brix, go to Schedules under Content, select New, then draw a block on the weekly grid for each daypart and choose what it plays. To put a finished schedule on a screen, read put content on a screen.
Plan the dayparts first
Write the plan down before you open the grid:
| Daypart | Days | Time | Plays |
|---|---|---|---|
| Breakfast | Mon to Fri | 6:00 to 10:30 | Breakfast menu playlist |
| Lunch | Every day | 10:30 to 16:00 | Lunch menu playlist |
| Weekend brunch | Sat, Sun | 8:00 to 12:00 | Brunch playlist (priority 1, so it wins over Lunch) |
| Late night | Fri, Sat | 22:00 to 02:00 | Late-night playlist |
| Fallback | Any gap | Brand loop |
Each row becomes one block. Build the loop each block plays first: read playlists.
Create a schedule
- Select Schedules in the sidebar and select New at the top of the rail.
- Select the name New Schedule in the editor header, type a name and press Enter.
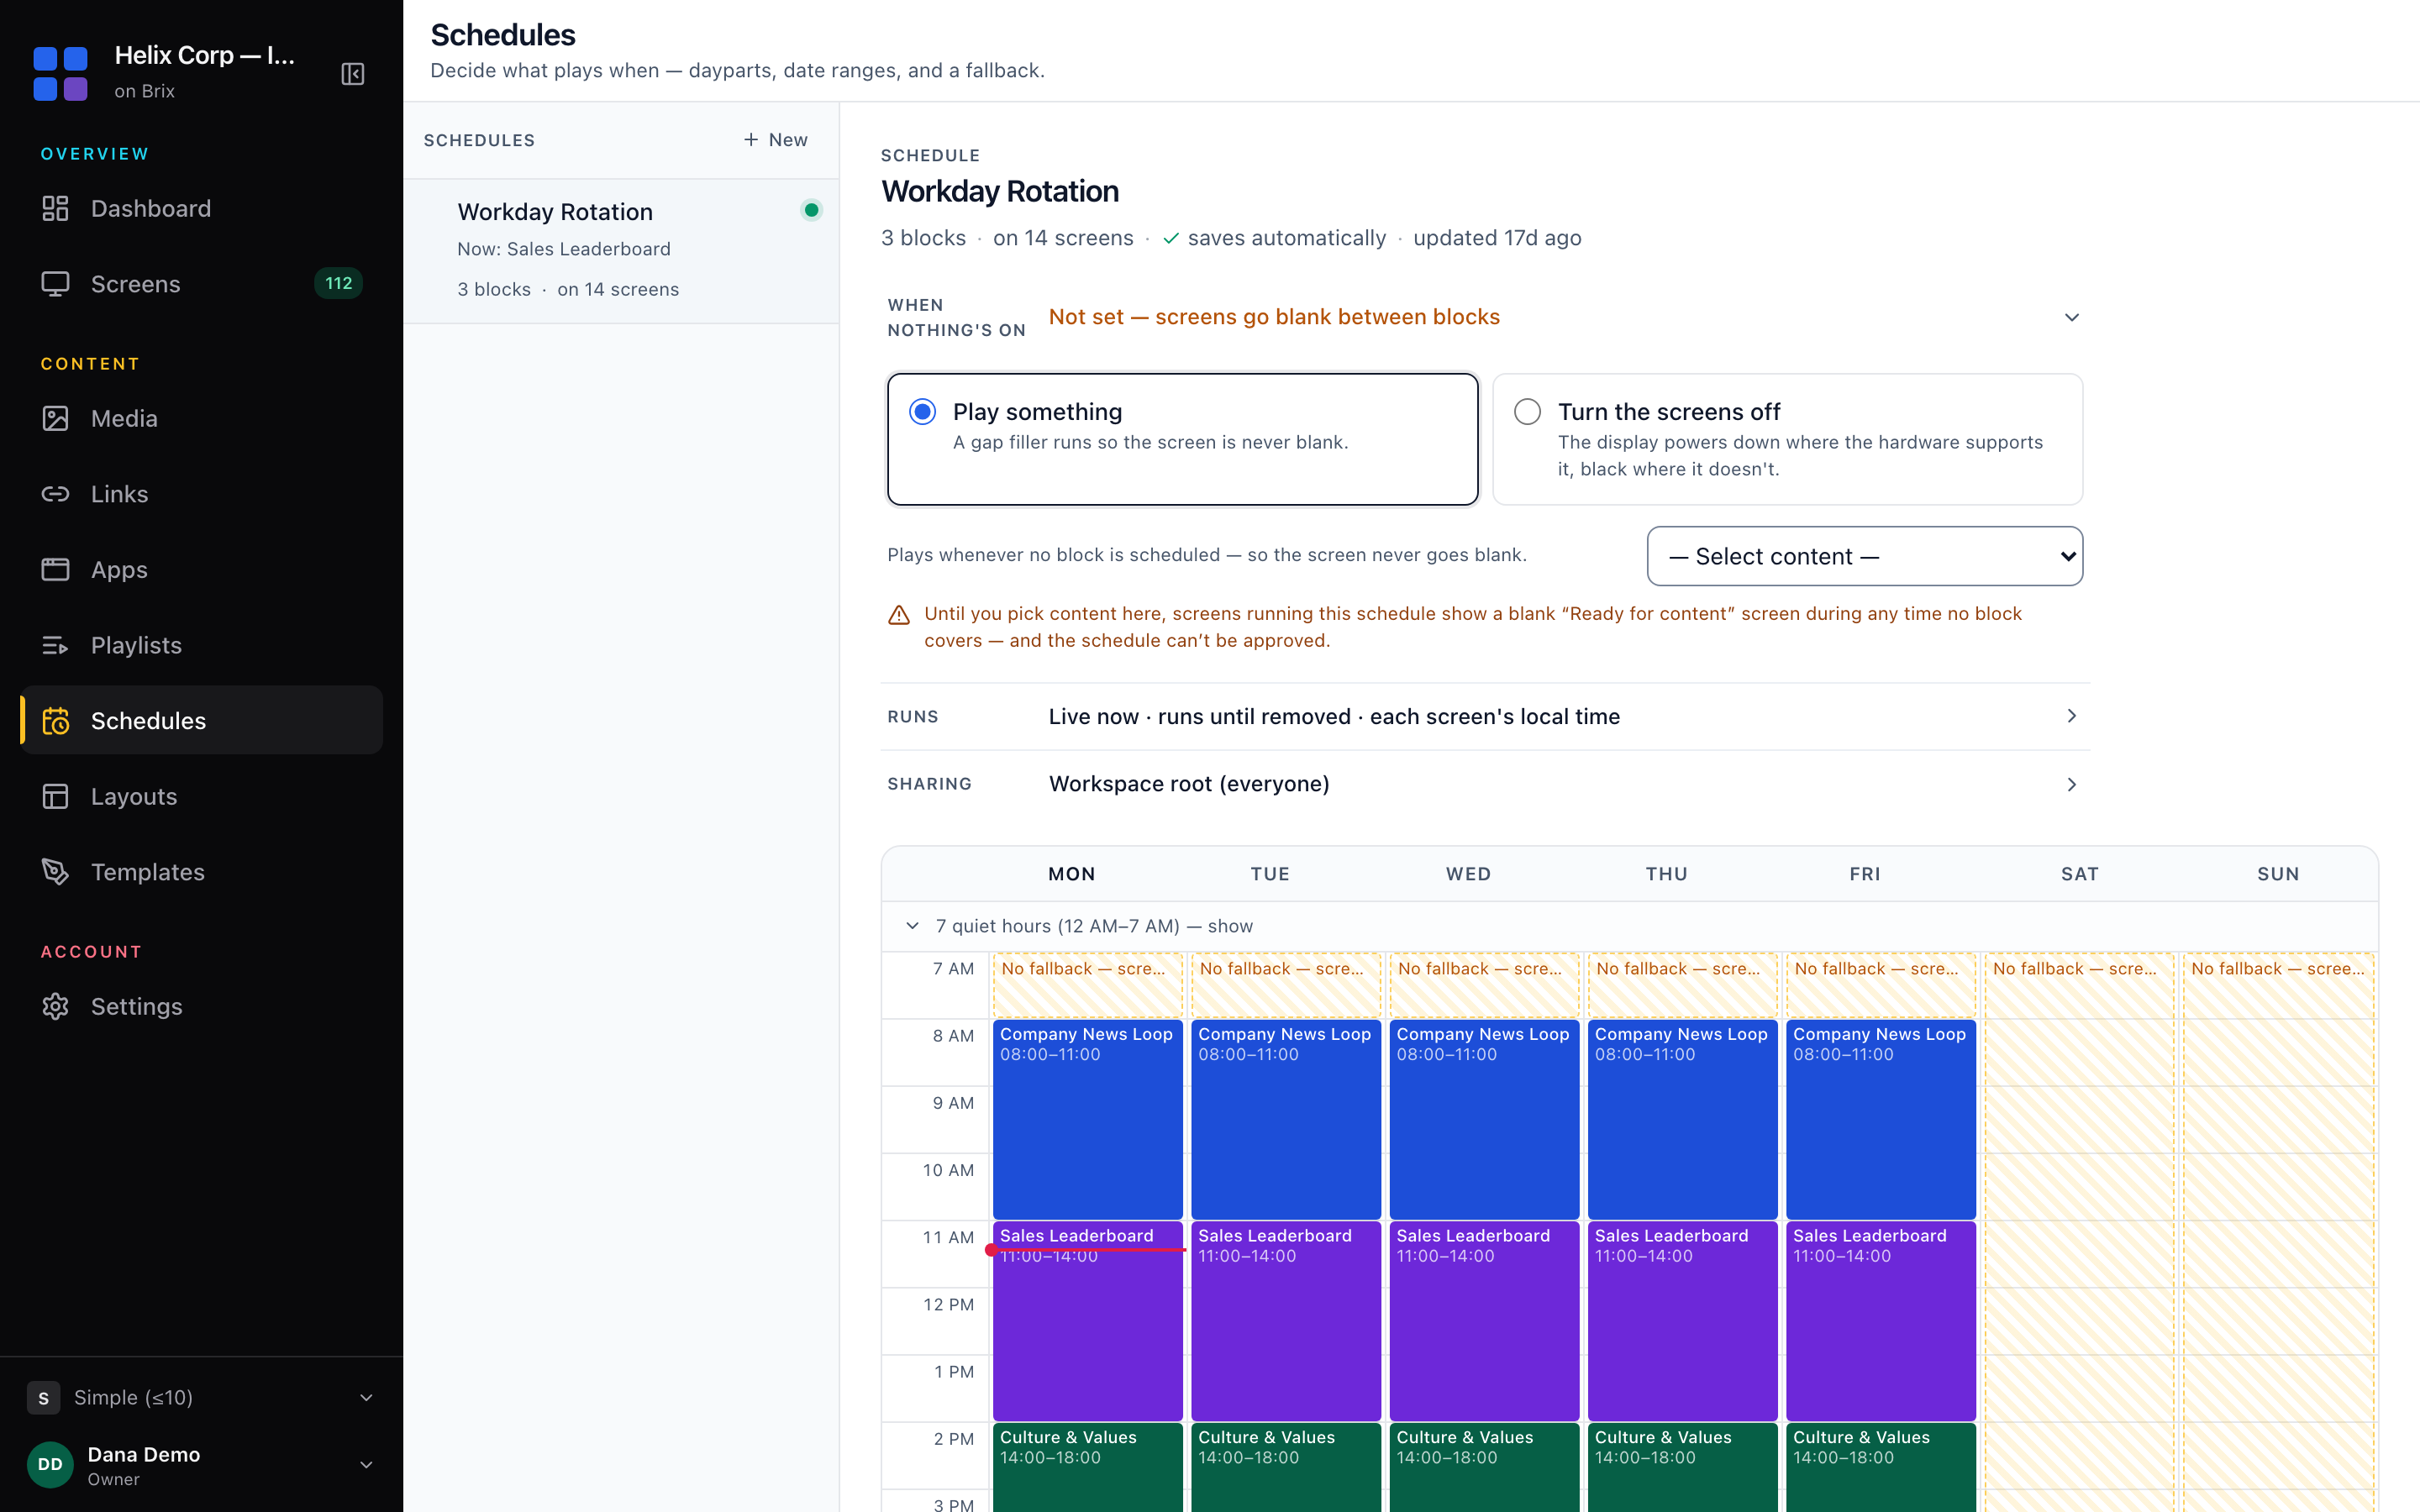
There is no Save button: the editor saves every change as you make it.
Add a time block (daypart)
A block is one daypart with its days, start time, end time and one item of content.
- Press on the first hour cell in a day column and drag down to the last hour. Release to open the New block sheet. (If the grid hides the hours you need, select the quiet hours strip first.) Or select Add block beside the Blocks heading.
- Type a Label such as Morning, Lunch or After School.
- Select a day button for each day the block runs.
- Set Start time and End time. Type 930 or 9pm, or pick a quarter hour.
- Choose the item under Content: Media, Apps, Playlists, Layouts or Templates.
- Select Add block. It stays disabled until the block has a label, a day and two different times. A block you never save disappears when you dismiss the sheet.
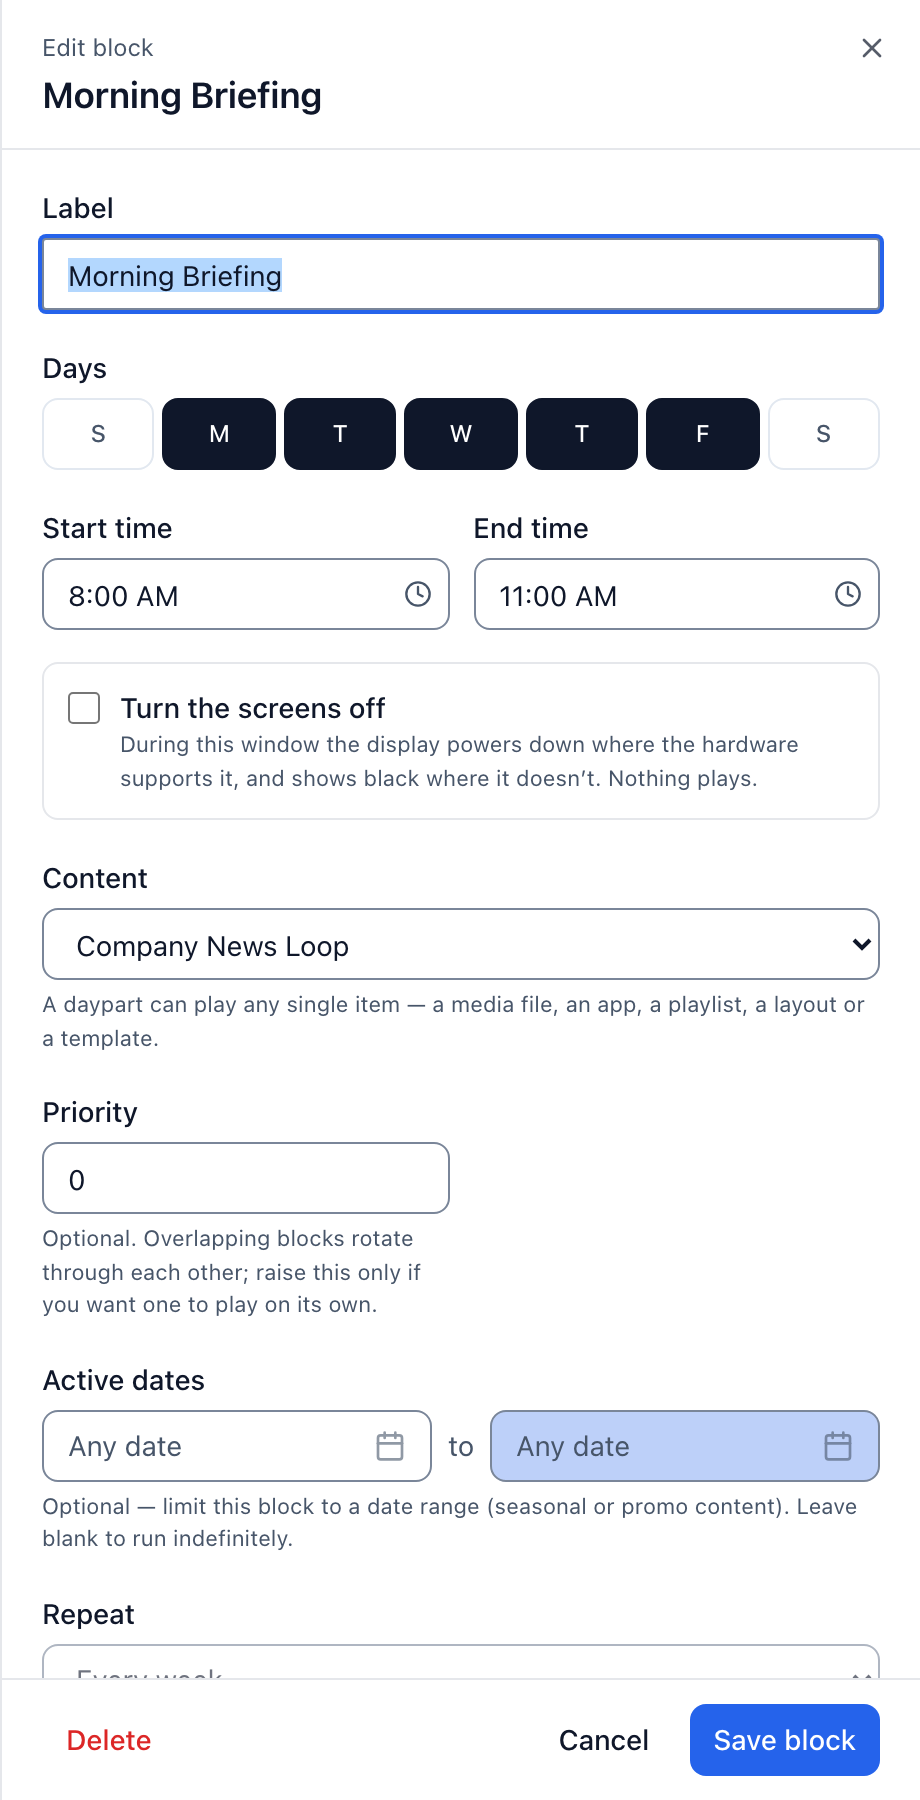
To edit a block, select it in the grid or use the pencil in the Blocks list. To remove one, use the trash icon and Undo in the snackbar within 8 seconds.
Past midnight: set the end time earlier than the start, for example 22:00 to 02:00. An end of 00:00 means midnight.
Turn the screens off: tick Turn the screens off on a block. It plays nothing and raises the same display power signal as a screen's opening hours; read screen settings and display power.
Date range: under Active dates pick a start and end date. Repeat (for example Every other week) needs a start date.
Overlaps: two blocks over the same minutes take turns on screen, and an amber banner names the first overlapping pair. Type a Priority above 0 on the block that should play alone.
Copy one day onto the rest of the week
- Point at a day column header that has blocks and select the copy icon.
- Select each target day.
- Select the Copy to button.
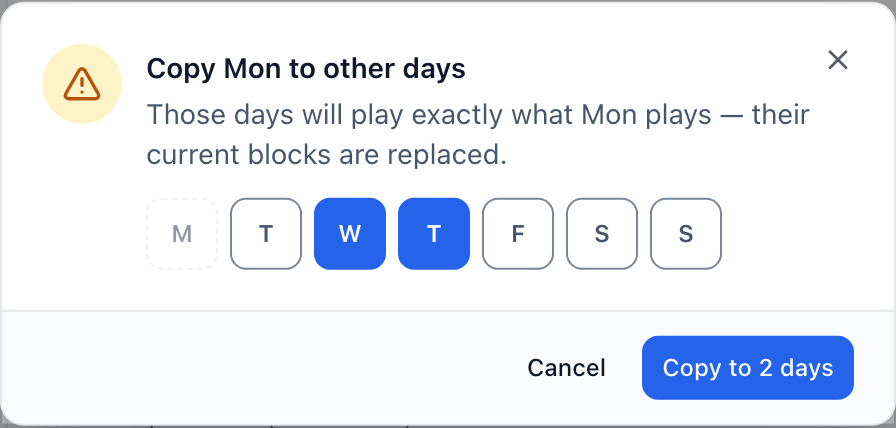
A copy replaces the blocks on every target day.
Choose what plays between blocks, or turn screens off
- Select the When nothing's on row to expand it.
- Select Play something and choose a Fallback content item.
Without fallback content, a screen shows a blank "Ready for content" frame in every uncovered minute, and Brix blocks approval. Select Turn the screens off in the same row to power the displays down between blocks instead.
Set the time zone and the run dates
- Select the Runs row to expand it.
- Under Clock, choose Each screen's local time (a 9 AM block starts at 9 AM in every time zone) or Workspace time (all together).
- Set Starts (default Today) and Expires (default Never).
Before the start date and after the expiry date, the schedule does not drive its screens, which fall through to their next assignment.
Send a schedule for review
Where the schedule's location needs a review, select Request approval, choose the location under Where is this being published?, type a note and select Send for approval. Set the fallback content first, or the button stays disabled.
Delete a schedule
Tick the checkbox at the left of a row in the rail (hold Shift for a run), select Delete in the bar at the bottom and confirm. Screens on a deleted schedule fall back to the workspace default. Brix keeps it in the recycle bin for 30 days.
To split one screen into zones, read layouts. To build the loop a block plays, read playlists.