Media Library
Upload, organize, and manage all your digital signage content in one place. January 12, 2026
Media holds every file your screens play. Upload images, videos and documents, file them into folders, and set how each file behaves on screen. Every member of a Space can browse Media. Upload, move and delete each need their own permission.
What you can do
- Upload files — Add images, videos, PDFs and PowerPoint files from your computer or a web address.
- Find any file — Narrow the library by name, tag, kind, usage or processing state.
- Organise with folders — File media into a folder tree, and move files between folders at any time.
- Set sound and captions — Turn audio on for a video, and add a caption track for sound-off rooms.
- Control when a file plays — Set the date a file starts playing and the date it stops.
- Undo a delete — Restore anything you delete for 30 days.
Upload files from your computer
- Open Media from the Content group in the sidebar.
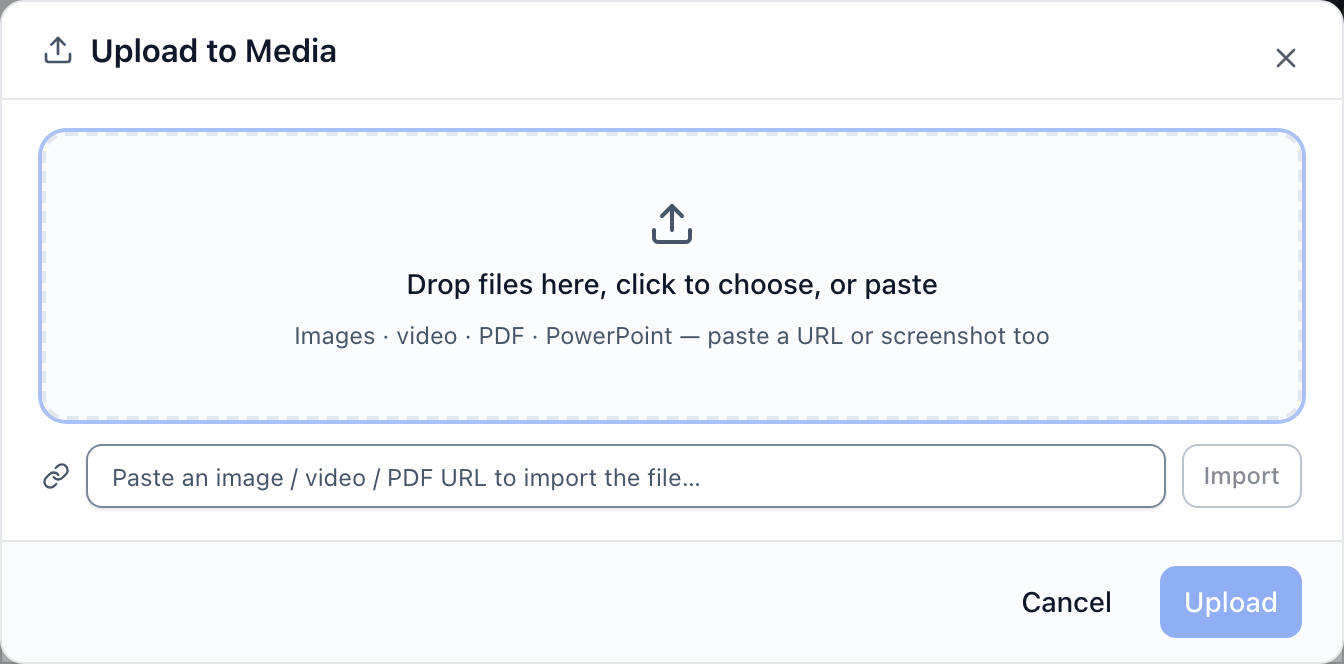
- Select Upload in the topbar.
- Drop your files onto the dashed area, or select the area to open the file picker.
- Wait for each staged row to show its thumbnail and its dimensions.
- Change the name in the text box on a row if you want a name other than the file name.
- Add tags in the Add tag… box on the row.
- Choose a destination in the Folder dropdown at the bottom left.
- Select Upload.

️ One folder applies to the whole batch. Brix hides the Folder dropdown when your Space has no folders.
️ Brix re-encodes a large video to 1080p in your browser before upload. The Upload button reads Optimising… until the conversion finishes. Brix then sends your original in the background as the master copy.
️ Brix downscales an image only when the image is larger than 4K and is a JPEG, PNG or WebP file. Brix uploads GIF, SVG, AVIF and HEIC files untouched.
️ Brix saves your tags in a second save after the file lands. A tag that fails to save does not fail the upload.
Import a file from a web address
- Select Upload in the topbar to open the Upload to Media dialog.
- Paste the address into the import box under the drop area.
- Select Import, or press Enter.
- Copy an image or a screenshot and paste it into the drop area instead, if you have no address.
Remove a file before you upload it
- Find the staged row you no longer want.
- Select the X button at the right of the row.
Describe an image for screen readers
- Add an image to the staged list.
- Type a description into the alt text box under the file row.
- If the image carries no information, tick Decorative — no description needed instead.
- Select Upload.
️ Brix fills the alt text box from a description inside the image file when the file holds one. Brix fills only an empty box.
️ When your Space needs alt text, Upload does not work until every image has a description or a decorative tick.
Ask for captions when you upload a video
- Add a video to the staged list.
- Tick Auto-generate captions under the file row.
- Select Upload.
- Leave the page open while Brix produces the caption track.
️ Auto-generate captions is off for every video by default. Smart-fit on portrait / ticker zones is on for every image by default.
Find a file in the library
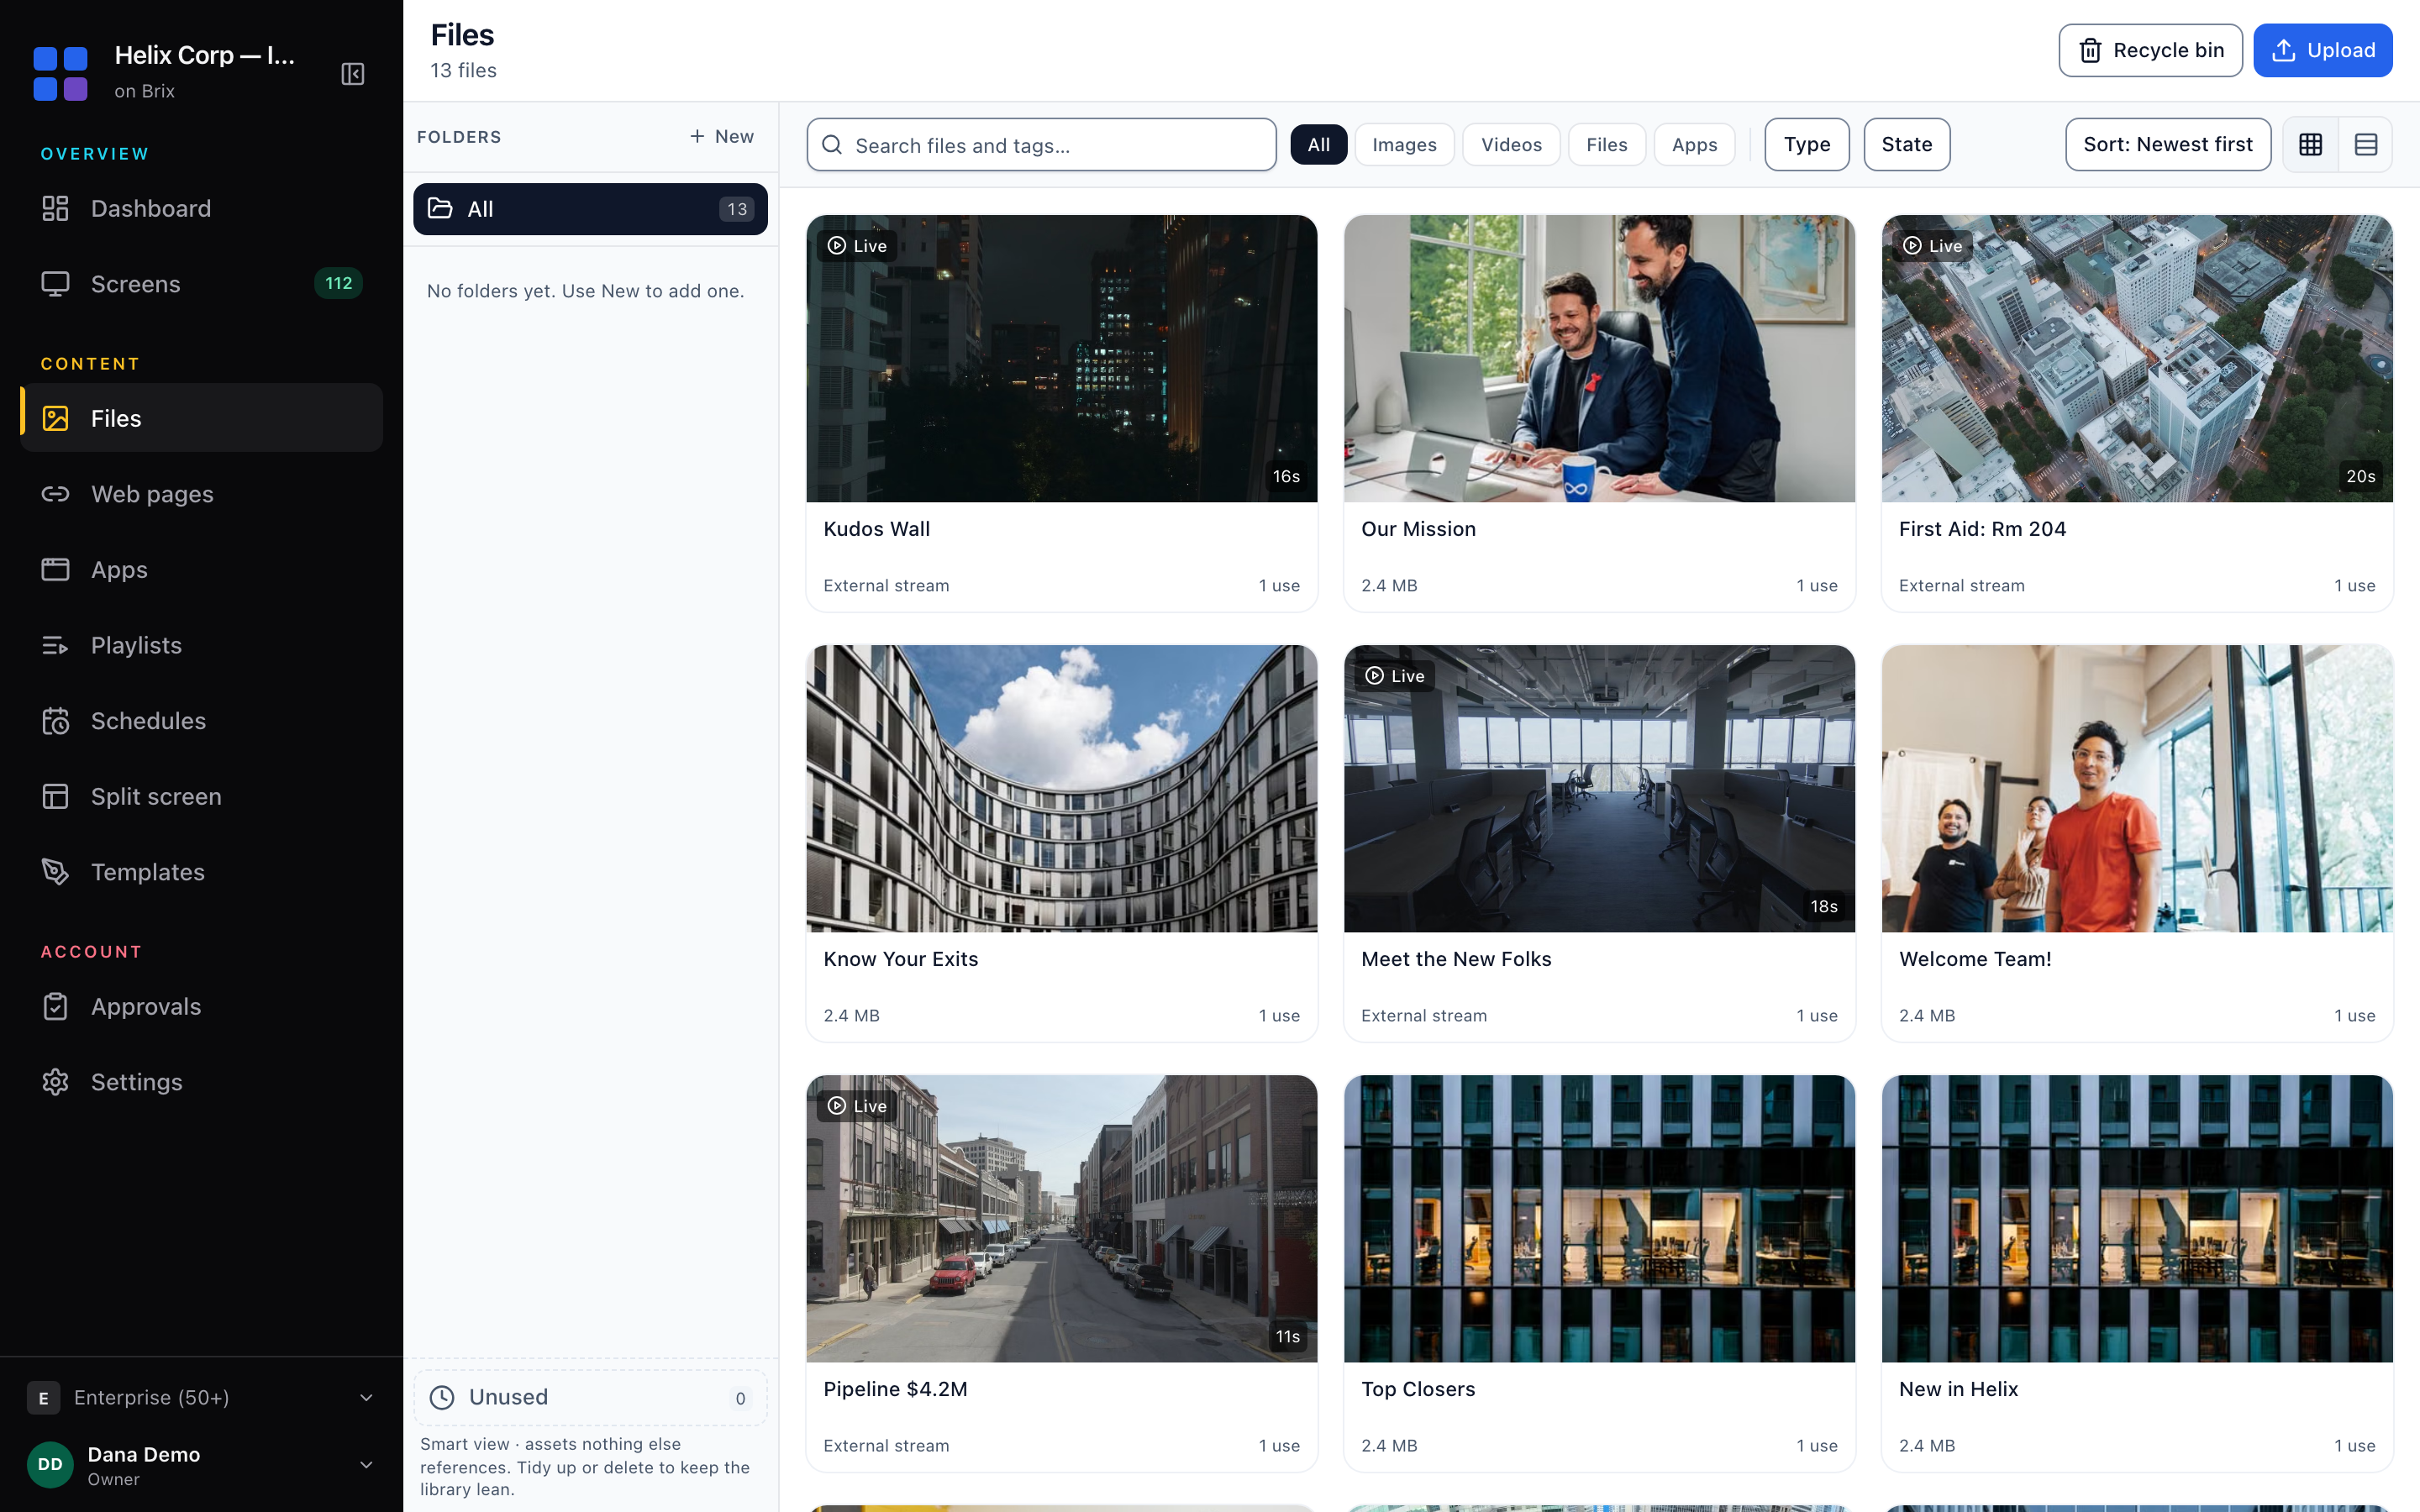
- Open Media.
- Type a name or a tag into the search box.
- Select All, Images, Videos, Files or Apps to narrow the library by kind.
- Open the Type dropdown to combine Image, Video, PDF, PowerPoint, Web page and RSS.
- Open the State dropdown to pick In use or Unused under Usage.
- Pick a processing state such as Ready, Processing, Queued, Warnings, Needs re-upload, Needs action or Expired.
- Select Sort: Newest first to reorder by Name, File size or Most used.
- Select Clear search and filters when the view reports no matches.
️ Fonts do not appear in Media. Fonts live in the Brand Kit.
️ The Expired, In use and Unused filters load the whole library at once, as does any sort other than Newest first. A large library takes longer to open.
️ A change of folder, search, kind or state clears your current selection. A bulk delete can never act on rows you can no longer see.
Switch between grid and list
- Select the Grid view button at the right of the filter bar to see cards with thumbnails.
- Select the List view button to see the Name, Type, State, Size, Duration, Usage and Added columns.
- Scroll to the bottom of either view to load more files.
Open a file and rename it
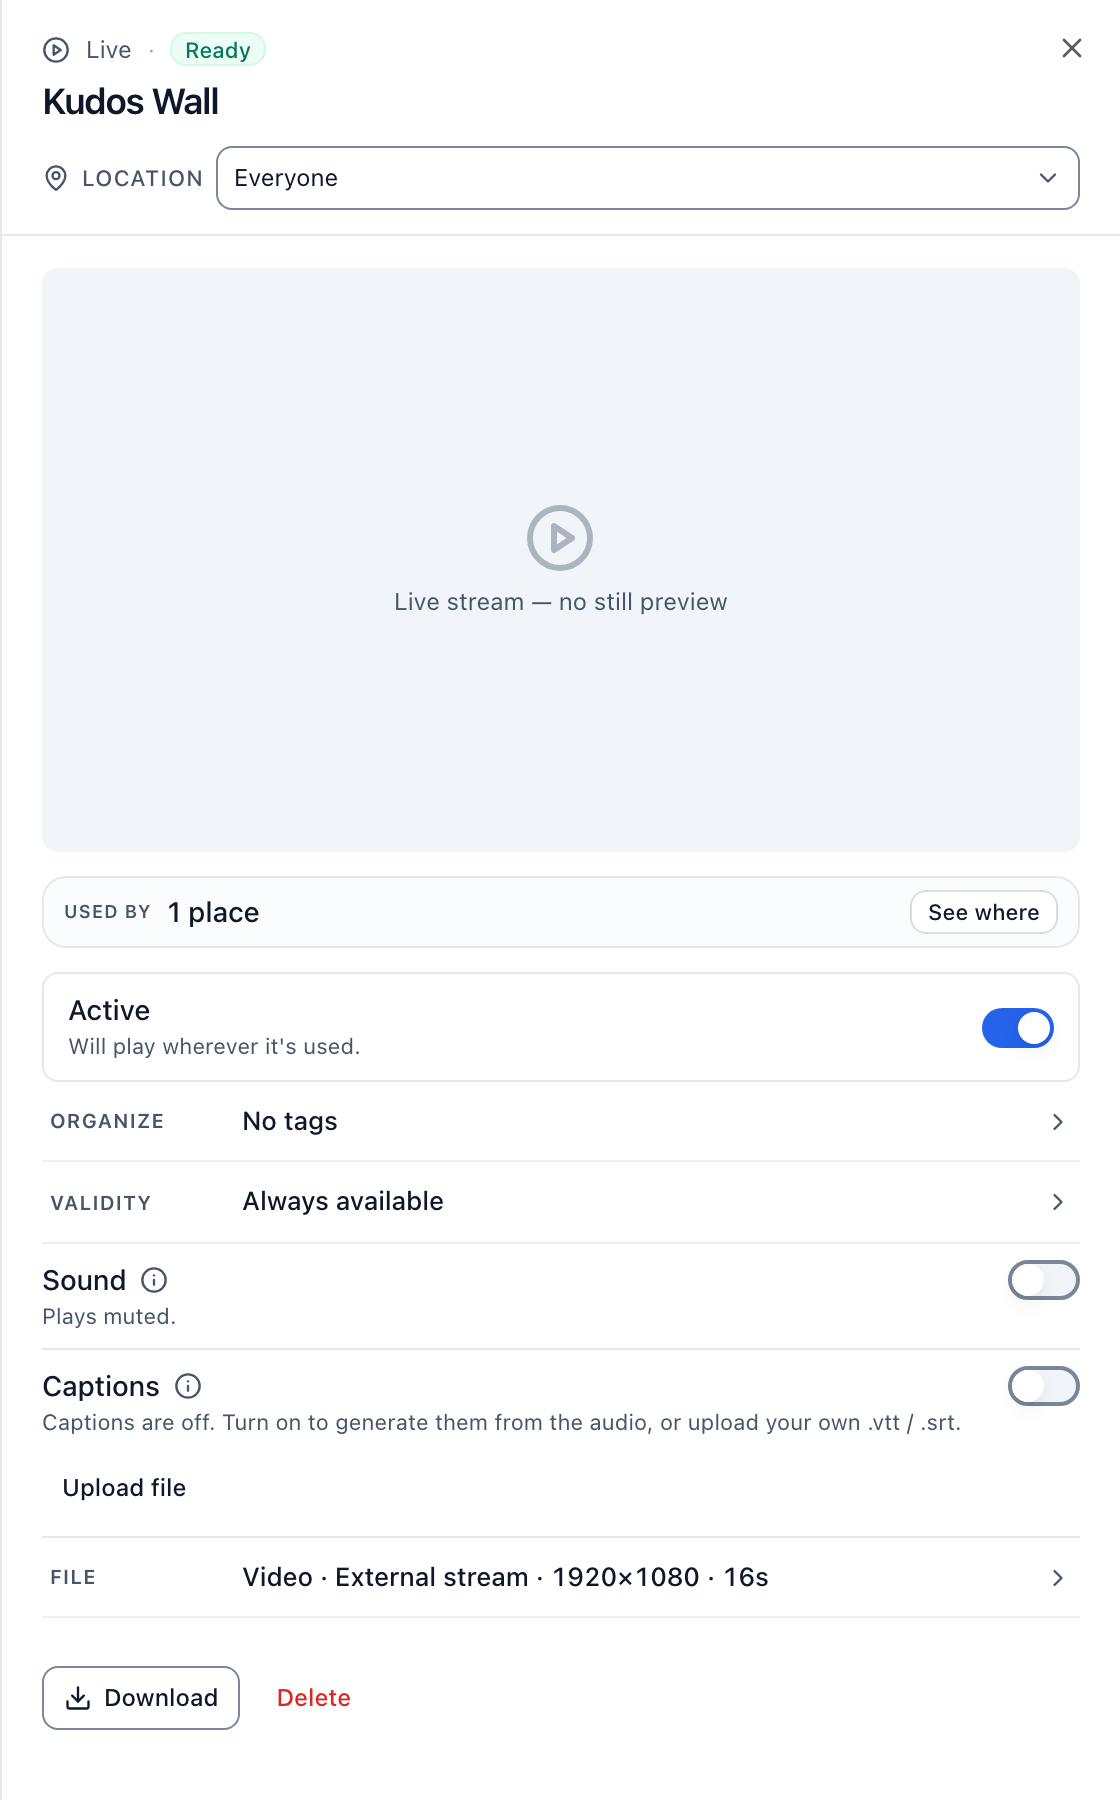
- Select a file card or row to open its detail panel.
- Select the name at the top of the panel.
- Type a new name.
- Press Enter to save.
- Use the Owned by dropdown to move the file to another part of your Organization.

See where a file plays
- Open the file to show its detail panel.
- Read the Used by row to see how many places reference the file.
- Select See where to open the Used in drawer.
- Review the playlists, schedules, layouts and templates in the list.
- Read the list of screens that show the file now.
- Select Open on any row to go to that playlist, schedule, layout or template.
Pause a file without deleting it
- Open the file to show its detail panel.
- Turn the Active switch off.
- Check that the panel now reports the file as paused.
- Turn the switch back on to resume playback.
️ A paused file stays in the library. A paused file plays in no playlist and no schedule until you turn Active back on.
Download the original file
- Open the file to show its detail panel.
- Scroll to the buttons at the bottom of the panel.
- Select Download.
️ Brix offers no download for a link. A link points at a remote page, so Brix stores no file for it.
Create a folder
- Open Media.
- Select New at the top of the Folders rail.
- Type the folder name.
- Press Enter, or select the tick button.
Rename or delete a folder
- Hover the folder row in the rail.
- Select the pencil button to rename the folder.
- Type the new name.
- Press Enter.
- Select the bin button to delete the folder instead.
- Read the confirm dialog.
- Select Delete folder.
️ A deleted folder does not go to the recycle bin. Brix cannot bring a deleted folder back.
️ You need edit permission to drag files between folders. You need create permission to add, rename or delete a folder.
Move files into a folder
- Select one or more files with their checkboxes.
- Drag the selection over the Folders rail. A valid target shows a dashed outline.
- Hold over the destination folder until the folder shows a plus and a count.
- Release to file the media.
- Select Move to… in the bar at the bottom of the page to move without a drag.
- Pick a destination in the folder tree.
- Select Move.
️ A folder does not change where a file plays. Folders only organize the library.
️ A folder move saves one file at a time. Some files in a selection can succeed while others fail, and the failures stay selected so that you can retry them.
Browse one folder
- Select a folder in the Folders rail to filter the grid to that folder.
- Select All media to go back to the whole library.
- Drop files onto All media to take them out of every folder.
- Choose All media (no folder) in the Move dialog to do the same without a drag.
Set when a file starts and stops playing
- Open Media.
- Select the file.
- Expand the Validity section in the detail panel.
- Pick a date and a time under Show from to keep the file hidden until then.
- Pick a date and a time under Expires to stop the file playing after then.
- Leave a field empty to keep the file always available.
- Tick Move to recycle bin when it expires to archive the file for you.
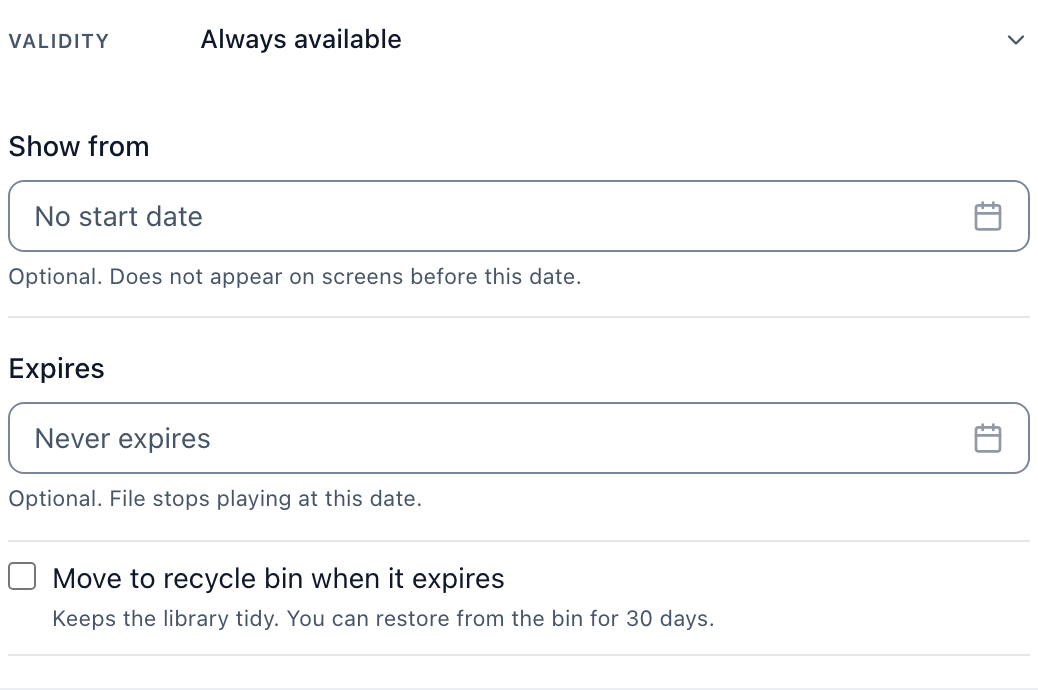
️ Each date field saves the moment you change it. If a save fails, the field returns to the stored value and Brix shows the reason.
️ An expired file stays in the library. Brix dims the card and adds an Expired pill. To clear expired files for you, tick Move to recycle bin when it expires.
️ To list the files that expired, open the State dropdown and choose Expired under Processing state.
Turn sound on for a video
- Open Media.
- Select the video.
- Find the Sound row in the detail panel.
- Turn the Sound switch on.
- Hover the information icon to read how screen volume works with this setting.
️ A video plays with no sound by default, because most screens sit in quiet rooms. Each screen keeps its own volume, so a muted screen stays silent.
Turn captions on for a video
- Open the video to show its detail panel.
- Find the Captions row.
- Turn the Captions switch on.
- If the video has no caption track yet, wait while Brix transcribes the audio.
- Check that the row reports captions as on.
- Select Preview to read the timed cue list.
- Select Hide preview when you finish.
️ Brix keeps the caption track when you turn the switch off, so a later switch back on costs nothing.
️ A video with no audio track cannot carry captions. The Captions row says so.
Use your own caption file
- Open the video to show its detail panel.
- Select Upload file in the Captions row.
- Select Replace file instead, when a track already exists.
- Choose a .vtt or .srt file.
- Check that the switch is now on.
️ Brix turns captions on when you upload your own caption file.
Center a crop on the subject of an image
- Open Media.
- Select the image.
- Find the Smart-fit row in the detail panel.
- Select Detect subject.
- Wait for the button to stop reading Detecting….
- Read the result line to see whether Brix found an off-center subject.
- Select Re-detect after you replace or recrop the image.
️ Smart-fit changes previews and crops into a zone with a shape unlike the image. A full-frame image looks the same as before.
️ When the subject sits near the middle, the panel says so and the crop matches an ordinary center crop.
Delete one file
- Open the file to show its detail panel.
- Select Delete.
- If the file is in use, read the figures in the Move to recycle bin? dialog.
- Confirm the delete.
- Select Undo in the message at the bottom of the page to bring the file back.
️ A file that nothing uses goes to the recycle bin with no confirm dialog. Only the Undo message appears, so read the card name before you delete it.
Delete more than one file at once
- Hover a file card.
- Select the checkbox in the top-right corner of the card.
- Hold Shift and select another checkbox to select a range.
- Hold Cmd or Ctrl and select a checkbox to add one more file.
- Select Delete with the count in the bar at the bottom of the page.
- Read the figures for files that move to the recycle bin and places that stop showing them.
- Select Delete in the dialog.
Clear out files nothing uses
- Open Media.
- Select Unused at the bottom of the Folders rail.
- Read the banner that explains what unused means.
- Open any file you are unsure about.
- Select Delete all with the count in the banner.
- Read the figures in the Clear out unused media? dialog.
- Select Move all to recycle bin.
️ Unused means that no playlist, schedule, layout, template or signage board points at the file. Unused is not a measure of age, because Brix does not record when a file was last on screen.
️ Delete all appears only when the view holds at least one file and you hold the delete permission. The files move to the recycle bin, so the action is reversible.
Restore something you deleted
- Open Media.
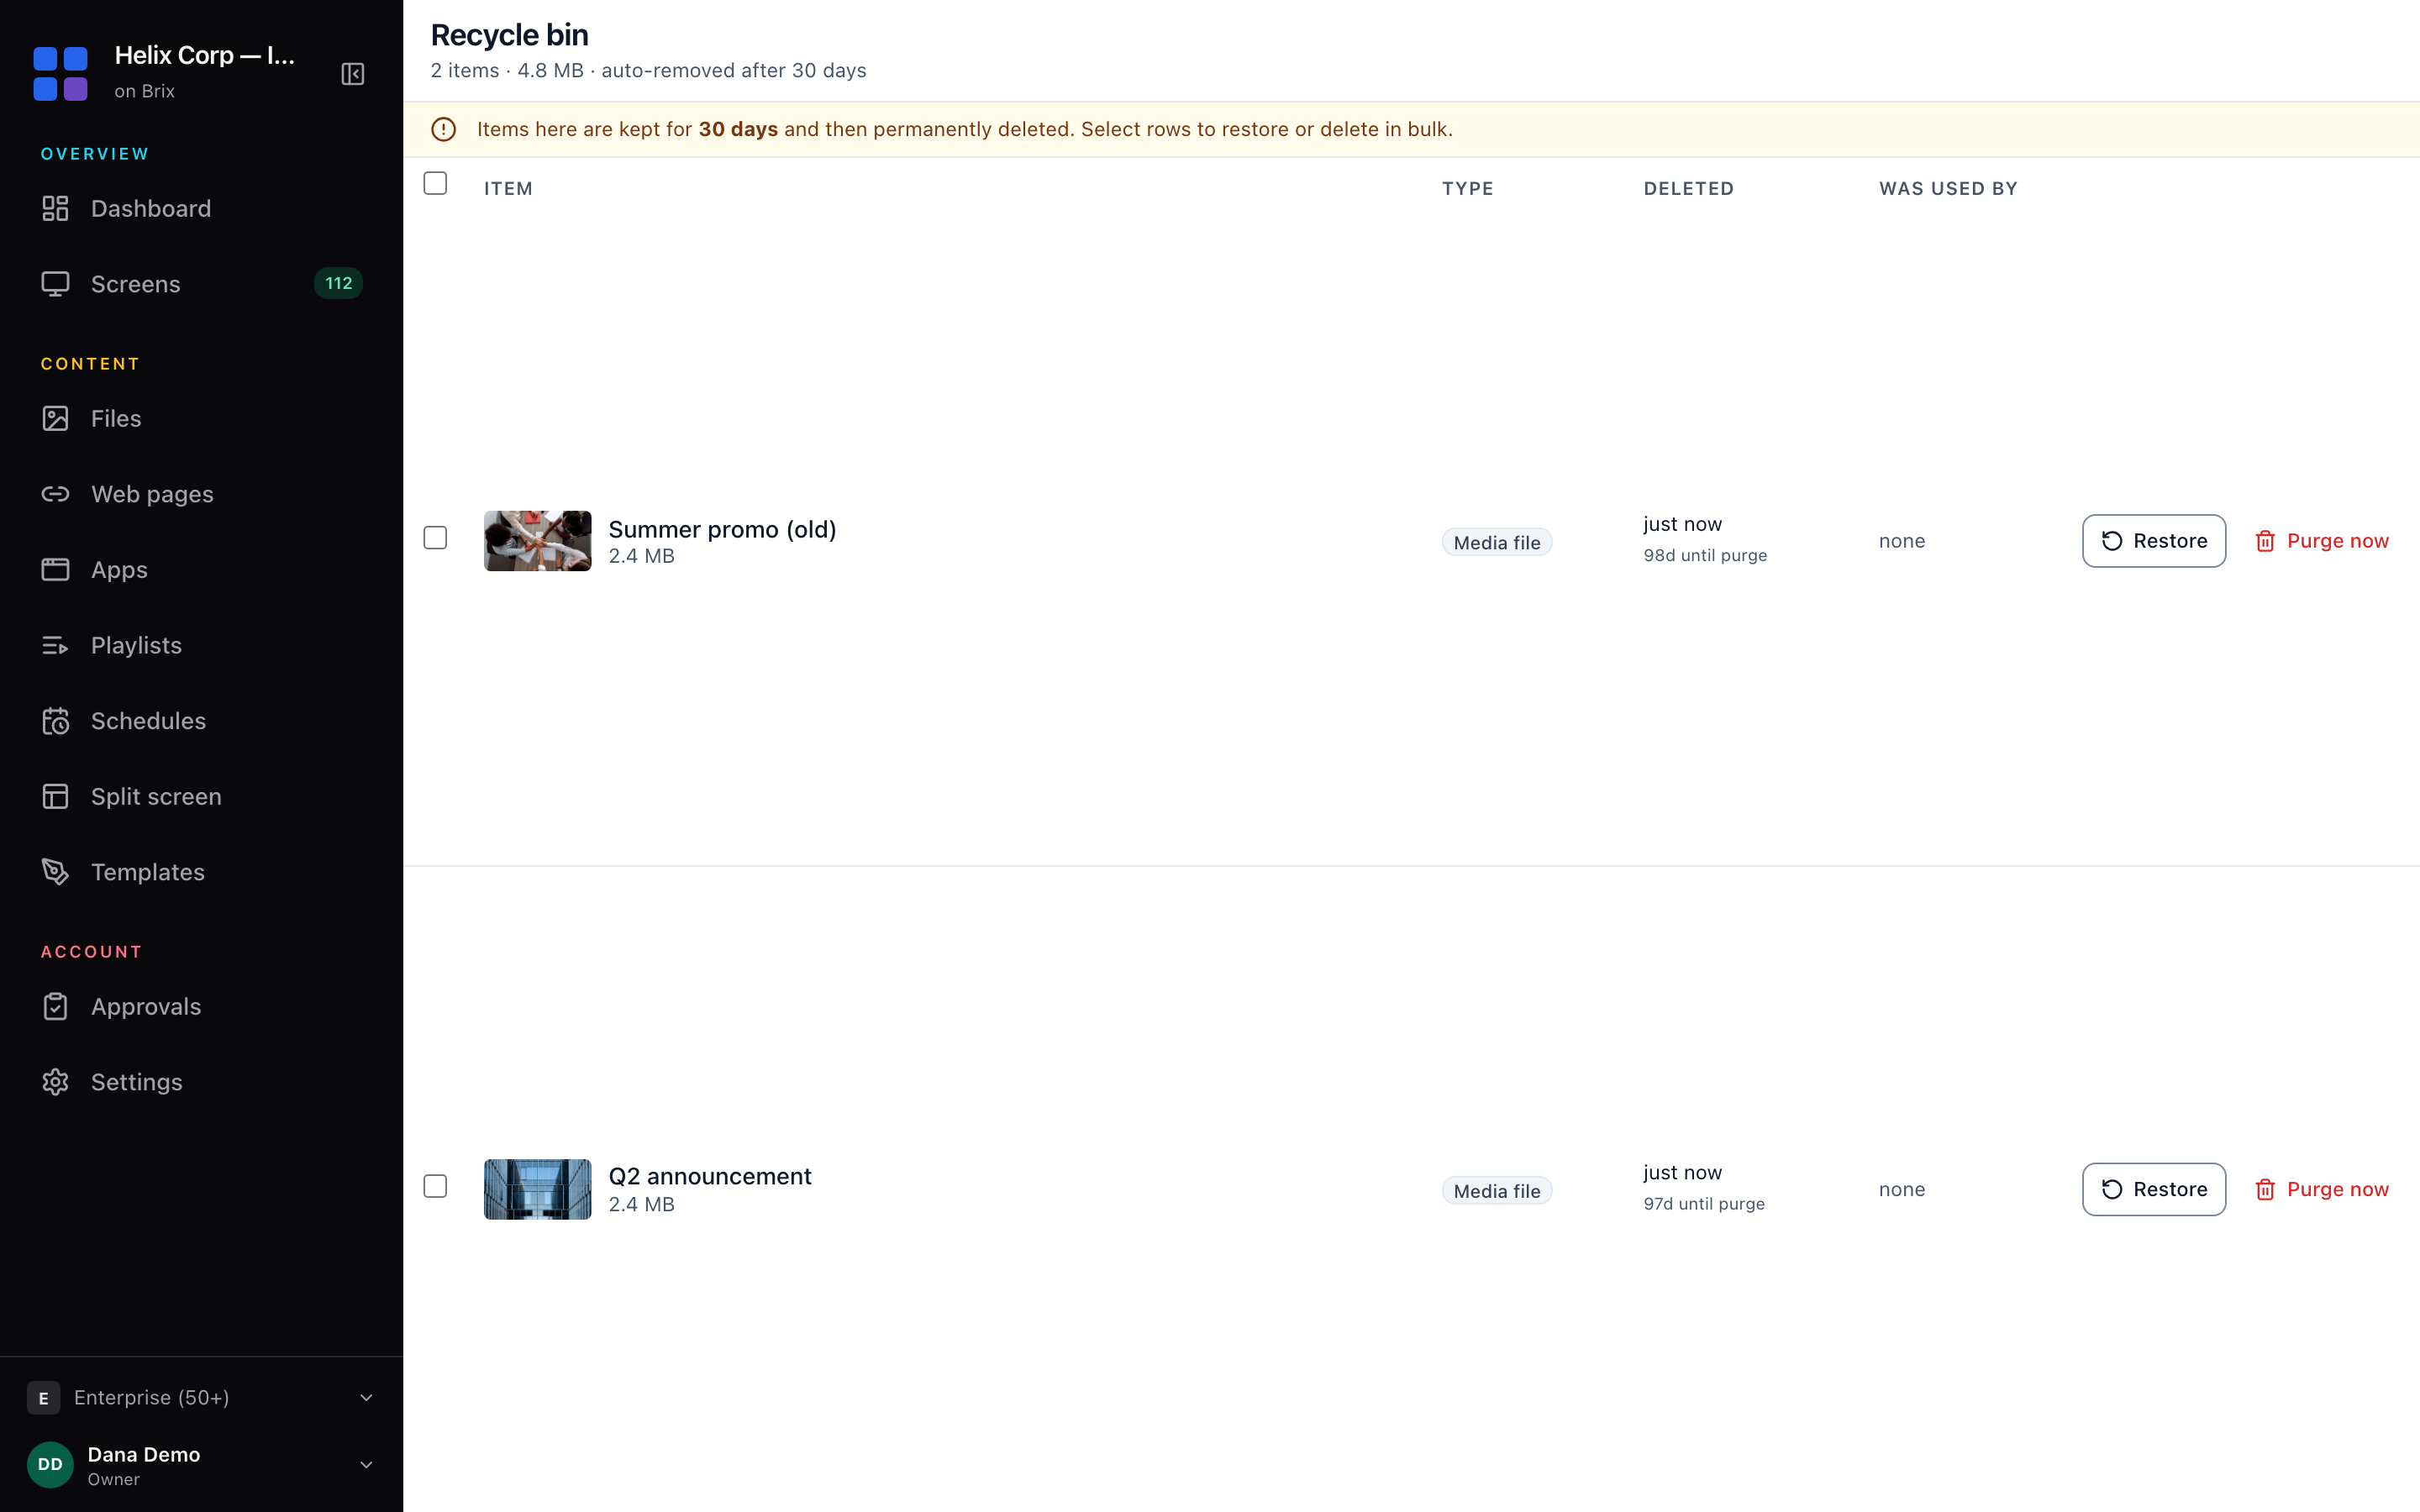
- Select Recycle bin in the topbar.
- Find the row you want in the table.
- Read the days-until-purge figure to see how long is left.
- Select Restore on that row.

Restore or delete more than one item
- Tick the checkboxes on the rows you want.
- Tick the header checkbox to select every row instead.
- Select Restore in the dark bar at the top to bring them all back.
- Select Delete forever to remove them for good instead.
- Read the figures in the confirm dialog.
- Select Delete permanently.
Delete one item for good
- Find the row in the table.
- Select Purge now.
- Read the dialog, including the places that used the item.
- Select Delete permanently.
️ Brix deletes everything in the recycle bin 30 days after you remove it. Purge now and Delete forever cannot be undone, and the stored file goes too.
️ A deleted screen never appears in the recycle bin. To bring a screen back, see Manage your screens.
️ A bulk purge keeps any failed rows on the page, so you can try them again.
Ready to get started?
Open Brix Portal