A digital signage TV turns itself off at night when the media player sends it an HDMI-CEC standby command at closing time and a wake command at opening time. That needs three things:
- A player that speaks HDMI-CEC.
- A TV with CEC switched on in its settings (Samsung calls it Anynet+, LG SimpLink, Sony Bravia Sync, Philips EasyLink).
- An on/off schedule in the signage software.
Without CEC, the software can only blank the picture, and the TV's own sleep or on/off timer has to switch it off.
In Brix, a new screen starts on Standard hours: on from 6:00 am to 11:00 pm, off overnight. To change it, open the screen panel on the Screens page and expand On and off times. The same panel holds the time zone, volume, input lock and PIN lock. To turn a screen to portrait, follow Amazon Signage Stick portrait mode.
Set the on and off times for one screen
- Open the screen panel.
- Expand On and off times.
- Under Schedule source choose Custom hours, or pick a power policy.
- Under On / off schedule choose Standard hours (6:00 am to 11:00 pm, every day), Always on or Custom per-day hours….
- For custom hours, give each of the seven days an opening time and a closing time. Select Copy to all on a row to use its times every day.
- On a screen without HDMI-CEC, choose under When this screen is closed what the screen does after closing time.
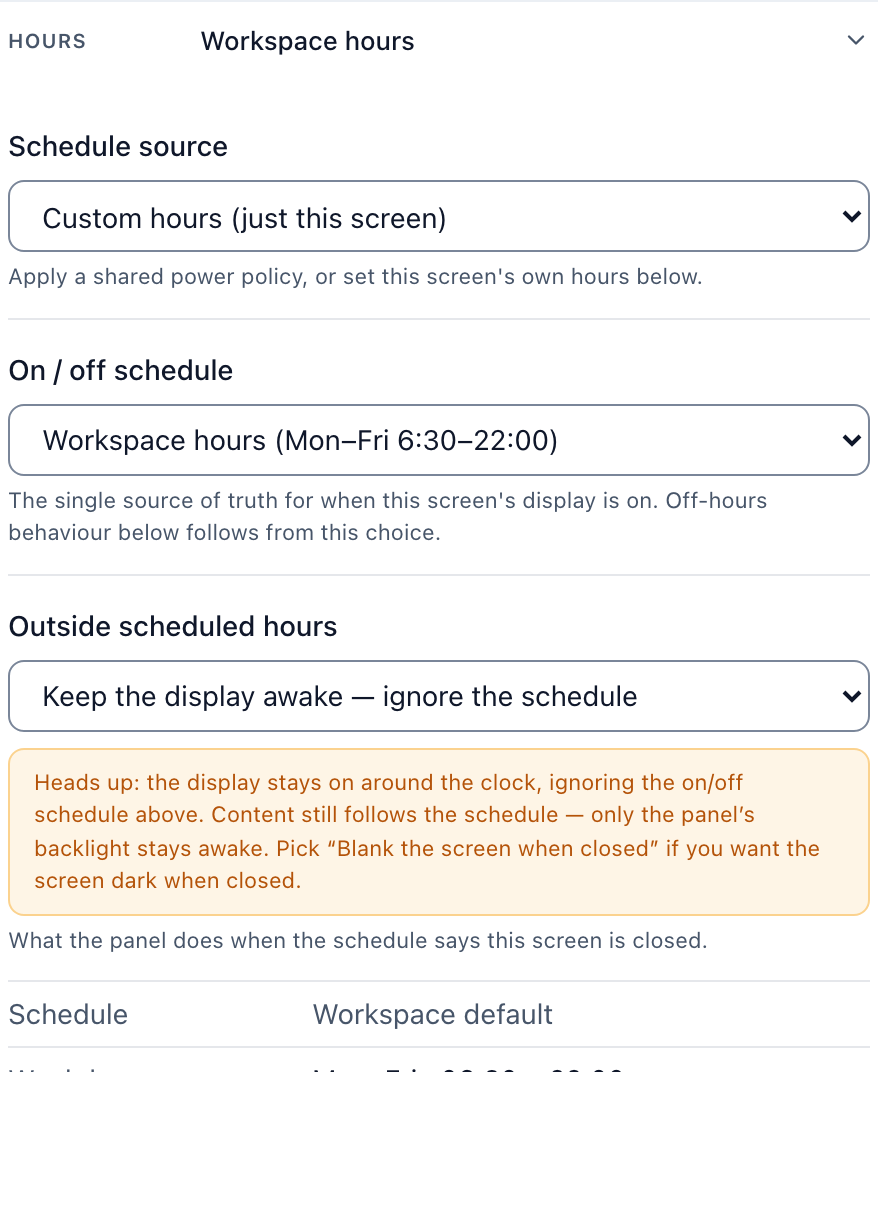
A new screen starts on Standard hours, so it turns off from 11:00 pm to 6:00 am. For a site that is open all night, select Keep it on 24/7 beside that line to switch to Always on.
The choices after closing are Let the screen sleep (default), Keep the screen awake and Use the device's own power settings. On a screen with HDMI-CEC the TV turns off at closing time and this field does not appear. Without HDMI-CEC, Brix cannot switch the TV's power, so out of hours the picture goes blank; the setting only decides whether the display may sleep behind it. With Always on the field becomes Screen power, offering Keep the screen awake (default) and Use the device's own power settings. A power policy hides the per-screen hours editor: one of the two drives the schedule.
If a Stick turns the TV off when it should not, read Amazon Signage Stick keeps turning off. If the TV ignores the schedule, check that CEC is on in the TV's settings: read HDMI-CEC not working on the Amazon Signage Stick.
Turn the TV on or off now, remotely
- Open the screen panel and expand On and off times.
- Select Screen on or Screen off under the schedule controls.
The buttons appear only on a device that speaks HDMI-CEC. The TV does not always confirm these commands, so check the screen.
Set on and off times for many screens at once
- Open Screens and switch to list view.
- Tick the checkbox on every screen you want.
- Select Operating hours in the black action bar.
- Choose an option under When on and under Outside those hours.
- Select Apply to n screens.
Bulk changes need list view. See manage your screens.
Use one schedule for a whole fleet (power policies)
A power policy is one set of opening hours you write once and apply to many screens.
- Open Settings > Organization, then Power policies.
- Select New policy and type a name such as Store hours.
- Switch on each day the screens must run and give every open day an opening and a closing time. A day left off keeps the display dark all day.
- Switch on Reboot the device once a day for a nightly restart, and pick the hour.
- Choose Each screen's own time zone or A fixed time zone (pick the zone in the list).
- Select Save.
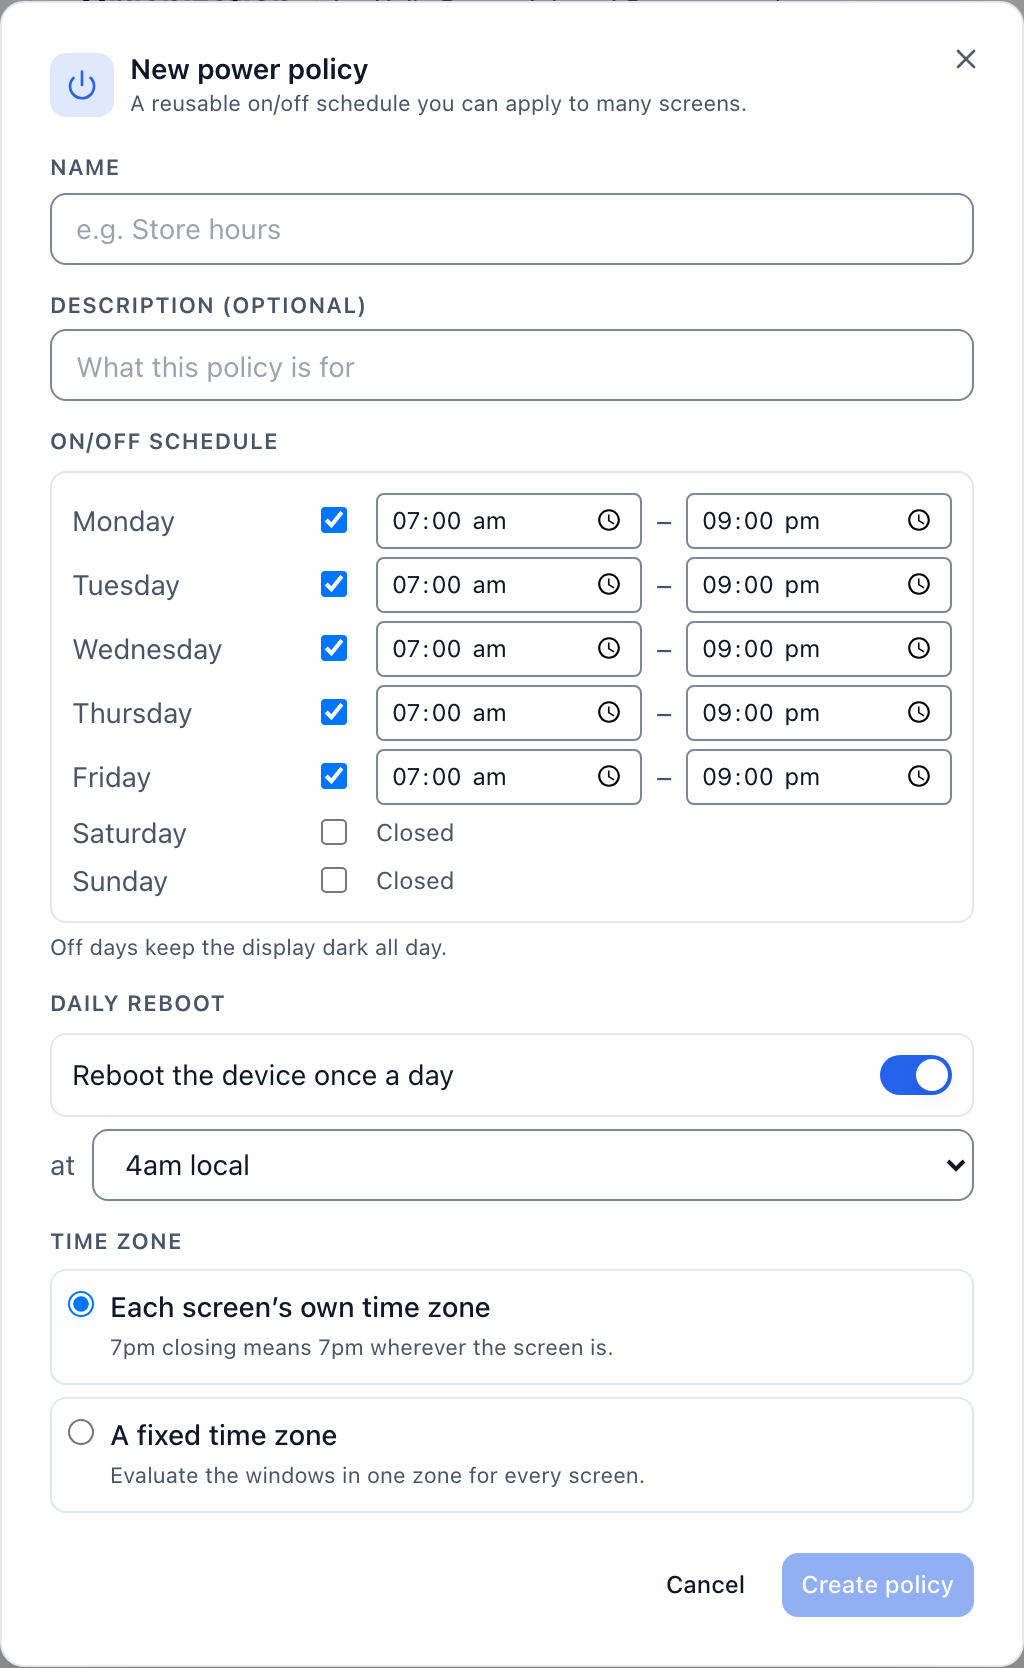
You apply a policy from a screen's On and off times section or the bulk action bar. When you delete a policy, its screens fall back to their own hours.
Set the time zone and location
- Open the screen panel and expand About this screen.
- Pick a zone under Time zone, or leave Inherit from location.
- Select Set location, type a city name, select the suggestion and select Save location.
- Type comma-separated words into Tags, and pick a place under Location.
Opening hours and the daily refresh run in the screen's own local time. Weather and the other location-aware apps read the location you set here.
Set the volume for one screen
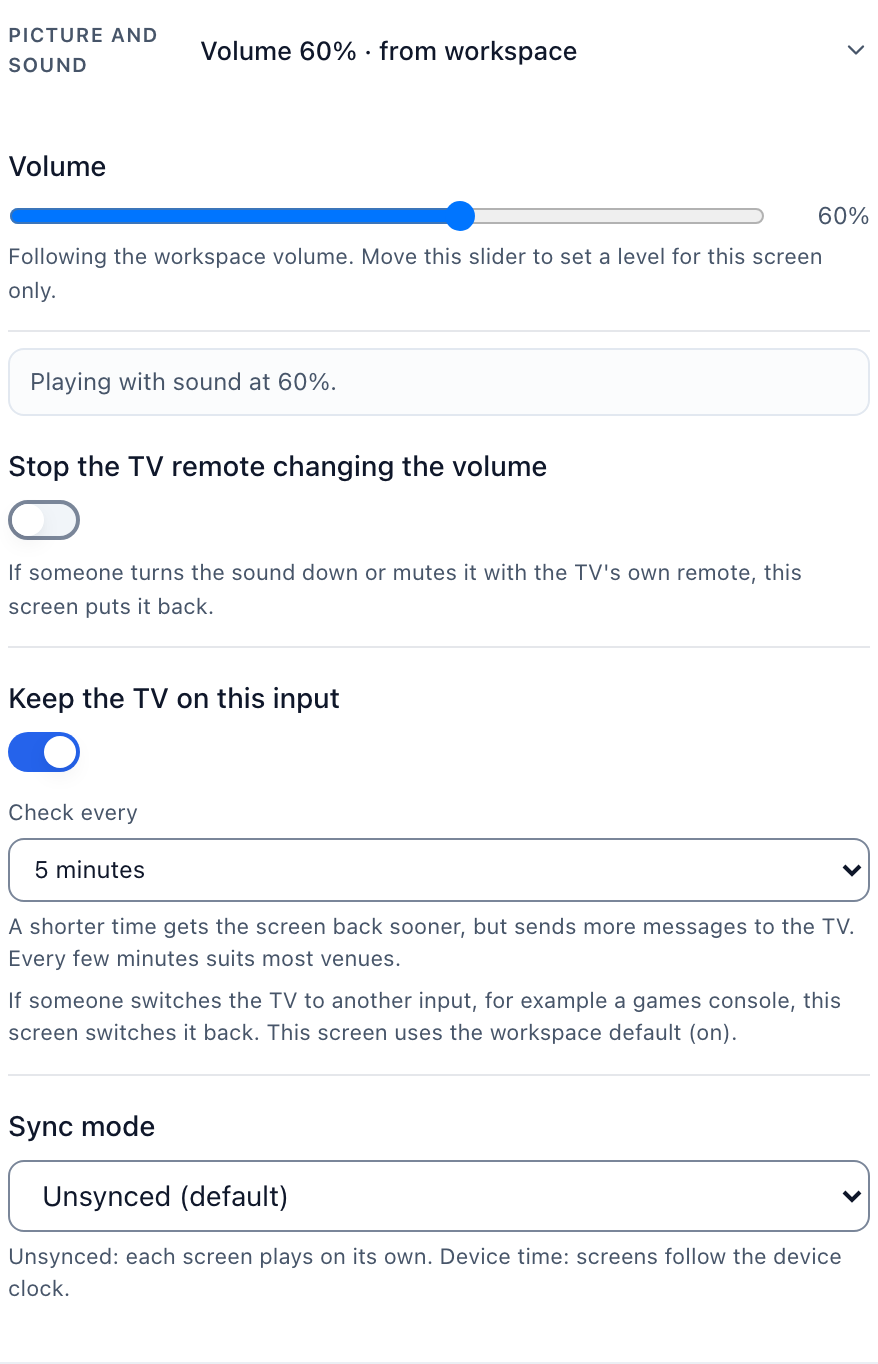
- Open the screen panel and expand Picture and sound.
- Drag the Volume slider and release it to save.
A workspace-wide mute beats this slider. Clear Mute everything in Settings > Workspace to get the sound back.
Stop staff changing the volume or the input
Staff sometimes mute a TV with its own remote, or switch it to another input, and the screen looks healthy in the CMS while nobody sees or hears it. Two switches under Picture and sound undo that:
- Stop the TV remote changing the volume: if someone turns the sound down or mutes it with the TV remote, the screen puts it back.
- Keep the TV on this input: if someone switches the TV to another input, the screen switches it back. Choose how often it checks under Check every.
Each switch appears only on a device that reports volume or input control.
Lock a screen with a PIN
- Open the screen panel and expand Lock this screen.
- Turn on Lock this screen.
- Choose Workspace PIN or Custom for this screen.
- Type a PIN of 4 to 8 digits and select Save.
- Set Return to content after in seconds (10 to 600).
- Select Reveal under Recovery code and store the code somewhere safe.
Brix never shows the current PIN again. Every screen set to Workspace PIN shares one code, so a change reaches them all. With no PIN set, the screen opens only with its recovery code or a remote unlock. Rotate issues a new recovery code and the old one stops at once.
To let a technician in on site, select Unlock now (10 min) under Lock this screen. If the screen is offline, Brix runs the unlock when it reconnects.
When a screen ignores a setting you saved here, read troubleshoot a screen.
When Brix cannot switch the TV off
A browser-tab screen, the Windows player and any other player without HDMI-CEC cannot switch the TV's power. Outside the hours the picture goes blank, and the TV stays on. For those screens, use the display's own on/off timer, or run the screen on a Signage Stick or another CEC-capable player.