To manage digital signage screens remotely, you need a cloud CMS that lists every screen with its status, shows what each one plays, sends device commands (screenshot, refresh, reboot, clear cache) and applies one change to many screens at once. With that, a problem at a store becomes a two-minute job from a laptop or phone, not a site visit. What a CMS cannot fix remotely is physical: a TV that is unplugged, on the wrong input or switched off at the wall still needs someone on site.
In Brix, all of this happens on the Screens page. Search or filter to find a screen, select it to open its side panel, tick several to act on them together, and use Replace or remove to retire hardware. To connect a new screen, read connect a screen. To change what a screen plays, read put content on a screen.
Find a screen
- Select Screens in the sidebar.
- Type a name, an ID, a location or a tag into the search box.
- Select Filter to open the filter strip.
- Open the Status, Location, Group or Advanced chip.
- Tick the values you want.
- Select Clear all to drop every filter.
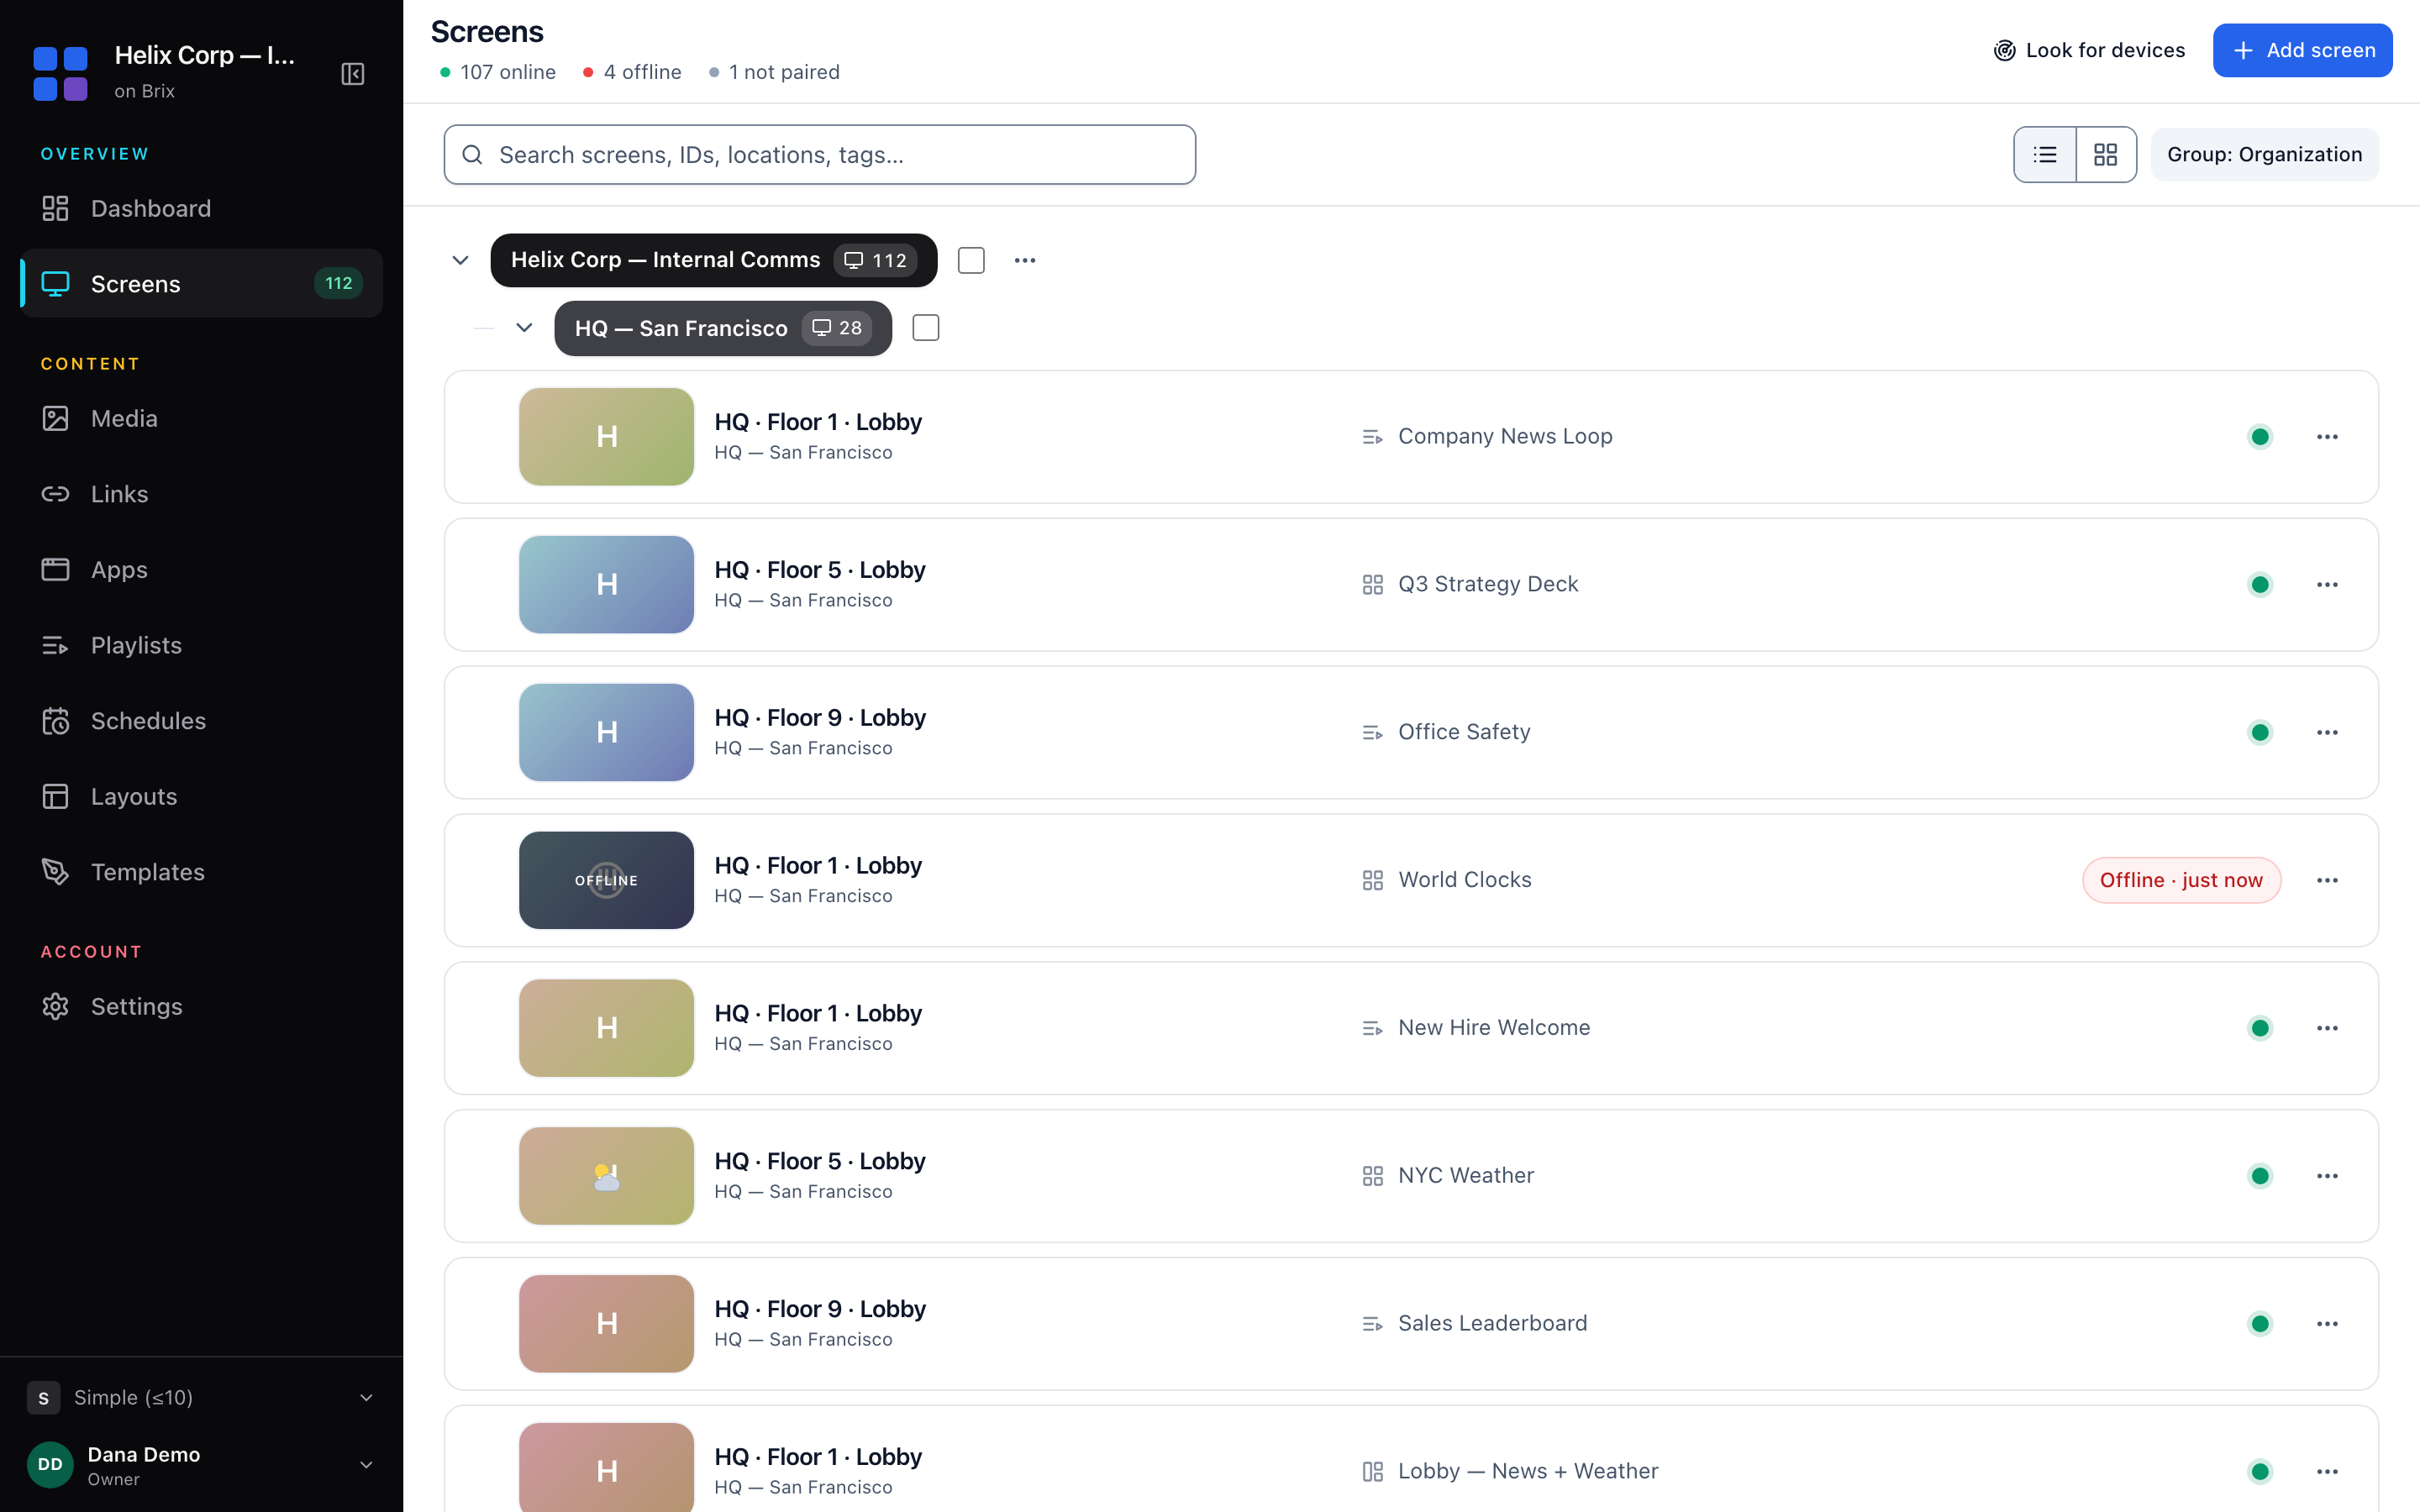
Show only the screens that need attention
Under the Screens title, Brix counts the fleet by status, for example "12 online · 2 need attention · 1 offline".
- Select a count such as 2 need attention to narrow the list to that group.
- Select the same count again to go back to all screens.
To work out why a screen is offline or out of sync, read troubleshoot a screen.
Rename a screen
- Move the pointer over the screen name in its row.
- Select the pencil next to the name.
- Type the new name.
- Press Enter.
You can also rename a screen inside the side panel. Select the name at the top of the panel and type over it.
See what a screen is showing right now
- Select a row or a card to open the side panel.
- Read the preview frame at the top of the panel.
- Read the Now bar for what the screen plays.
- Check the status pill, the connection icon and the sync percentage beside the name.
- Select the ID pill to copy the screen ID for a support ticket.
- Press Escape to close the panel.
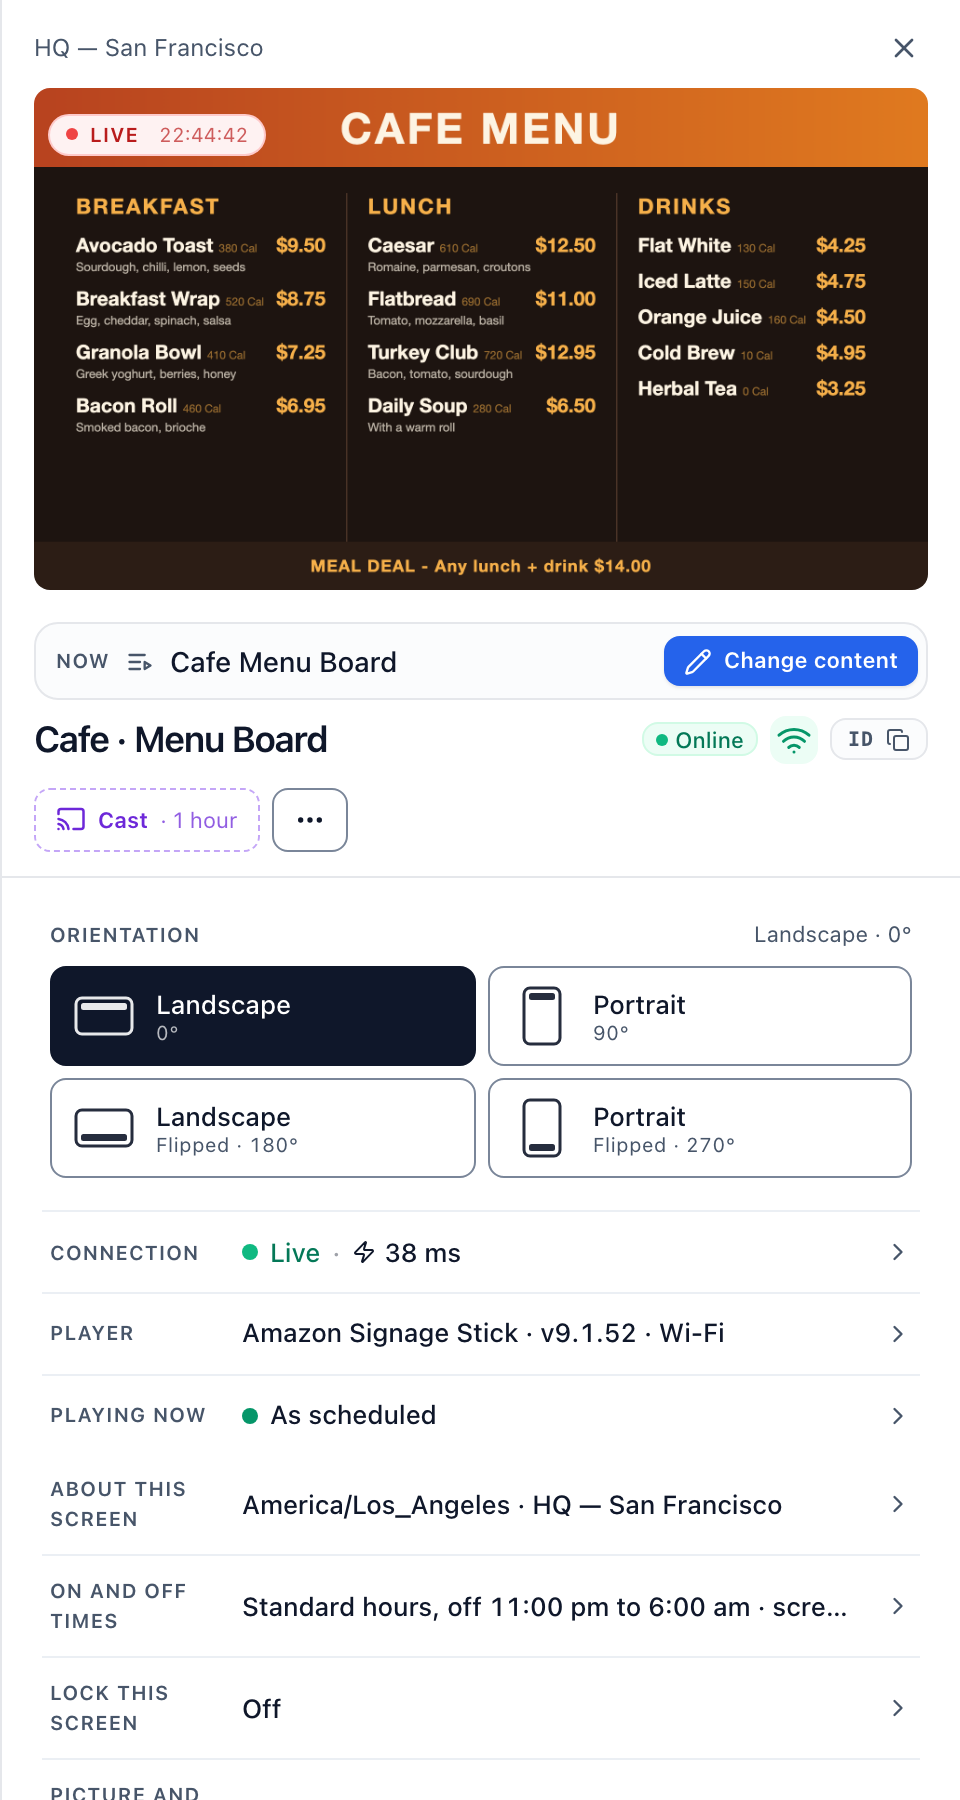
The preview slows down the longer the panel stays open. Close it and open it again for full speed.
Reboot, refresh or screenshot a screen remotely
- Open the screen panel.
- Select the … button next to Cast.
- Choose Mirror live, Force refresh or Reboot.
The row carries the same kind of menu. Move the pointer over a row and select … for Cast content, Take screenshot, Refresh, Reboot and Clear cache.
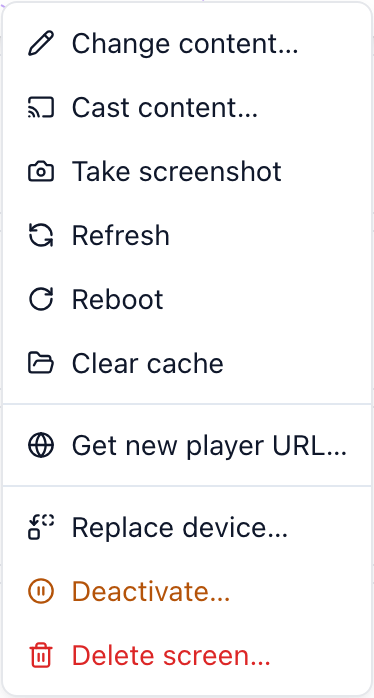
On a Signage Stick, the Actions block under the Player row also holds Screen on and Screen off, which switch the TV over HDMI-CEC. A screen that is offline gets the command when it reconnects.
Update many screens at once (bulk actions)
- Switch to list view.
- Move the pointer over a row.
- Select the checkbox at the left of the row.
- Hold Shift and select a second row to take every row between the two.
- Select Select all on page to take every row on the page.
- Select the Select all link beside it to take every screen your filters match.
A black action bar opens at the bottom of the window. The bar offers these actions:
- Change content — Put one playlist, schedule, layout, media file or app on every selected screen.
- Cast — Take the selected screens over for a set time.
- Move to — Move the screens to another place in the organization tree.
- Location & tags — Set one location and one set of tags across the selection.
- Screenshot, Reboot, Clear cache — Send one device command to the whole selection.
- Operating hours, Power policy — Set when the displays turn on and off.
- Set Wi-Fi — Save a Wi-Fi network to every selected screen.
- New group from selection — Make a screen group from the selected screens.
- Delete — Remove the screens for good, after you pick a reason.

Selection works in list view only. Brix skips any screen you cannot edit and reports how many got the action.
Hours and power policies have their own guide: read screen settings and display power.
Pause a screen and stop paying for it
- Open the screen panel.
- Expand Replace or remove.
- Select Deactivate.
- Keep the Deactivate screen card selected in the modal.
- Select Deactivate again to confirm.
- Select Reactivate on the same path to bring the screen back.
Swap a broken player without losing the setup
- Expand Replace or remove in the screen panel.
- Select Replace device.
- Power on the new device so the TV shows a six-digit code.
- Type the code into the modal.
- Select Replace device to confirm.
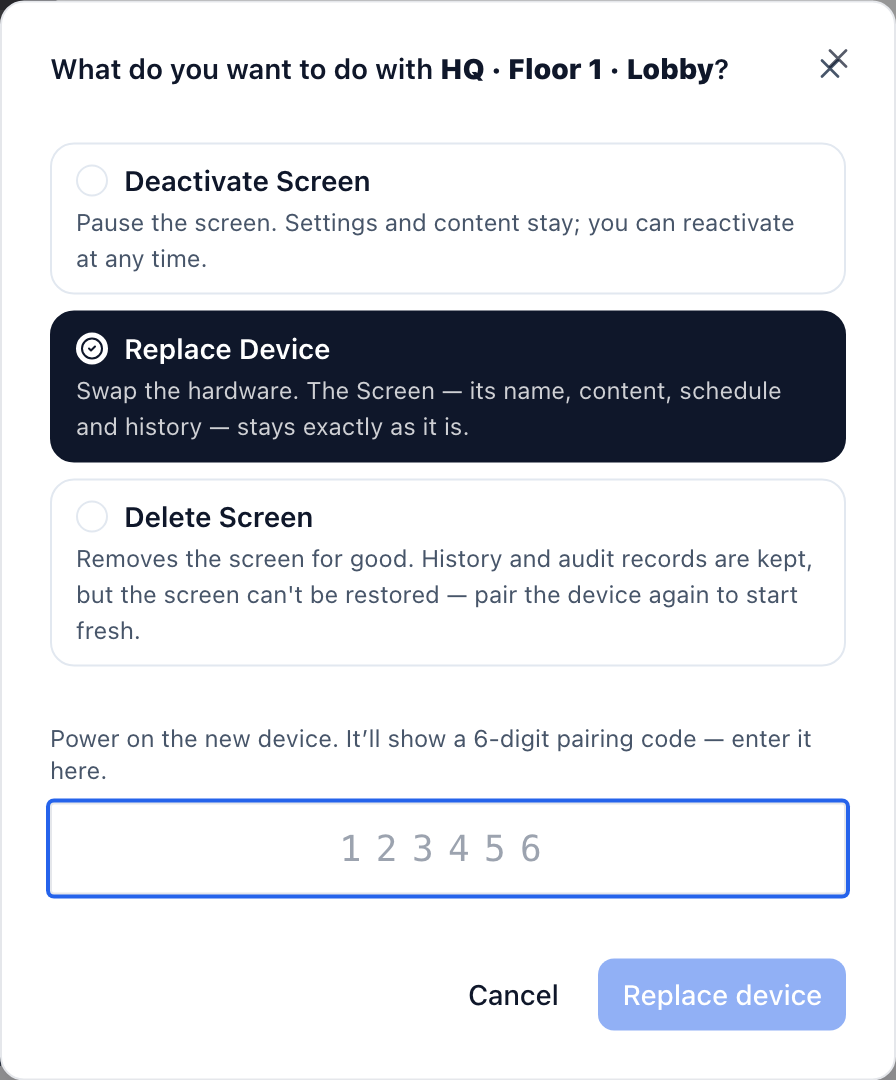
A replacement keeps the screen name, the content, the schedule and the history.
The row menu reaches the same modal. Move the pointer over a row, select …, then choose Replace device….
Delete a screen for good
- Expand Replace or remove in the screen panel.
- Select Delete screen.
- Pick a reason in the Pick a reason… list.
- Select Delete screen to confirm.
To power the TV down in the same step, select Unpower & delete instead. Brix turns the display off, unpairs the device, and deletes the screen.
To get a new browser link for a browser screen, expand Replace or remove and select Get new player URL; the old link stops at once. See connect a screen.
When the Screens page is not enough
A browser-tab screen (Open in a browser tab) shows no live picture and takes no reboot or power commands, because a browser cannot capture or control the device it runs on. For remote pictures, reboots and TV power, run the screen on an Amazon Signage Stick, an Android player or the Windows player. To manage screens away from a desk, the same page works in a phone browser: read change store TVs from your phone.