A digital signage API key lets another system (an HR roster, a POS, a script or an AI assistant) change your screens without a person signing in. Create one key per integration, give it only the permissions it needs, store the secret where the integration runs (the CMS shows it once), and rotate or revoke it when someone who knew it leaves. The integration sends the key in the Authorization: Bearer header.
In Brix, keys live in Settings > AI, API & MCP. The same tab connects Claude and ChatGPT, which need no key.
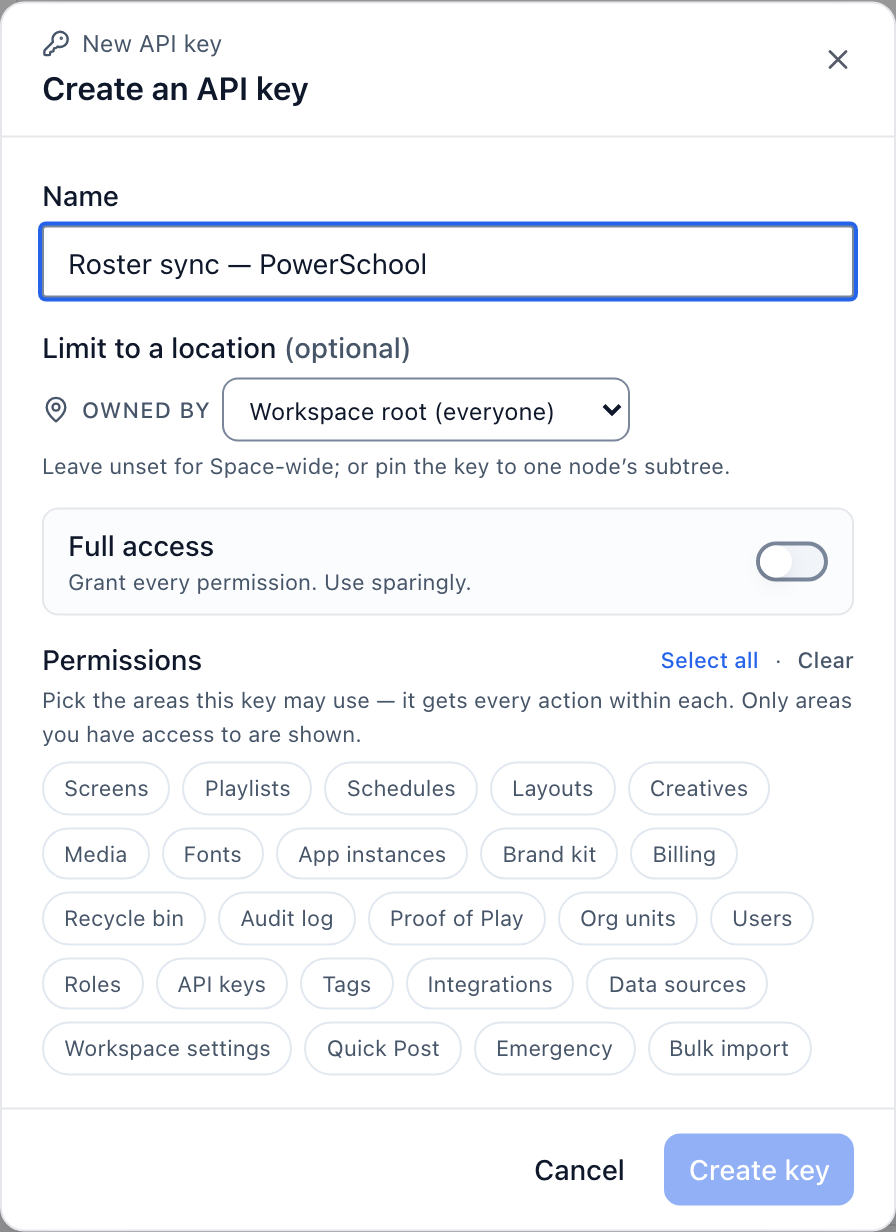
Create an API key
- Open Settings > AI, API & MCP and scroll to API keys.
- Select New key.
- Type a name into Name that says what uses it, such as
Roster sync - PowerSchool. - To pin the key to one location and the locations inside it, pick it under Limit to a location. Leave it empty for a key that reaches the whole workspace.
- Under Permissions, select each area the key may use, then pick View only or View and change for that area. Select all and Clear take every area or none.
- Select Create key.
- Copy the secret from the green panel that reads Key for "your key name" is ready and paste it into the integration. The full key is shown only once.
- Select Done.
- The key list shows only the start of each key, such as
ak_us_live_a73X, then its permissions, when it was created and when it was last used. - The permission list holds only the areas you hold yourself. A key never gets more permissions than the person who creates it.
- Full access appears only when you hold every permission. Use it only when the integration needs everything.
- A key pinned to a location shows a Node-pinned pill, and it cannot see or change screens outside that location.
- Every workspace can create API keys. There is no separate API plan and no charge per call.
To change who may create keys, read organization, people and roles.
Make your first API call
The base address is https://api.brixsignage.com, and every path starts with /v1. Check the key with:
curl https://api.brixsignage.com/v1/me \
  -H "Authorization: Bearer $BRIX_API_KEY"
The developer docs have a quickstart, authentication and scopes, errors and rate limits and the API reference for every endpoint: screens, media, playlists, schedules, casts, proof of play and more.
Rotate a key
Rotate a key when the secret escapes or when someone who knew it leaves.
- Open Settings > AI, API & MCP and find the key under API keys.
- Select Rotate on its row.
- Copy the new secret from the green panel and paste it into the integration.
The old secret stops working the moment the new one exists, so update the integration straight away. The name, permissions and location stay. A revoked key cannot be rotated: create a new one.
Revoke a key
- Open Settings > AI, API & MCP.
- Select Revoke on the key row, then Revoke key.
Every integration that uses the key stops at once, and you cannot undo it.
Connect Claude or ChatGPT (no key)
The first section of the tab, Connect Claude or ChatGPT, shows the MCP address and the steps for each app:
- Claude: open Customize > Connectors, select +, search for Brix and select Connect. Brix is in Claude's connector directory. Or add the MCP address as a custom connector.
- ChatGPT: turn on Developer mode, then add Brix as a plugin with the MCP address. The tab gives the current menu path.
Either app then opens a Brix page where you sign in, pick the workspace, a location if you want one, and the permission areas. The app appears under Connected apps, with who connected it and when it was last used. Select Revoke, then Revoke app, to disconnect it at once.
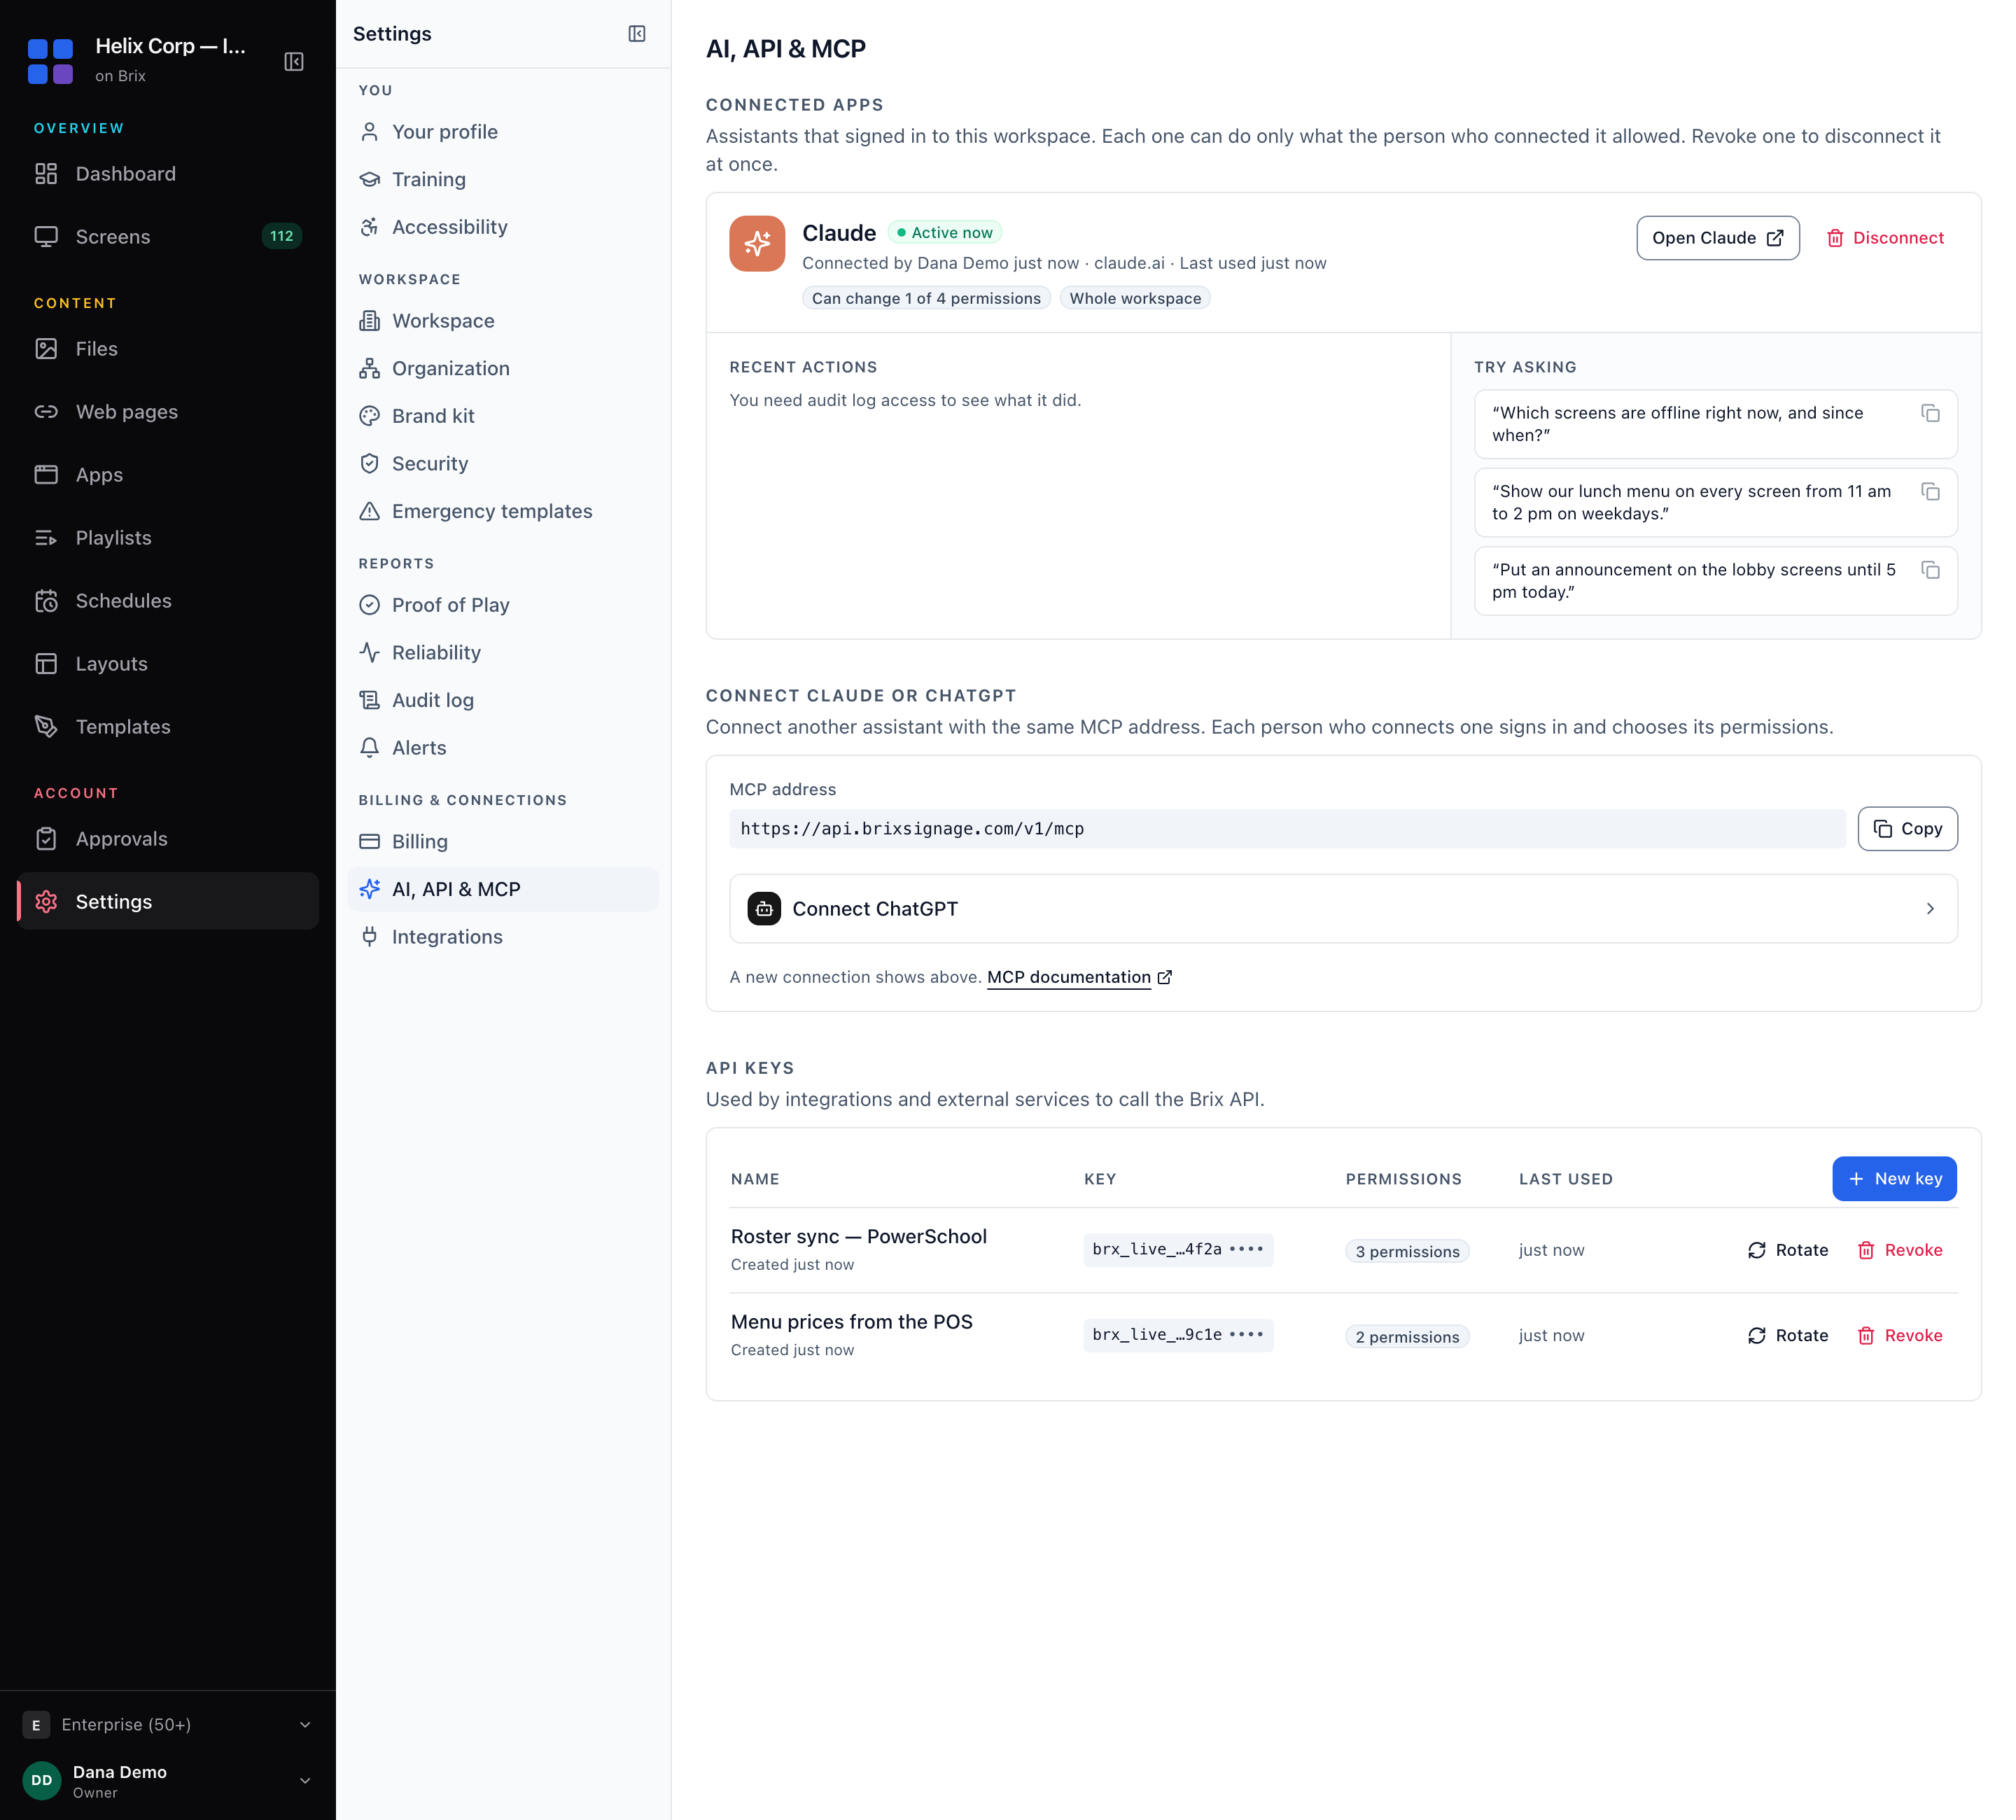
What to ask an assistant, and how to keep it safe, is in control your screens from Claude or ChatGPT.
Connect Claude Code, Cursor or another MCP client (with a key)
Clients that read a config file send an API key. Under MCP with an API key:
- Create a key as above. A key with only View only areas keeps the assistant read-only.
- Select Copy config for Claude Code, Cursor and other config-file clients, Copy command for the Claude Code command line, or the Claude Desktop config.
- Replace
<YOUR_API_KEY>with your key.
Read automate digital signage from Claude Code or Cursor and the MCP docs.
Control AI features
The Artificial intelligence section of the same tab says what Brix uses AI for: suggestions such as image descriptions, tags and captions. AI never publishes anything to a screen on its own. To switch AI off, switch single features off, or set a daily limit, turn on AI controls under Settings > Organization > Feature defaults. It is on by default in workspaces set up for more than 50 screens.
Send events to your systems (webhooks)
Webhooks let Brix call your system when something happens, instead of your system asking.
- Open Settings > Integrations.
- Select New webhook.
- Type the HTTPS Address and a Description, and tick the Events: for example a screen going offline or coming back, content recalled or restored, an approval requested or decided, and an emergency takeover starting or ending.
- Select Add webhook.
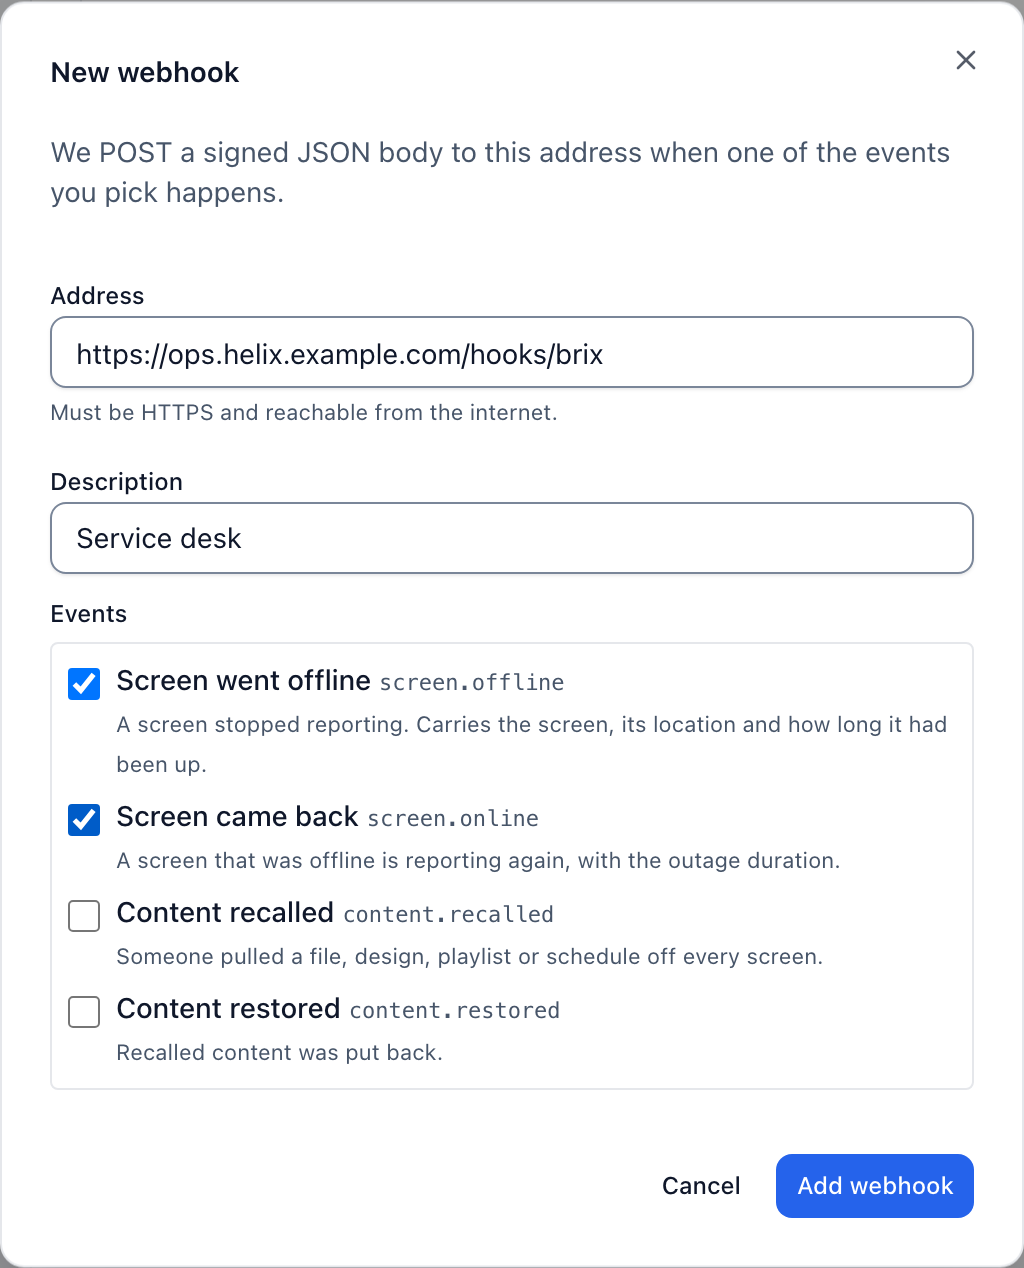
Brix sends a signed JSON body to the address. Read webhooks to check the signature.
Show a dashboard from inside your network
A dashboard that the internet cannot reach needs a render agent on a computer inside your network. Brix sets it up with you: open Settings > Integrations, select Contact us on the Render Agents card and describe what you need. For a dashboard the public internet can reach, read show a website or dashboard on a screen. For live data from a sheet or JSON feed, read live data on screen.