A digital signage content approval workflow holds new or changed content until a named reviewer signs it off, so nothing reaches a screen without a tick. In Brix you turn on Needs approval first for a location, people send content with Request approval, and reviewers decide in Approvals. The last approved version stays on air while an edit waits.
Set up approval in Brix
- Check that approvals are on. Open Settings > Organization > Feature defaults and find Approval workflows. It is on by default for workspaces set up for more than 10 screens; any workspace can turn it on here. The Approvals entry then appears in the sidebar.
- Open the Structure tab and select the card of the location.
- Select More settings. Under Approval, select Needs approval first. The other choices are Publish straight away and Same as the parent location.
- To add a second sign-off from the parent tier, tick Also require the parent tier to sign off (escalate up).
- Pick each reviewer in the + Add reviewer list.
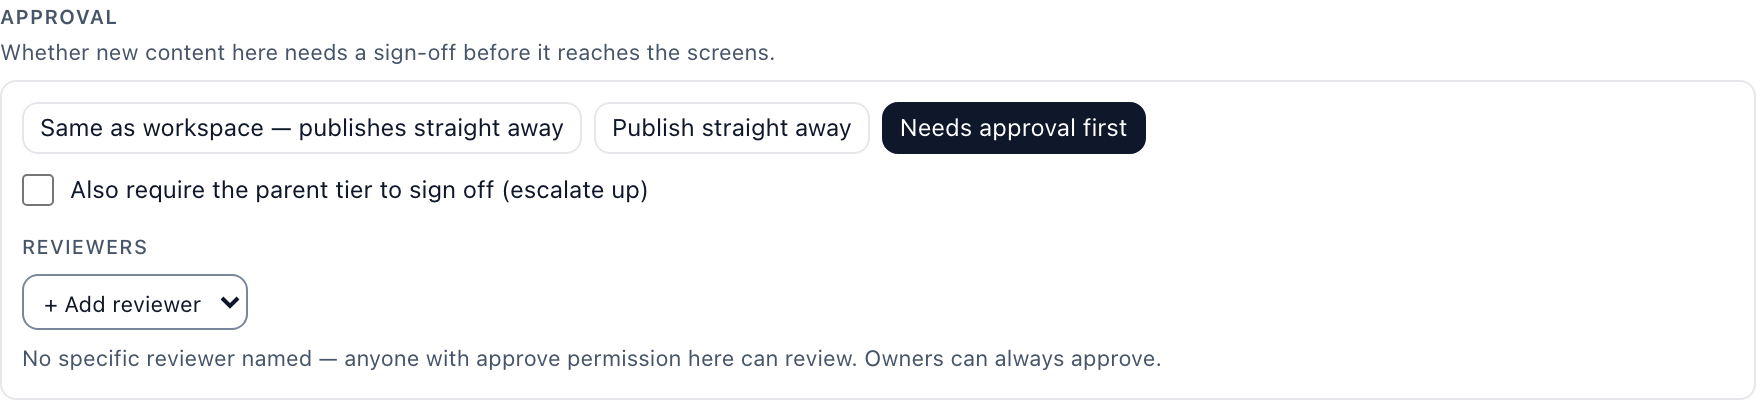
- The rule follows the tree. A location set to Same as its parent uses the parent's rule, so one setting on a region covers every store under it.
- With no reviewer named, anyone whose role can approve at that location can review, and an owner always can. Named reviewers get an email that starts Approval needed.
- Changing the rule needs the permission to edit locations. For reviewers and roles, read organization, people and roles.
Send content for review
- Open the playlist (Content > Playlists), the schedule (Content > Schedules) or the template (Content > Templates).
- Select Request approval at the top. For a schedule, set its fallback content first, or the button stays dim.
- Choose the location under Where is this being published?. Its reviewer gets the request.
- Optionally type a Note for the approver, then select Send for approval.
- Check that the content reads Pending approval.
Request approval appears only where the content's location needs approval. If your own role can approve at that location, Brix approves what you create there and no request is sent.
An edit to content that waits for review withdraws the open request, because the reviewer decides on a frozen copy. Finish the edit first, then send it.
Approve or reject a request
- Select Approvals in the Account group of the sidebar. The count beside it is the number of requests waiting.
- On the Pending tab, select a card. Read What changed (items added, removed, edited and moved), Publishing to, Note from requester and, across two tiers or more, Approval chain.
- Select Approve to let the content air.
- To turn it down, select Reject, type your reason under Why is this being rejected? and select Reject request. The requester reads the reason, so say what to change.

On a chain of two tiers or more, your sign-off sends the request to the next tier and it stays open until the last tier approves. The Decided tab keeps past decisions with who decided and when.
Track a request you sent
Open Approvals > My requests. Waiting on names the reviewer who holds it. Withdraw cancels it at once, with no confirmation. A rejected request keeps its card with the reason: fix the content and send it again.
What plays while content waits
Where a location needs approval, only approved content plays there. A playlist, schedule, layout or template in any other state does not reach that location's screens.
An edit to approved content sets it back to Draft. The screens keep playing the last approved version until a reviewer approves the new one, so an edit never leaves a screen blank or shows unreviewed content.
When approval is not the right tool
Approval slows every change at that location. Use it where a mistake costs money or trust: regulated wording, prices, brand campaigns, public screens. For store teams that only change a headline or a price, a locked template is often enough: they edit the fields you allow, and the logo and layout stay yours.
To build the content first, read playlists, schedules or design a sign.