Workspace settings are the defaults every screen inherits: time zone, time and date formats, temperature unit and volume. The brand kit holds your company name, logo, colors and fonts for templates and on-screen apps. Set both before you build content.
In Brix, the defaults are in Settings > Workspace, the brand kit is in Settings > Brand kit, and features are switched in Settings > Organization > Feature defaults. There is no Save button: each control saves the moment you change it.
Set the time zone, time format and volume for every screen
- Select Settings in the sidebar, then Workspace.
- To rename the workspace, type in the Name field of the General card, then select any other part of the page.
- Open Default screen timezone and pick your zone, for example
America/New_York. Select Use this to take the zone your browser reports. - Pick 12-hour or 24-hour under Time format.
- Pick Monday or Sunday under Week starts on.
- Pick a Date format (MM/DD/YYYY, DD/MM/YYYY or YYYY-MM-DD) and °F or °C under Temperature.
- Drag the Volume slider, or turn on Mute everything to silence every screen.
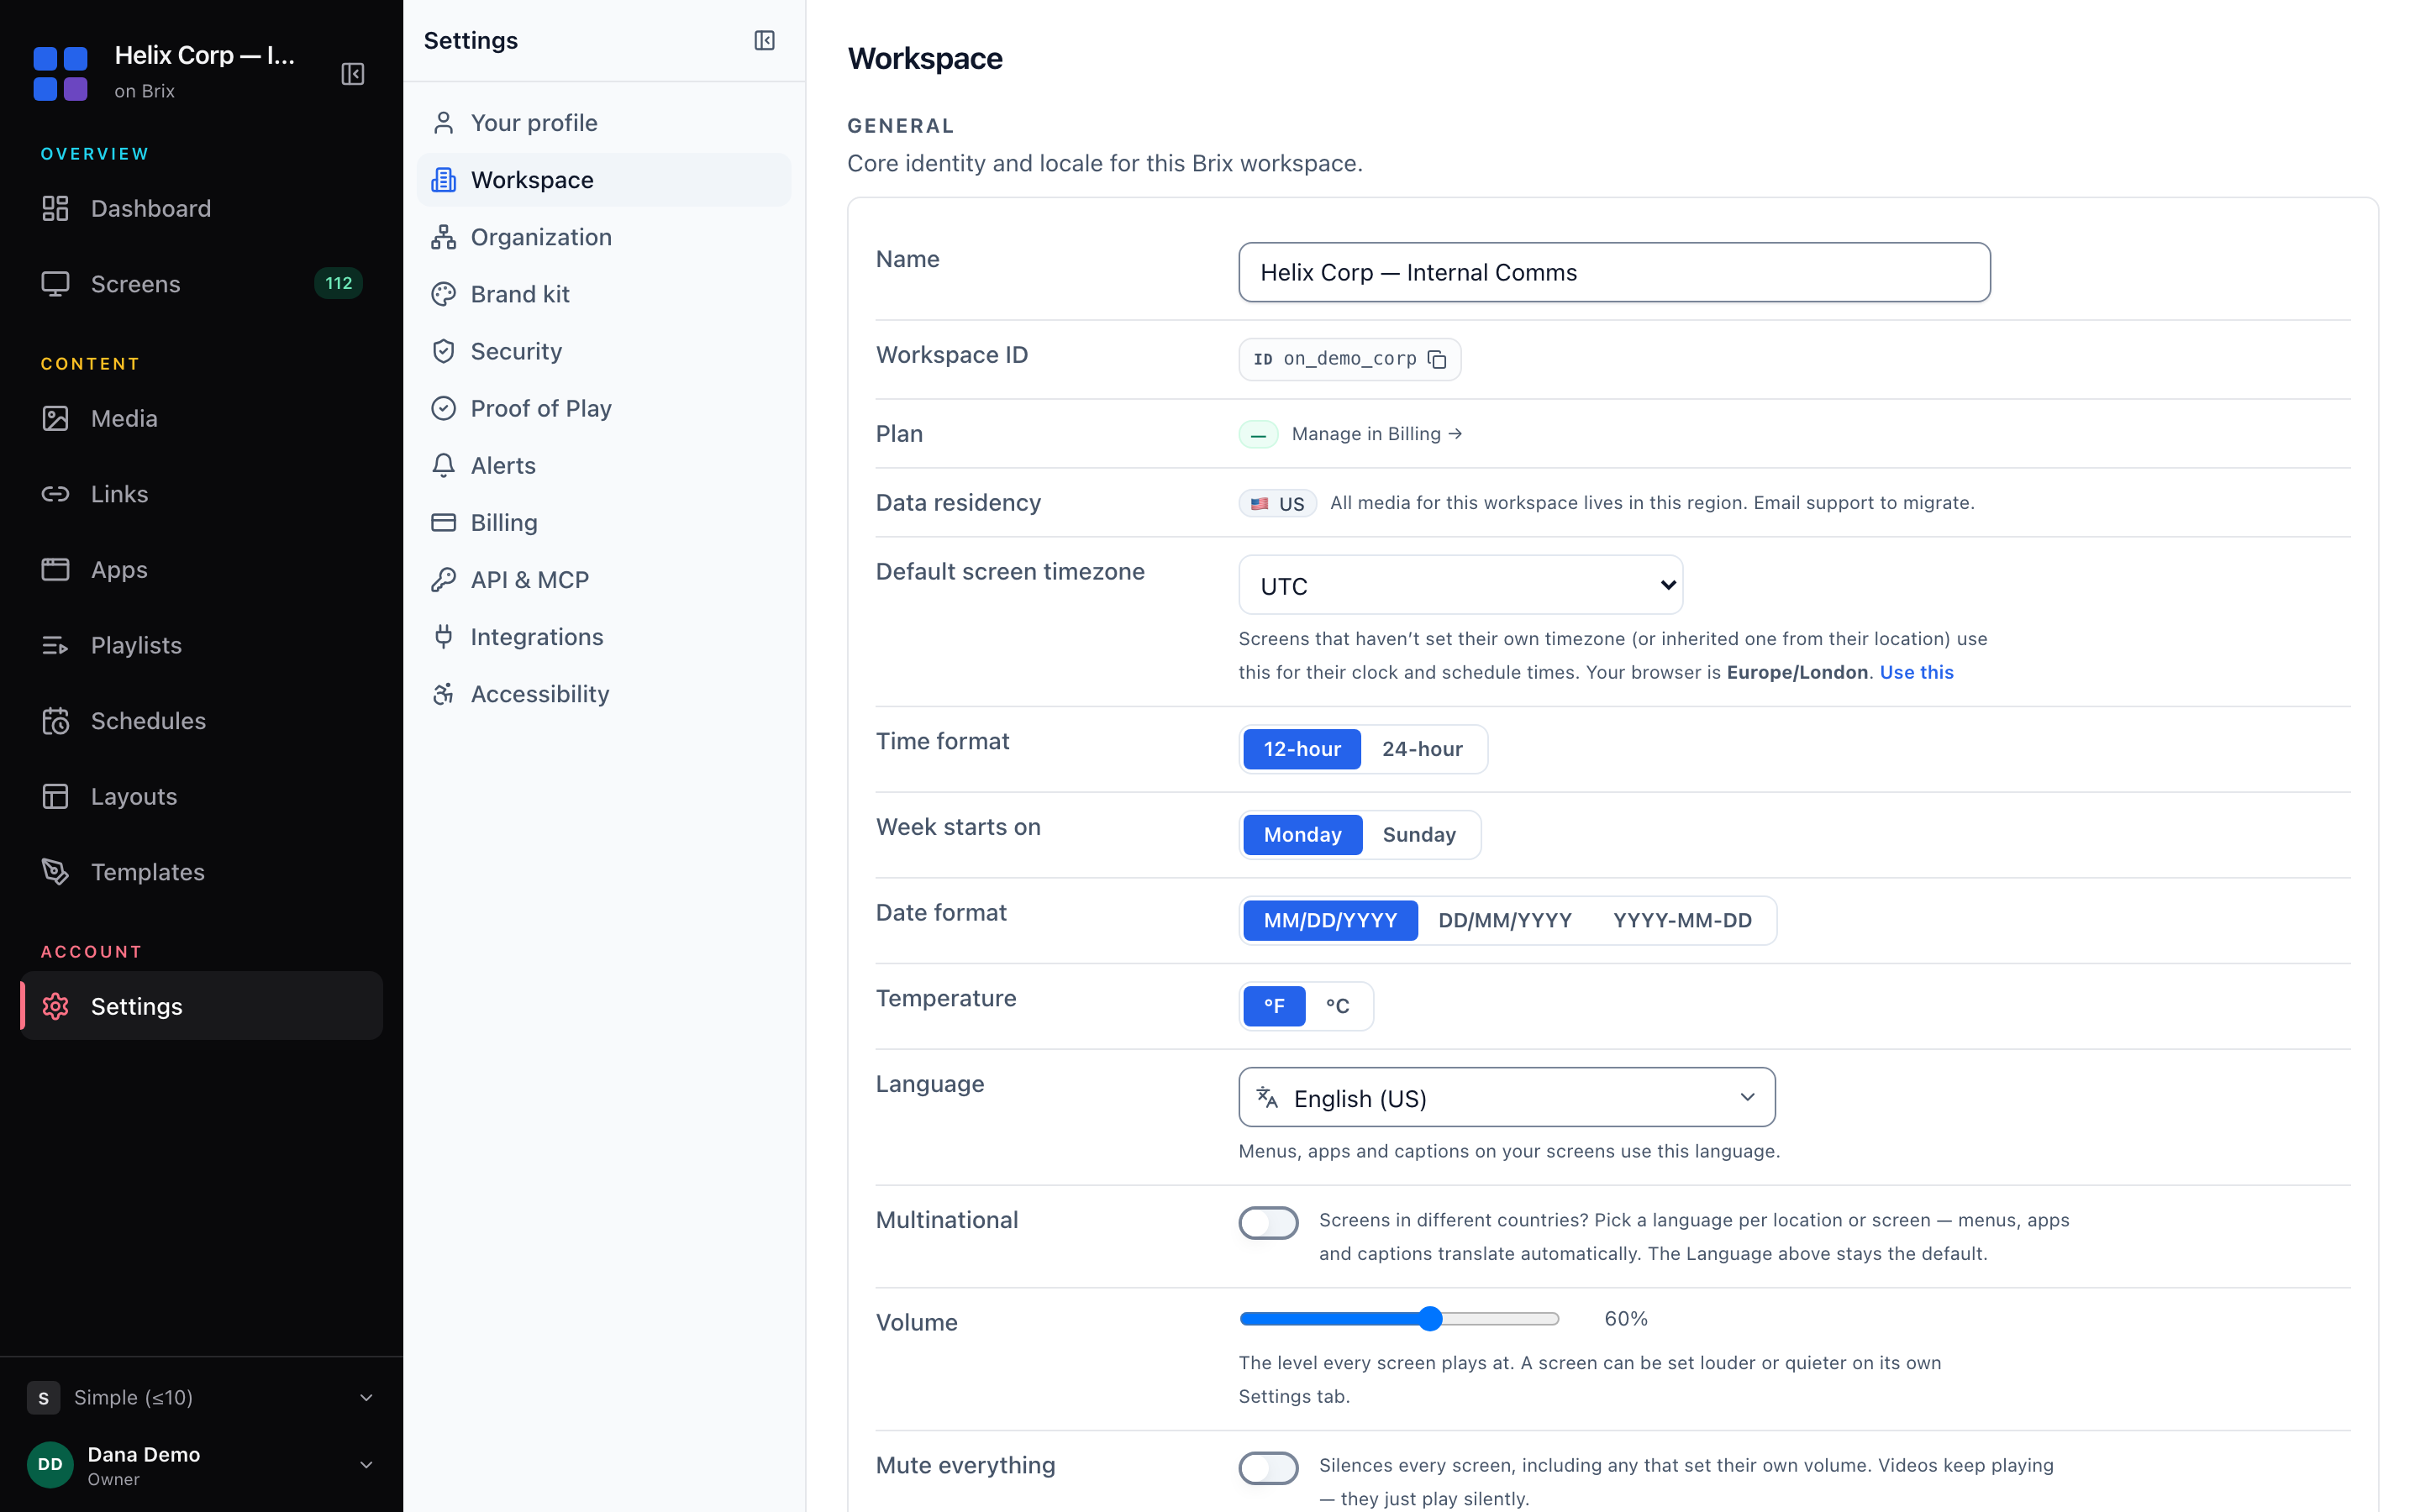
- Default screen timezone decides when schedules start and what clocks show on a screen that has no zone of its own and none from its location. A new workspace starts on UTC, so set it first. It does not change the CMS, which shows times in your browser's zone.
- Schedules for stores in several time zones: give each location its own zone. The workspace zone is only the fallback.
- A screen that sets its own volume keeps it. Mute everything overrides that, and videos keep playing without sound. A note under the slider names the screens with their own volume, and Reset all to workspace volume puts them back on the workspace level. To change one screen, read screen settings and display power.
- The General card also shows the read-only Workspace ID, Plan and Data residency. Quote the Workspace ID when you write to support. Data residency is the region your media is stored in, chosen at sign-up. To change the plan, read billing and your plan.
Add your logo and brand colors (brand kit)
- Select Settings, then Brand kit.
- Type your company name in Company name and press Enter. This is also the workspace name, so Settings > Workspace shows the same name.
- Select Upload logo and choose a PNG, JPEG, SVG or WebP file. Use Replace or Remove to change it later.
- Select a swatch on the Primary color row and on the Accent color row. The color box at the end of each row takes your own color, for example your brand's hex value.
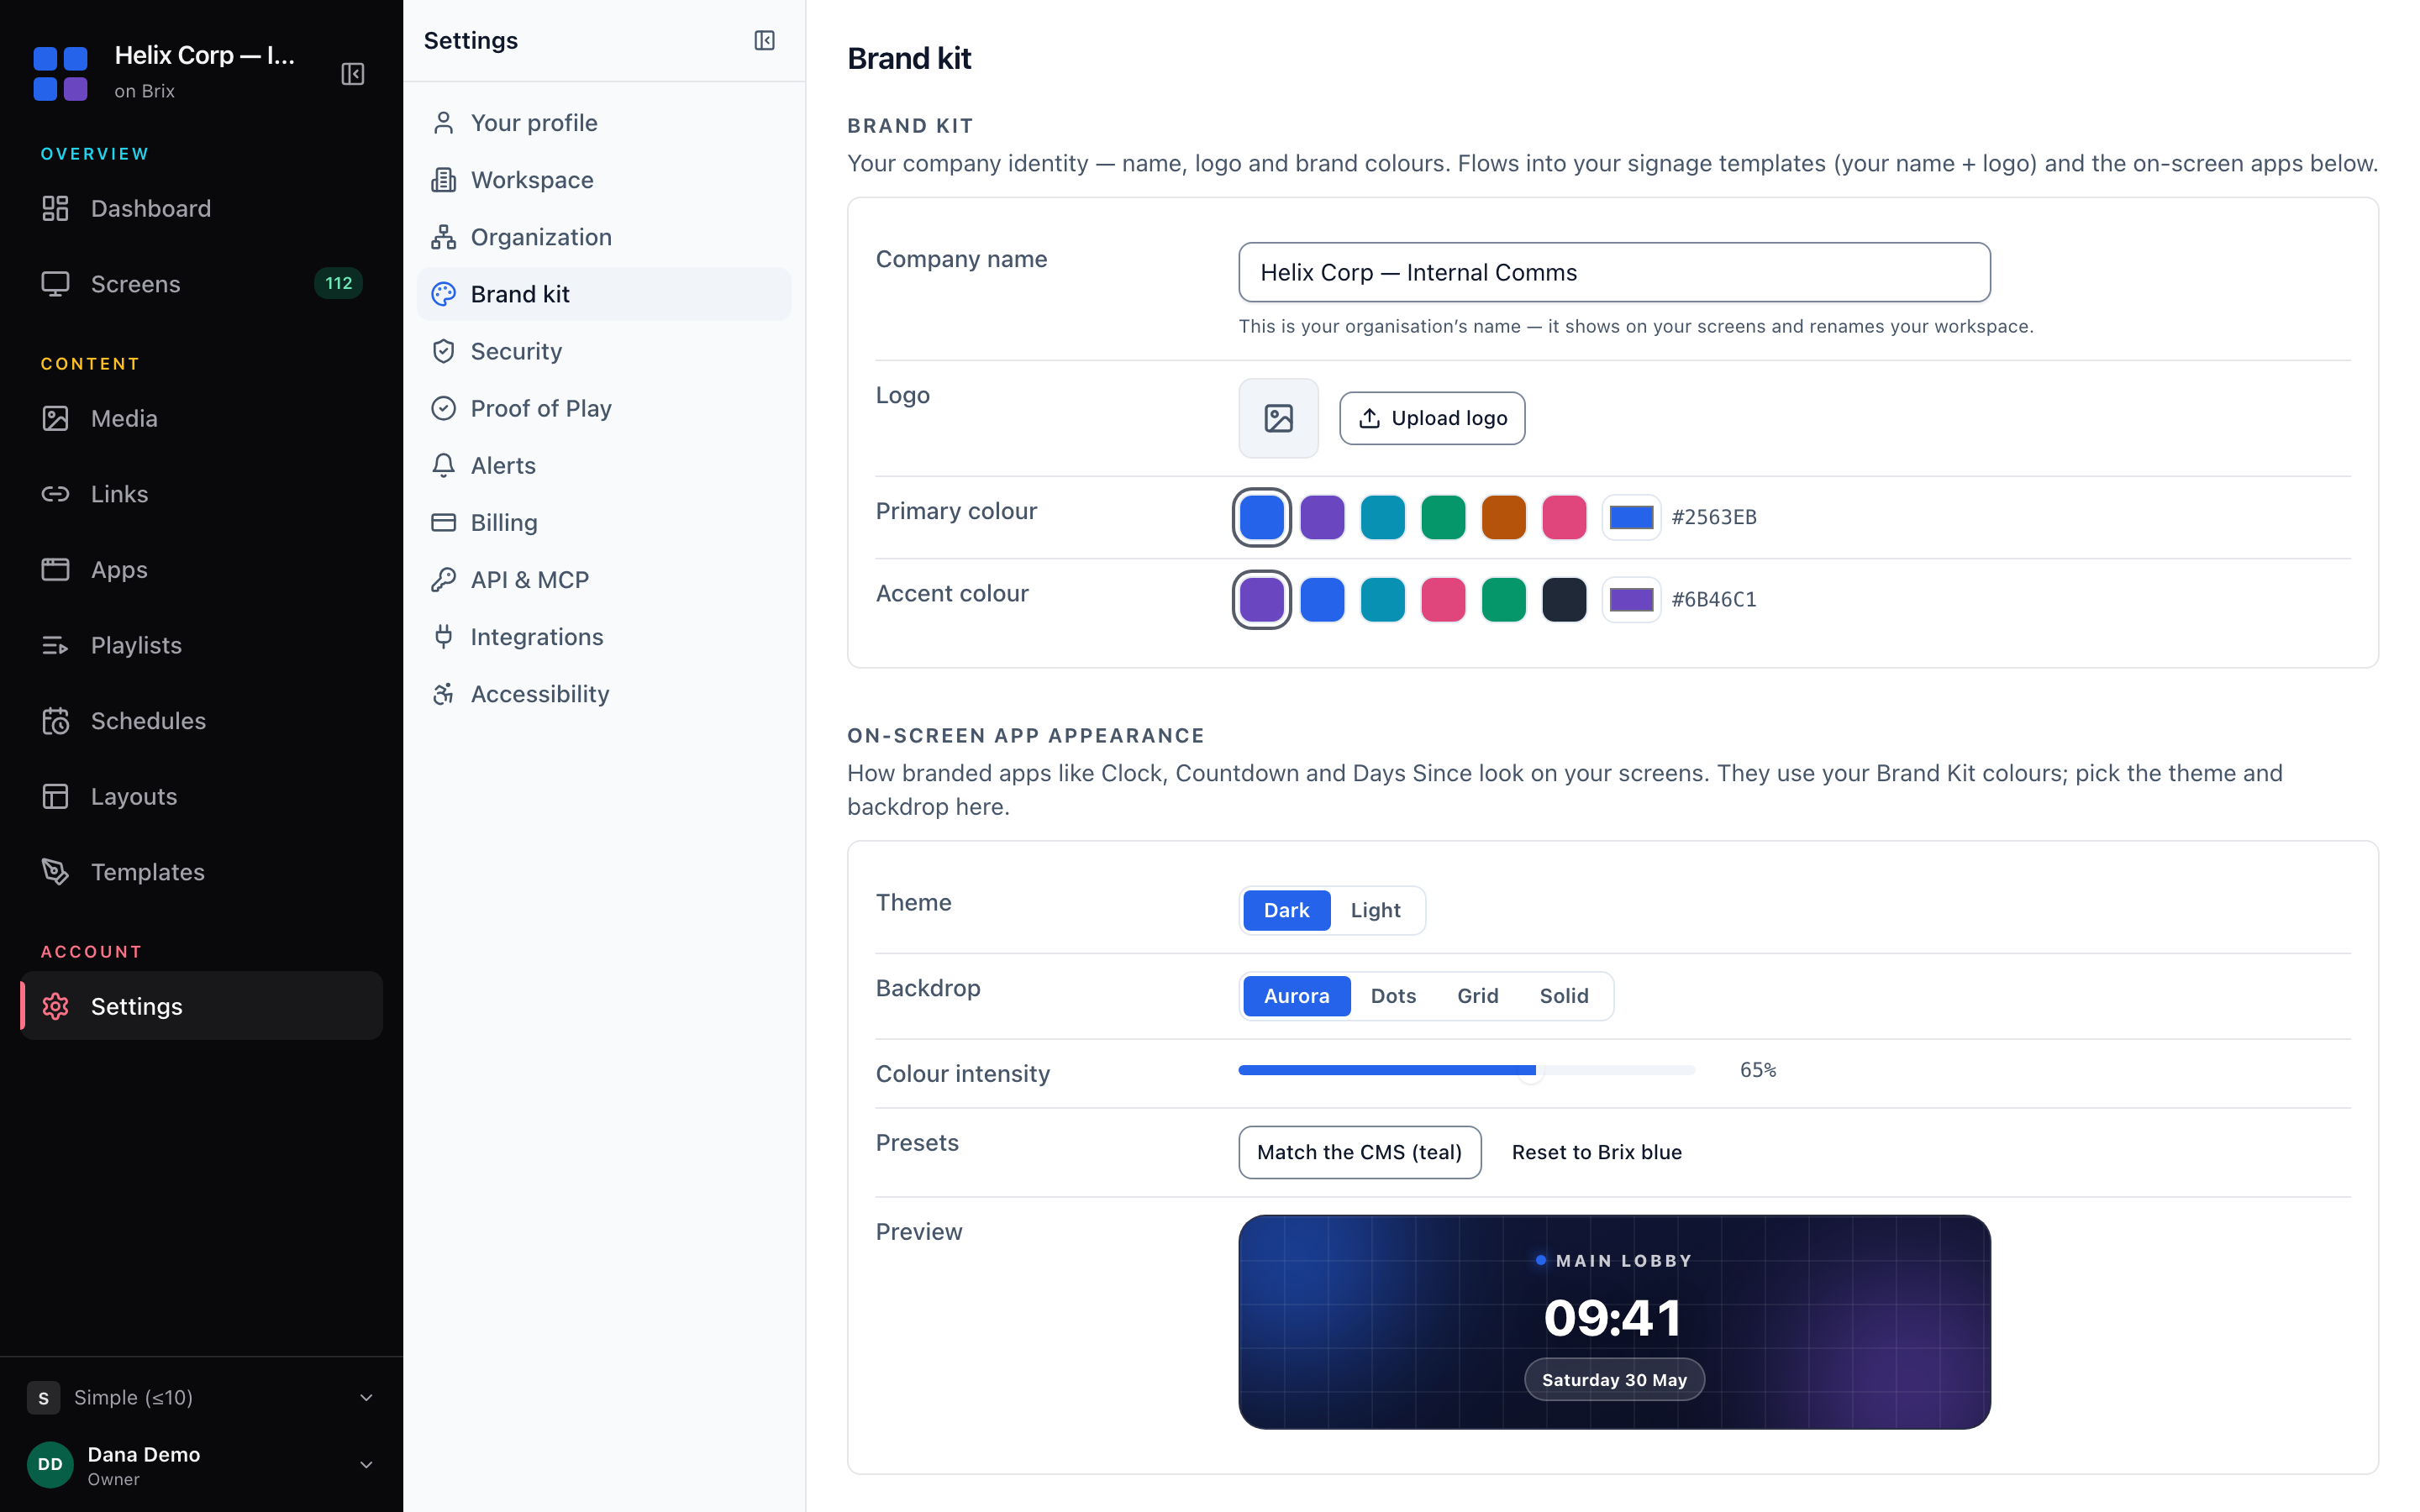
The name, logo and both colors flow into your templates and on-screen apps. Read design a sign and on-screen apps. When a workspace has locations under it, a Where it applies card lists them: each location can override the brand kit locally.
Pick a primary color that holds white text with strong contrast: signs are read from across a room. For print-only (PMS) brand colors, use their published hex values.
Set how clocks, weather and other apps look
The On-screen app appearance card on the same page styles apps such as Clock and Countdown:
- Pick Dark or Light under Theme.
- Pick a Background: Brand wash, Plain, Brand color, Aurora, Dots or Grid.
- For a wash, aurora, dots or grid background, drag Wash strength.
- Check the Preview. Match the CMS and Reset to the default set the colors back in one step.
Upload custom fonts
Under Custom fonts, drag your font files onto the box, or select it to choose them. Brix accepts .woff, .woff2, .ttf and .otf files. The fonts then appear in the design editor.
Hide the Brix logo on screens
Screens show a small Brix logo in the lower-right corner. To hide it, turn off Show the Brix logo in the Logo on screens card on the Brand kit page. It applies to every screen in the workspace, and screens update within a few seconds. During the free trial the switch is locked on: choose a plan in Settings > Billing to turn the logo off.
Turn a feature on or off
- Select Settings, then Organization, then the Feature defaults tab.
- Find the feature in its group and read its Default on or Default off note.
- Select the switch on that row.
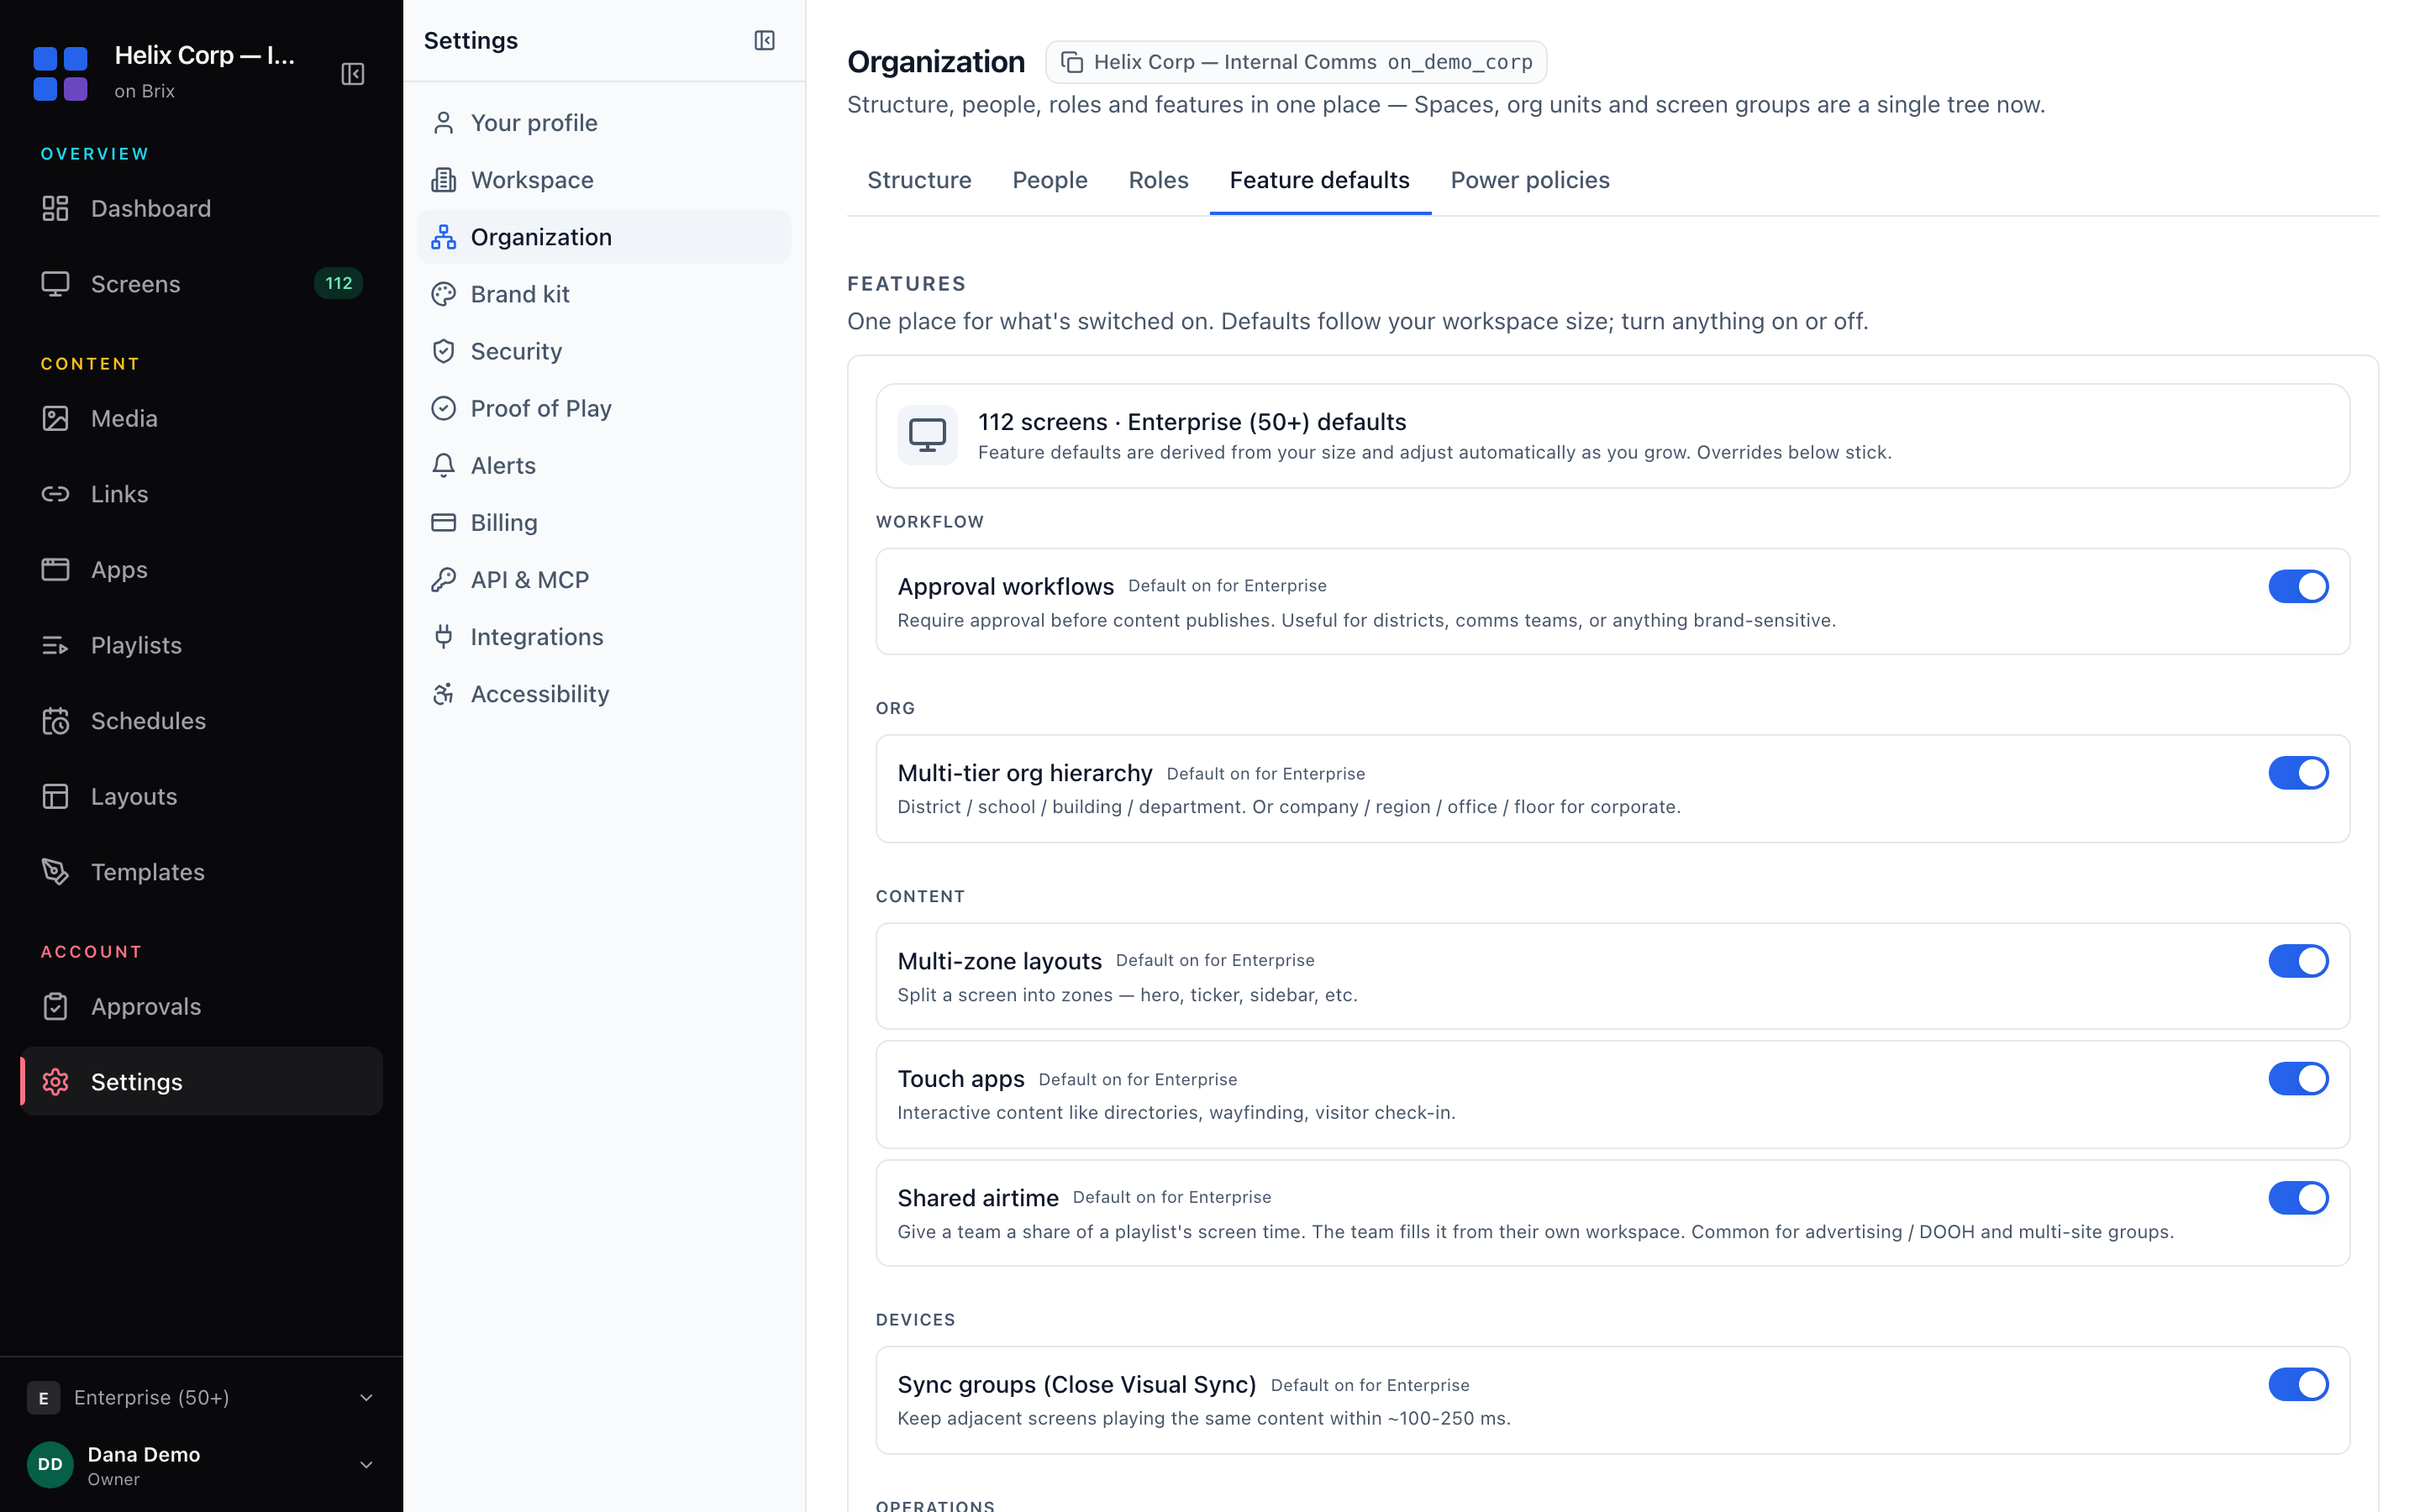
- Brix picks the defaults from your screen count: 10 screens or fewer is Simple, 11 to 50 is Team, more than 50 is Enterprise. The card at the top names your count and size. The defaults change as you grow, and what you set yourself stays.
- A switch you move away from the default shows an Overridden pill. When any differ, an amber banner offers Reset to defaults, which puts every feature back on its default for the whole workspace.
- Features people often look for here: Approval workflows (read approve content before it airs), Multi-zone layouts, Audit log and Proof of Play recording, which is off by default (read proof of play and audit).
- Emergency alert integrations adds Emergency templates to the settings list. Read alerts and emergencies.
Export your workspace data
The Export your data card at the bottom of Settings > Workspace has two exports:
- Summary file: select Download for one JSON file with your screens, files, playlists, schedules, designs, apps, data sources, people and the last year of audit history. Passwords, screen PINs and stored credentials are marked as withheld.
- Complete export: for a migration. It runs over the API with a key from Settings > AI, API & MCP. Read create and manage API keys.
Only a person who can change workspace settings can download the export.
To see the rest of the Organization page (locations, people and roles), read organization, people and roles.