To set up digital signage you need four things: a TV or display with an HDMI port, a media player plugged into it (or a TV that runs a signage app), an internet connection, and signage software (a CMS) that decides what plays. Plug the player into the TV, pair it to the CMS with the code it shows on screen, then assign content. With Brix and an Amazon Signage Stick, the first screen takes about 10 minutes, and the seven-day free trial needs no card.
What you need before you start
- A screen. Any TV or monitor with an HDMI port. A consumer TV works; for a screen that runs 16 hours a day or more, check that the warranty covers commercial use, or buy a commercial display.
- A player. Brix runs on the Amazon Signage Stick ($99.99 in the US), Fire TV, Android boxes such as the Walmart Onn, TVs with Google TV or Android TV built in (install Brix from Google Play), and Windows PCs. To try Brix with no hardware, use a browser tab.
- Internet. Wi-Fi or Ethernet at the screen. Content is stored on the player, so a short outage does not blank the screen.
- Power near the TV, and the TV remote for the first setup.
- Software. Brix costs $6 per screen per month billed annually, or $8 billed monthly. See pricing.
Not sure which player to buy? Read Amazon Signage Stick review or use the TVs you already have.
1. Create your Brix account
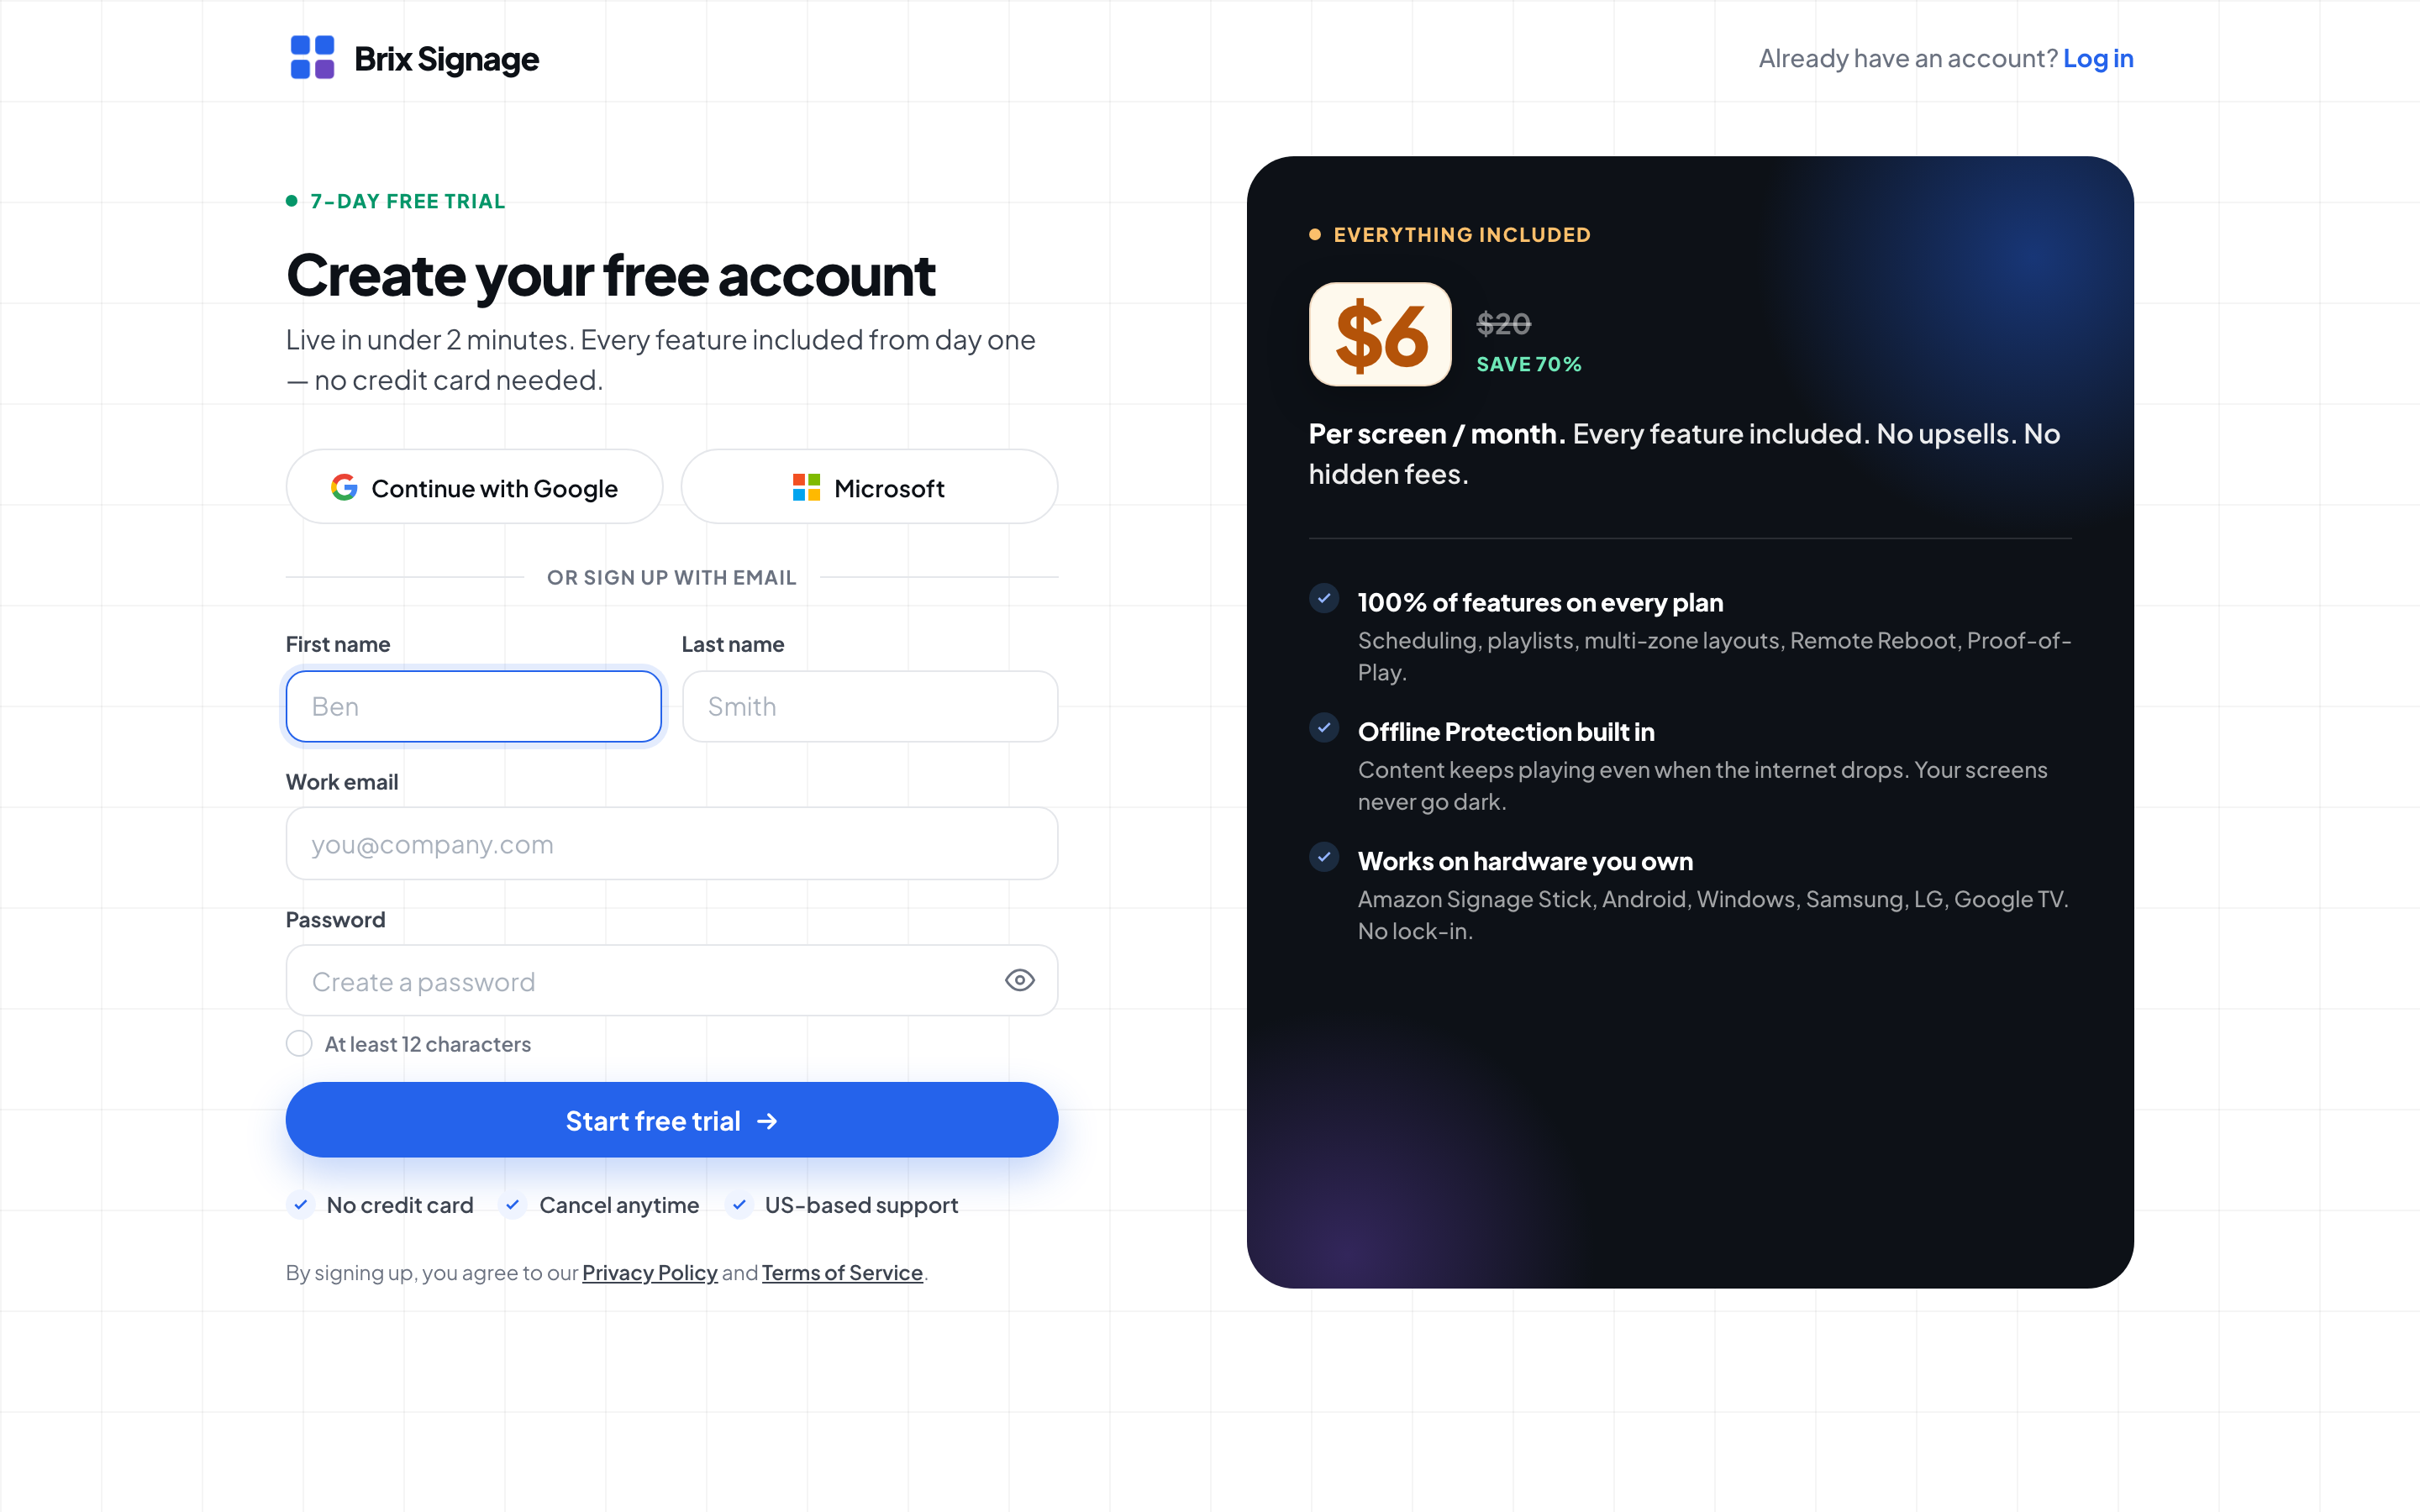
- Open the sign-up page.
- Type your first name, last name and work email.
- Type a password of at least 12 characters.
- Select Start free trial.
To use a Google or Microsoft account, select Continue with Google or Continue with Microsoft. For two-factor codes, passkeys and single sign-on, read Sign in and set your preferences.
Brix signs you in and opens the welcome wizard:
- Type your organization name. It is the name that appears on your screens.
- Select the tile that matches your kind of place.
- Type the number of screens.
- Choose what you will use as a screen: an Amazon Signage Stick, an Android TV or box, a Windows PC, or a browser tab, and follow the short install guide for it.
- Select Continue after each answer.
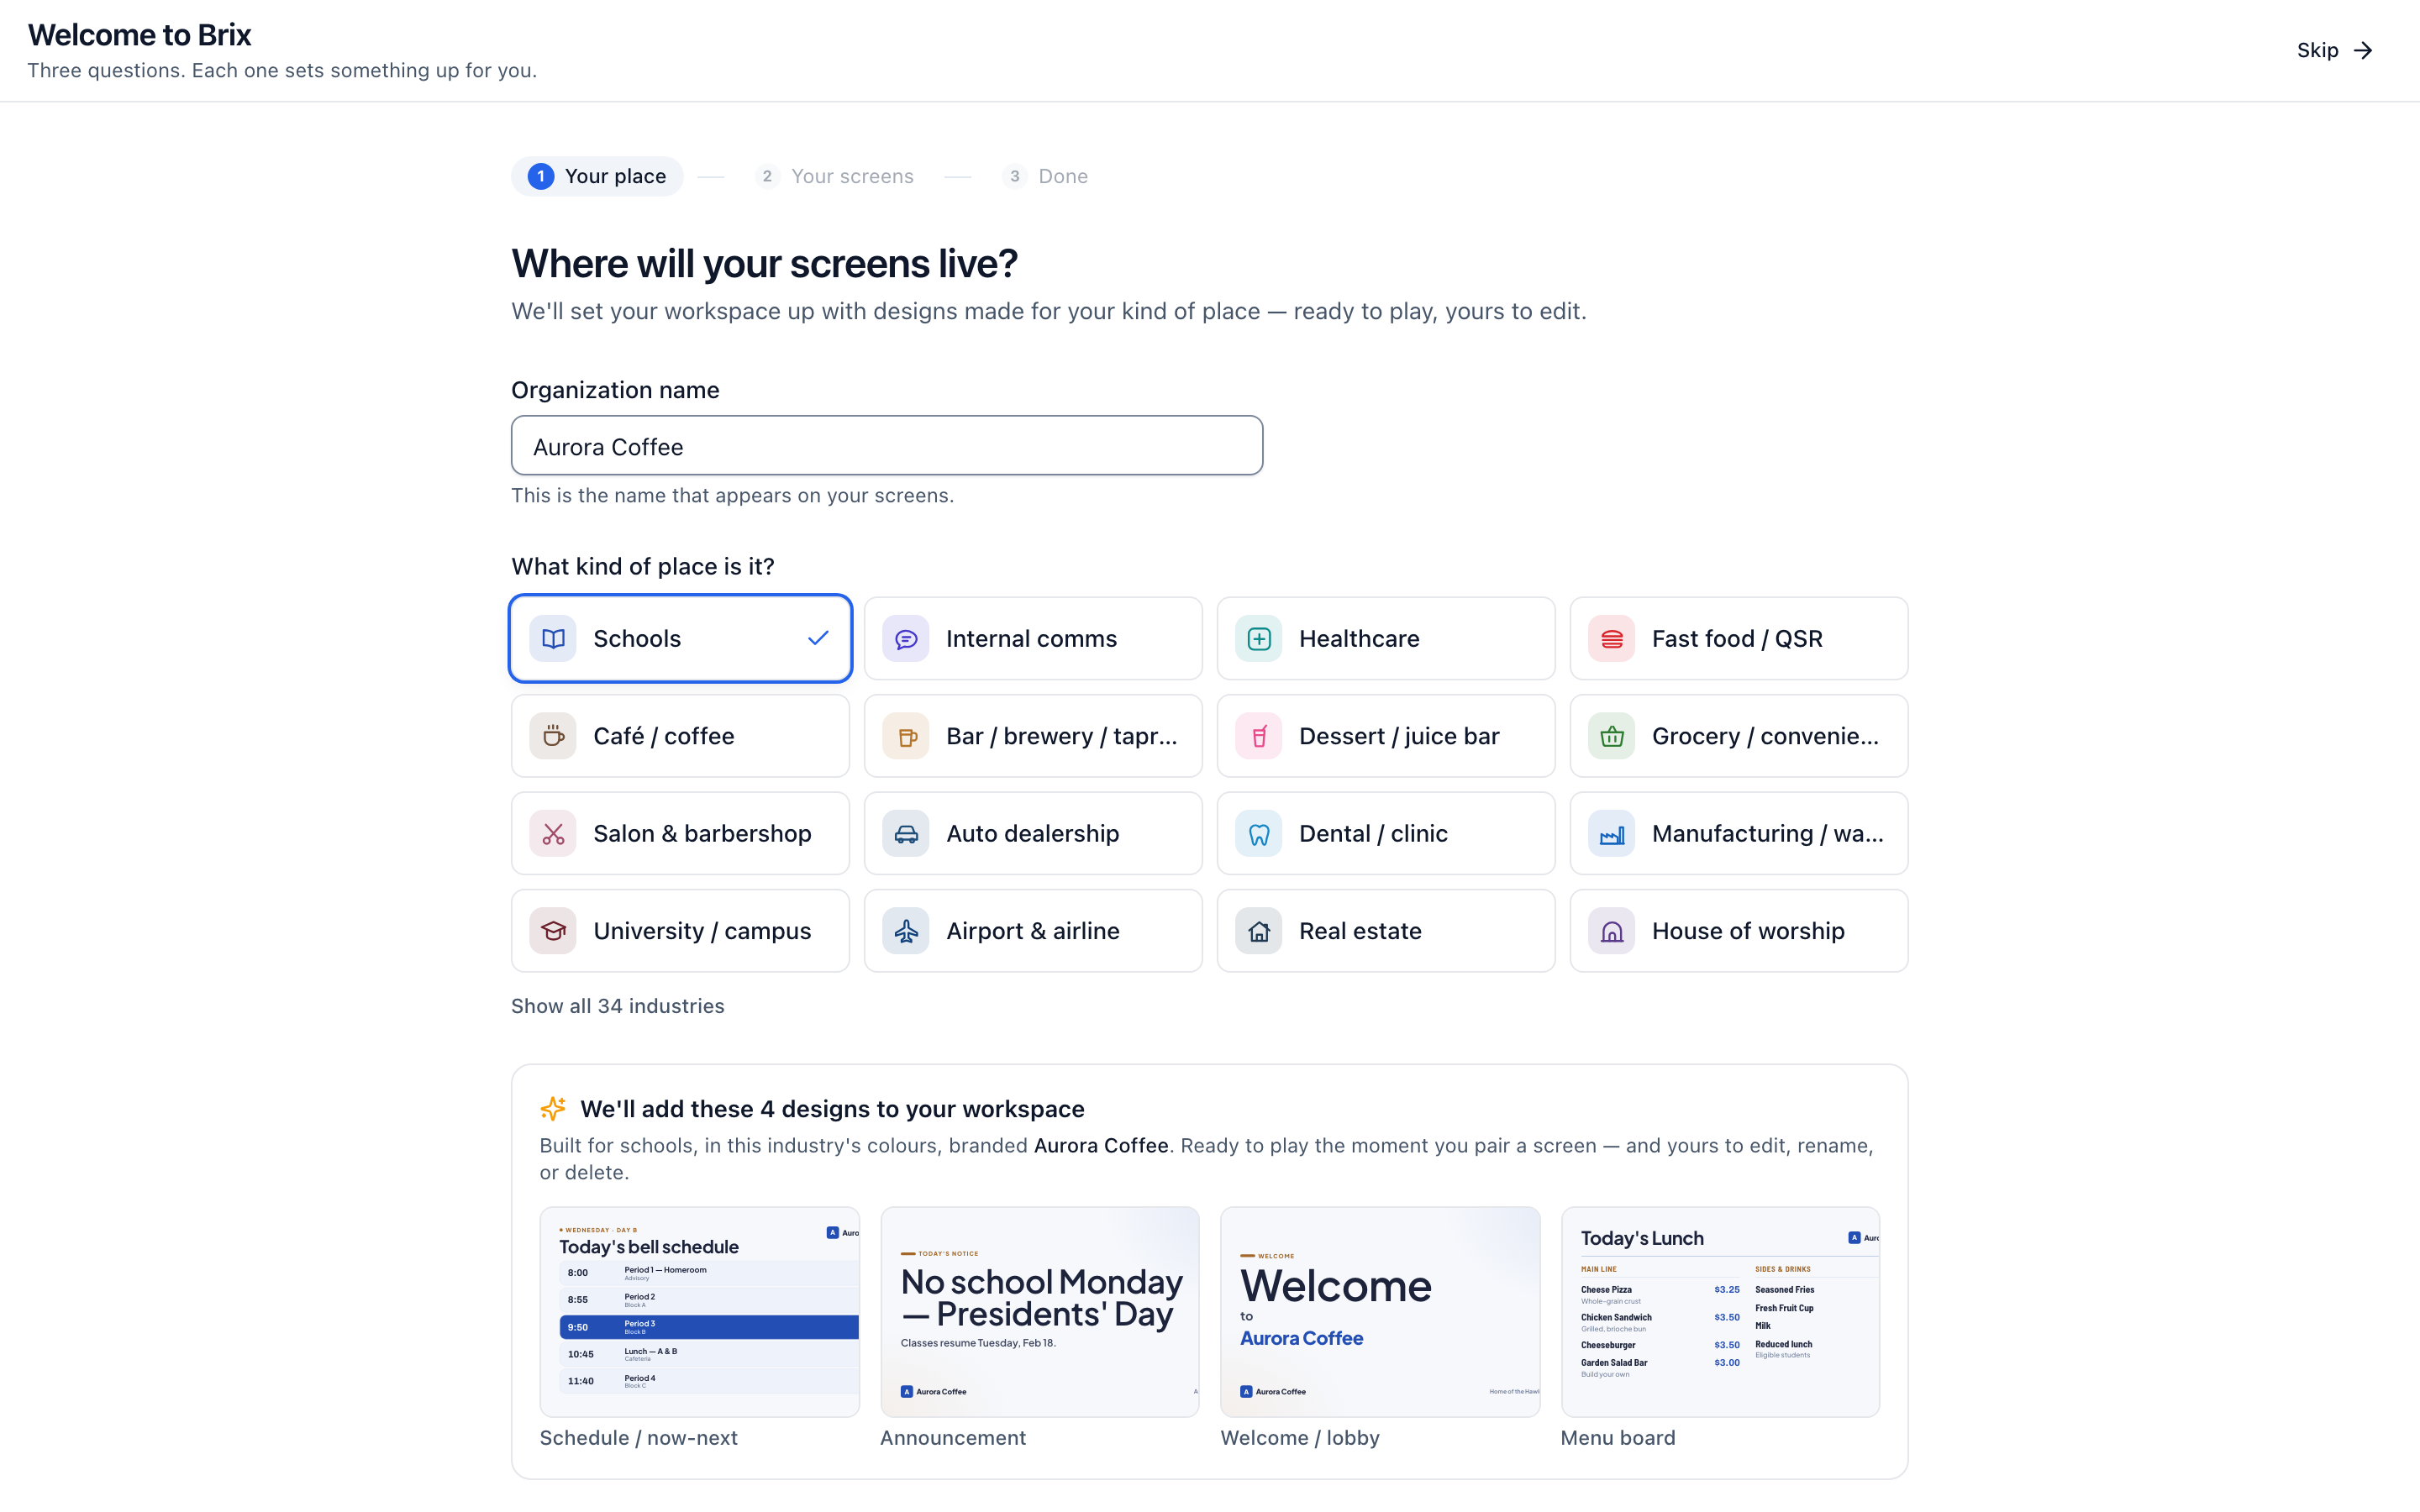
Brix adds a pack of starter designs, so you have something to show on your first screen. Your screen count also sets how much of the CMS the sidebar shows (see the last section). If you close the tab mid-wizard, select Finish setup at the bottom of the sidebar.
2. Connect the TV: pair the player
- Plug the player into the TV's HDMI port and into power, and turn on the TV. On an Amazon Signage Stick, pick "Brix Signage" during the stick's own on-screen setup. The screen then shows a 6-digit code.
- In Brix, go to Screens and select Add screen.
- Choose Pair a hardware device and type the code.
- Name the screen, pick a Location and select Finish pairing.
No hardware yet? Choose Open in a browser tab to try Brix on a laptop. The full walkthrough, including browser tabs and claiming devices in bulk, is in Connect a screen. If the code never appears, read Troubleshoot a screen.
A new screen follows Standard hours, 6:00 am to 11:00 pm, and turns the TV off outside them. For a screen that must run 24/7, set it to Always on: read screen settings and display power.
3. Put content on the screen
- On the Screen paired step, select Add content. Or select the screen on the Screens page, then Change content.
- Pick a starter design, playlist, media file or app.
The screen updates as soon as Brix saves. To upload your own images and videos, read Upload and organize media. More ways to assign content, including casting for a set time, are in Put content on a screen.
Until your first screen plays something, the Dashboard shows a Finish setting up panel with the same three steps: Pair a screen, Add content, Assign content. It disappears on its own once a screen has content. Dismissing it is final in that browser.
Keep your screens playing after the trial
A banner above the page counts the trial days left, for example "4 days left in your free trial". Select Upgrade, add a payment method and the banner goes. To end the trial and pay, read Your plan and invoices.
Find your way around
- Sidebar: Overview (Dashboard, Screens), Content (Files, Web pages, Apps, Playlists, Schedules, Layouts, Templates) and Account (Approvals, Settings). Templates opens the design tools.
- Command palette: press Command-K, or Control-K on Windows, and type a page name. Two or more characters find a screen, playlist, design or media file by name.
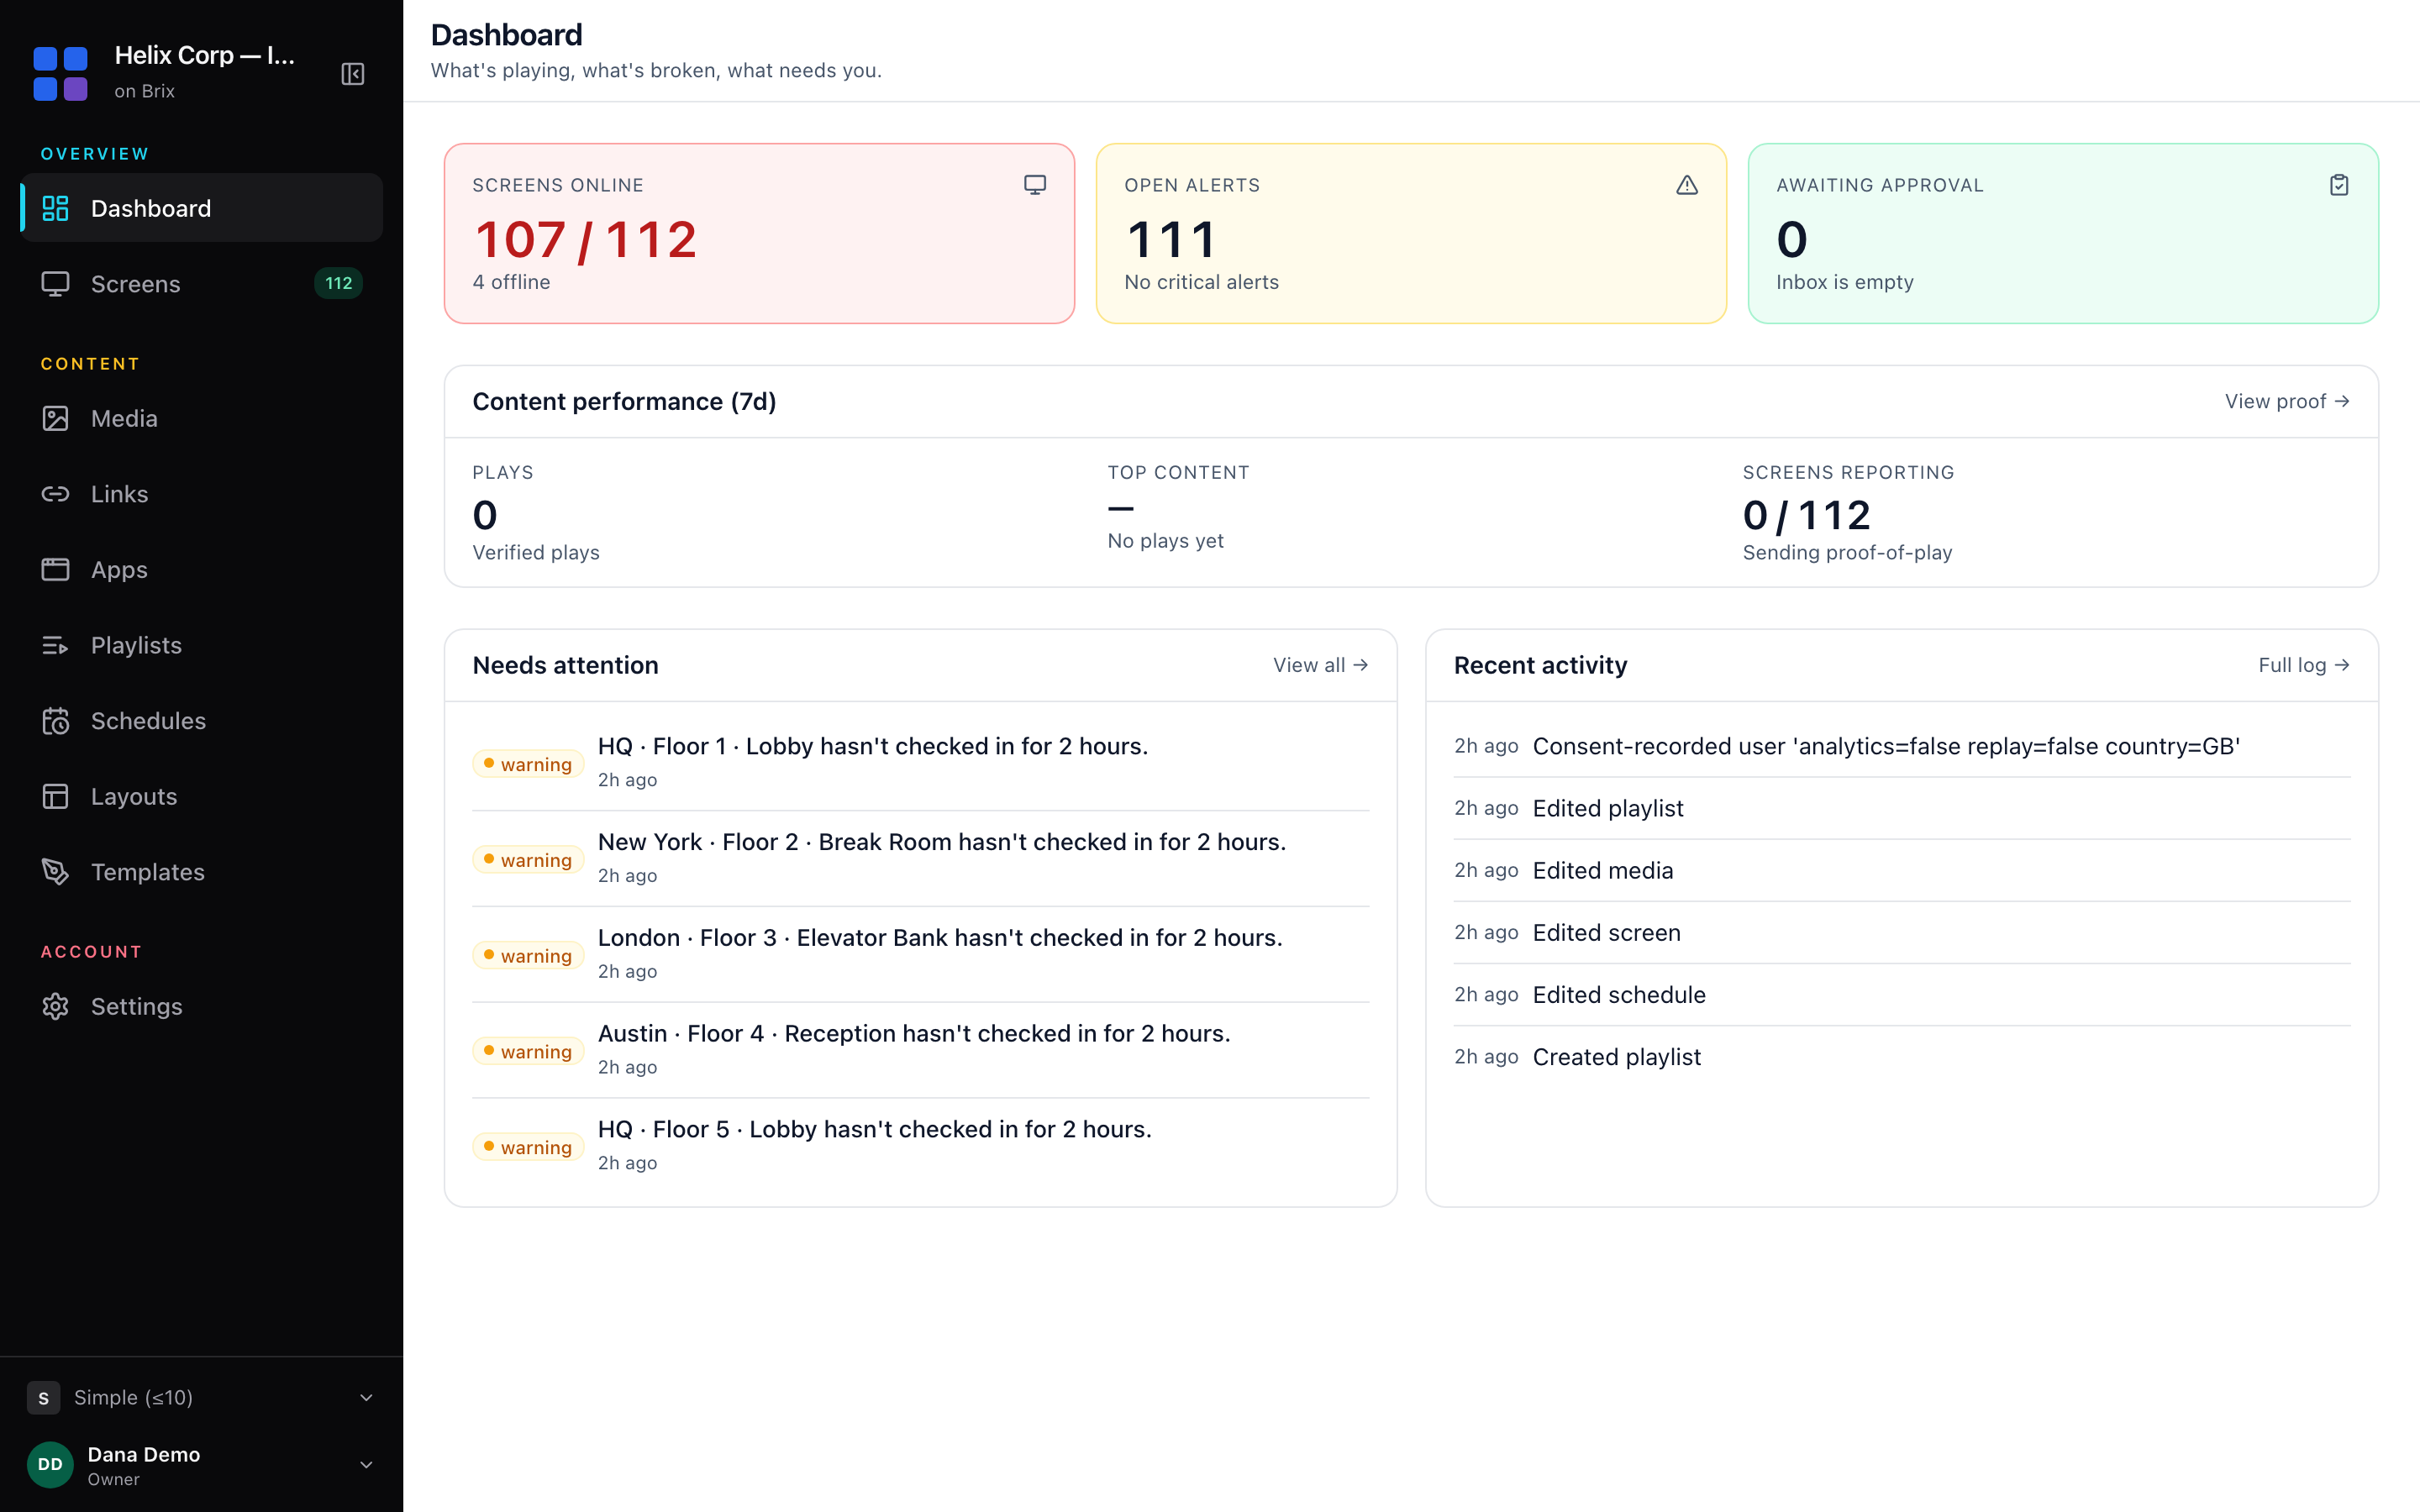
- Dashboard: tiles for Screens online, Open alerts and Awaiting approval. Each opens the page behind the number.
- How much you see: the level button at the bottom of the sidebar sets it: Simple (≤10), Team (11–50) or Enterprise (50+). Your screen count sets the first level. Team adds approvals and sync.
- Switching workspace: select your name at the bottom of the sidebar, then choose under Switch account. Add another account signs in to a second one.
Next steps
- Design a sign to change a starter design or make your own.
- Build a playlist to loop several items.
- Manage your screens to name, group and check them.